 Baby K and I are clear across the country visiting my newborn niece — who is quite literally the cutest four-week-old alive. Since newborn-hood involves a lot of sleeping and lazing around, it was decided that energizer R would be better off back home — where she can frolic noisily, have daddy days and receive oodles of attention from her grandparents. So here we are, our first trip where it’s just the two of us, and my second time (in five years!) being thousands of miles away from miss R. In between loads of sweet and soft cuddles, K and I are enjoying more downtime than usual — and we LIKE it! I began this post while lounging around in semi-peace while she napped (that lasted for 10 minutes, but still, that was a long-overdue 10 minutes). The following is a tutorial on TINFOIL MONOPRINTING FOR KIDS — another fine-art-for-kids project that renders beautiful results. This is a GOOD project, one that R and I developed together, modifying and experimenting as we went. It’s similar to the tried and true cling-wrap painting craft (where you squeeze paint blobs on paper, cover the paper in cling wrap, squish the cling-wrap and unveil abstract masterpiece), but allows for more gesture drawing and detail. You’re going to want to save this one — and I can almost guarantee you already have all required supplies on hand.
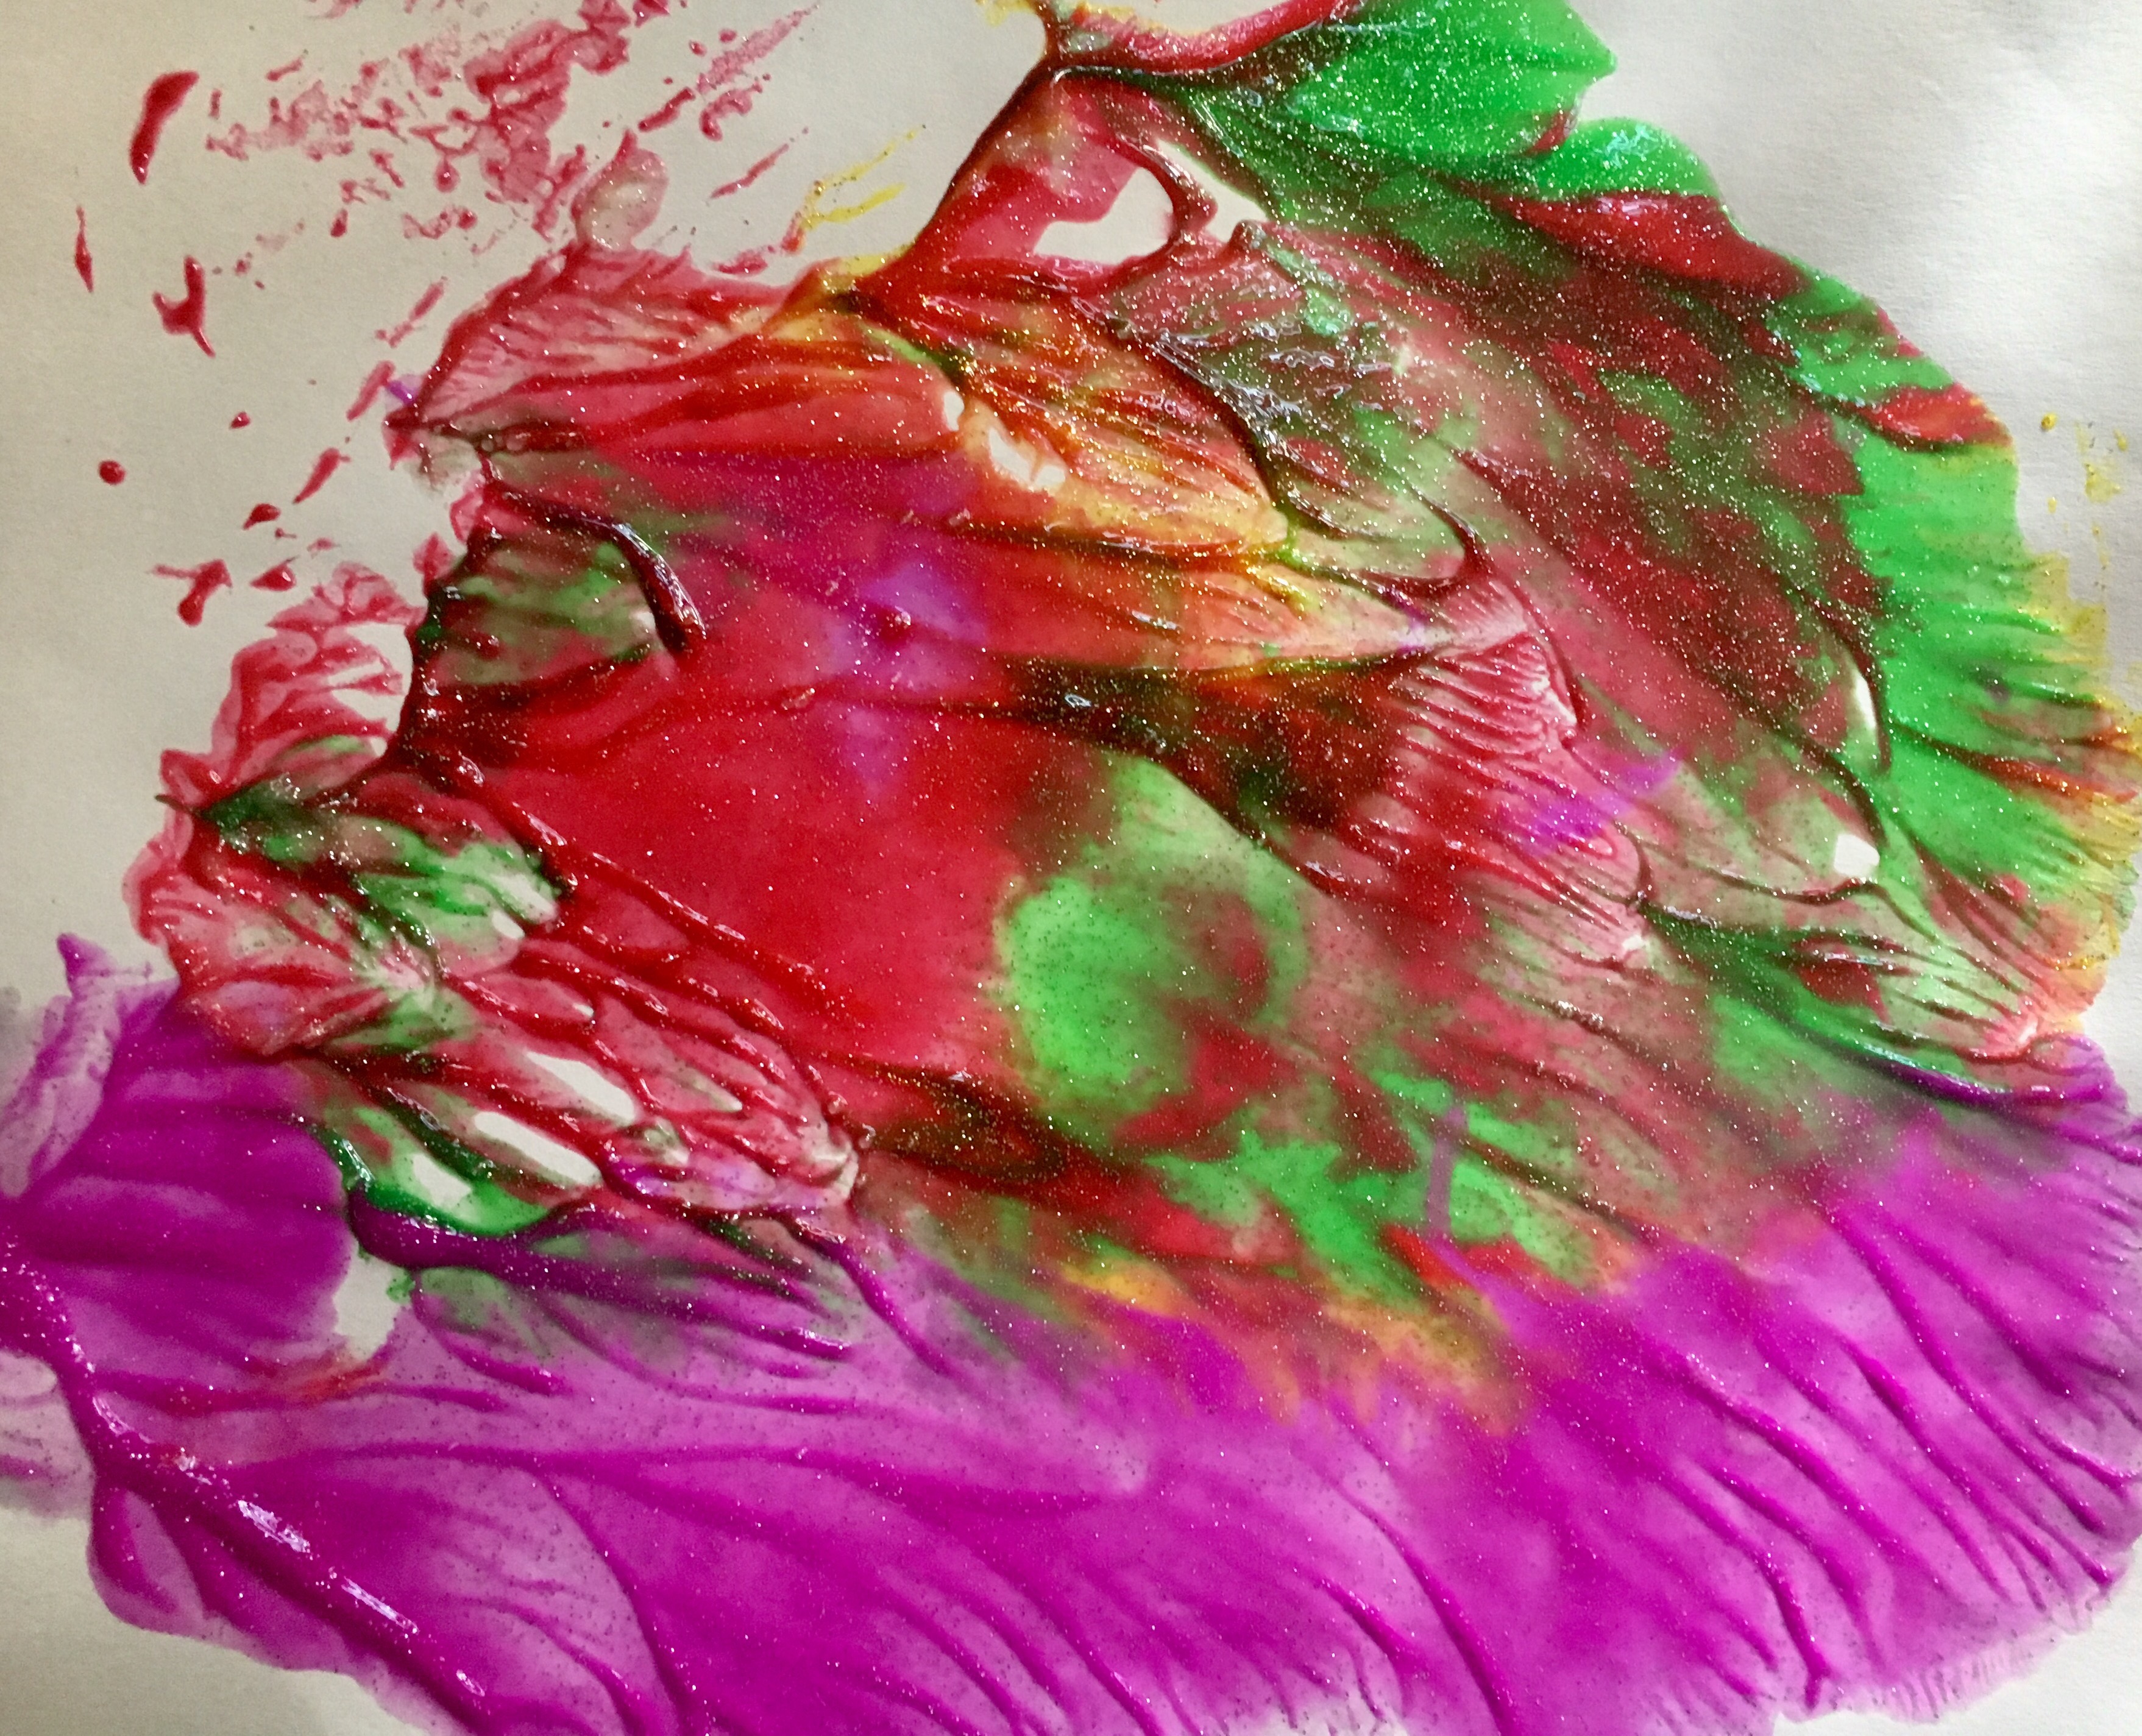
So go grab your paper, tinfoil, paint, and cotton swabs and make some prints! 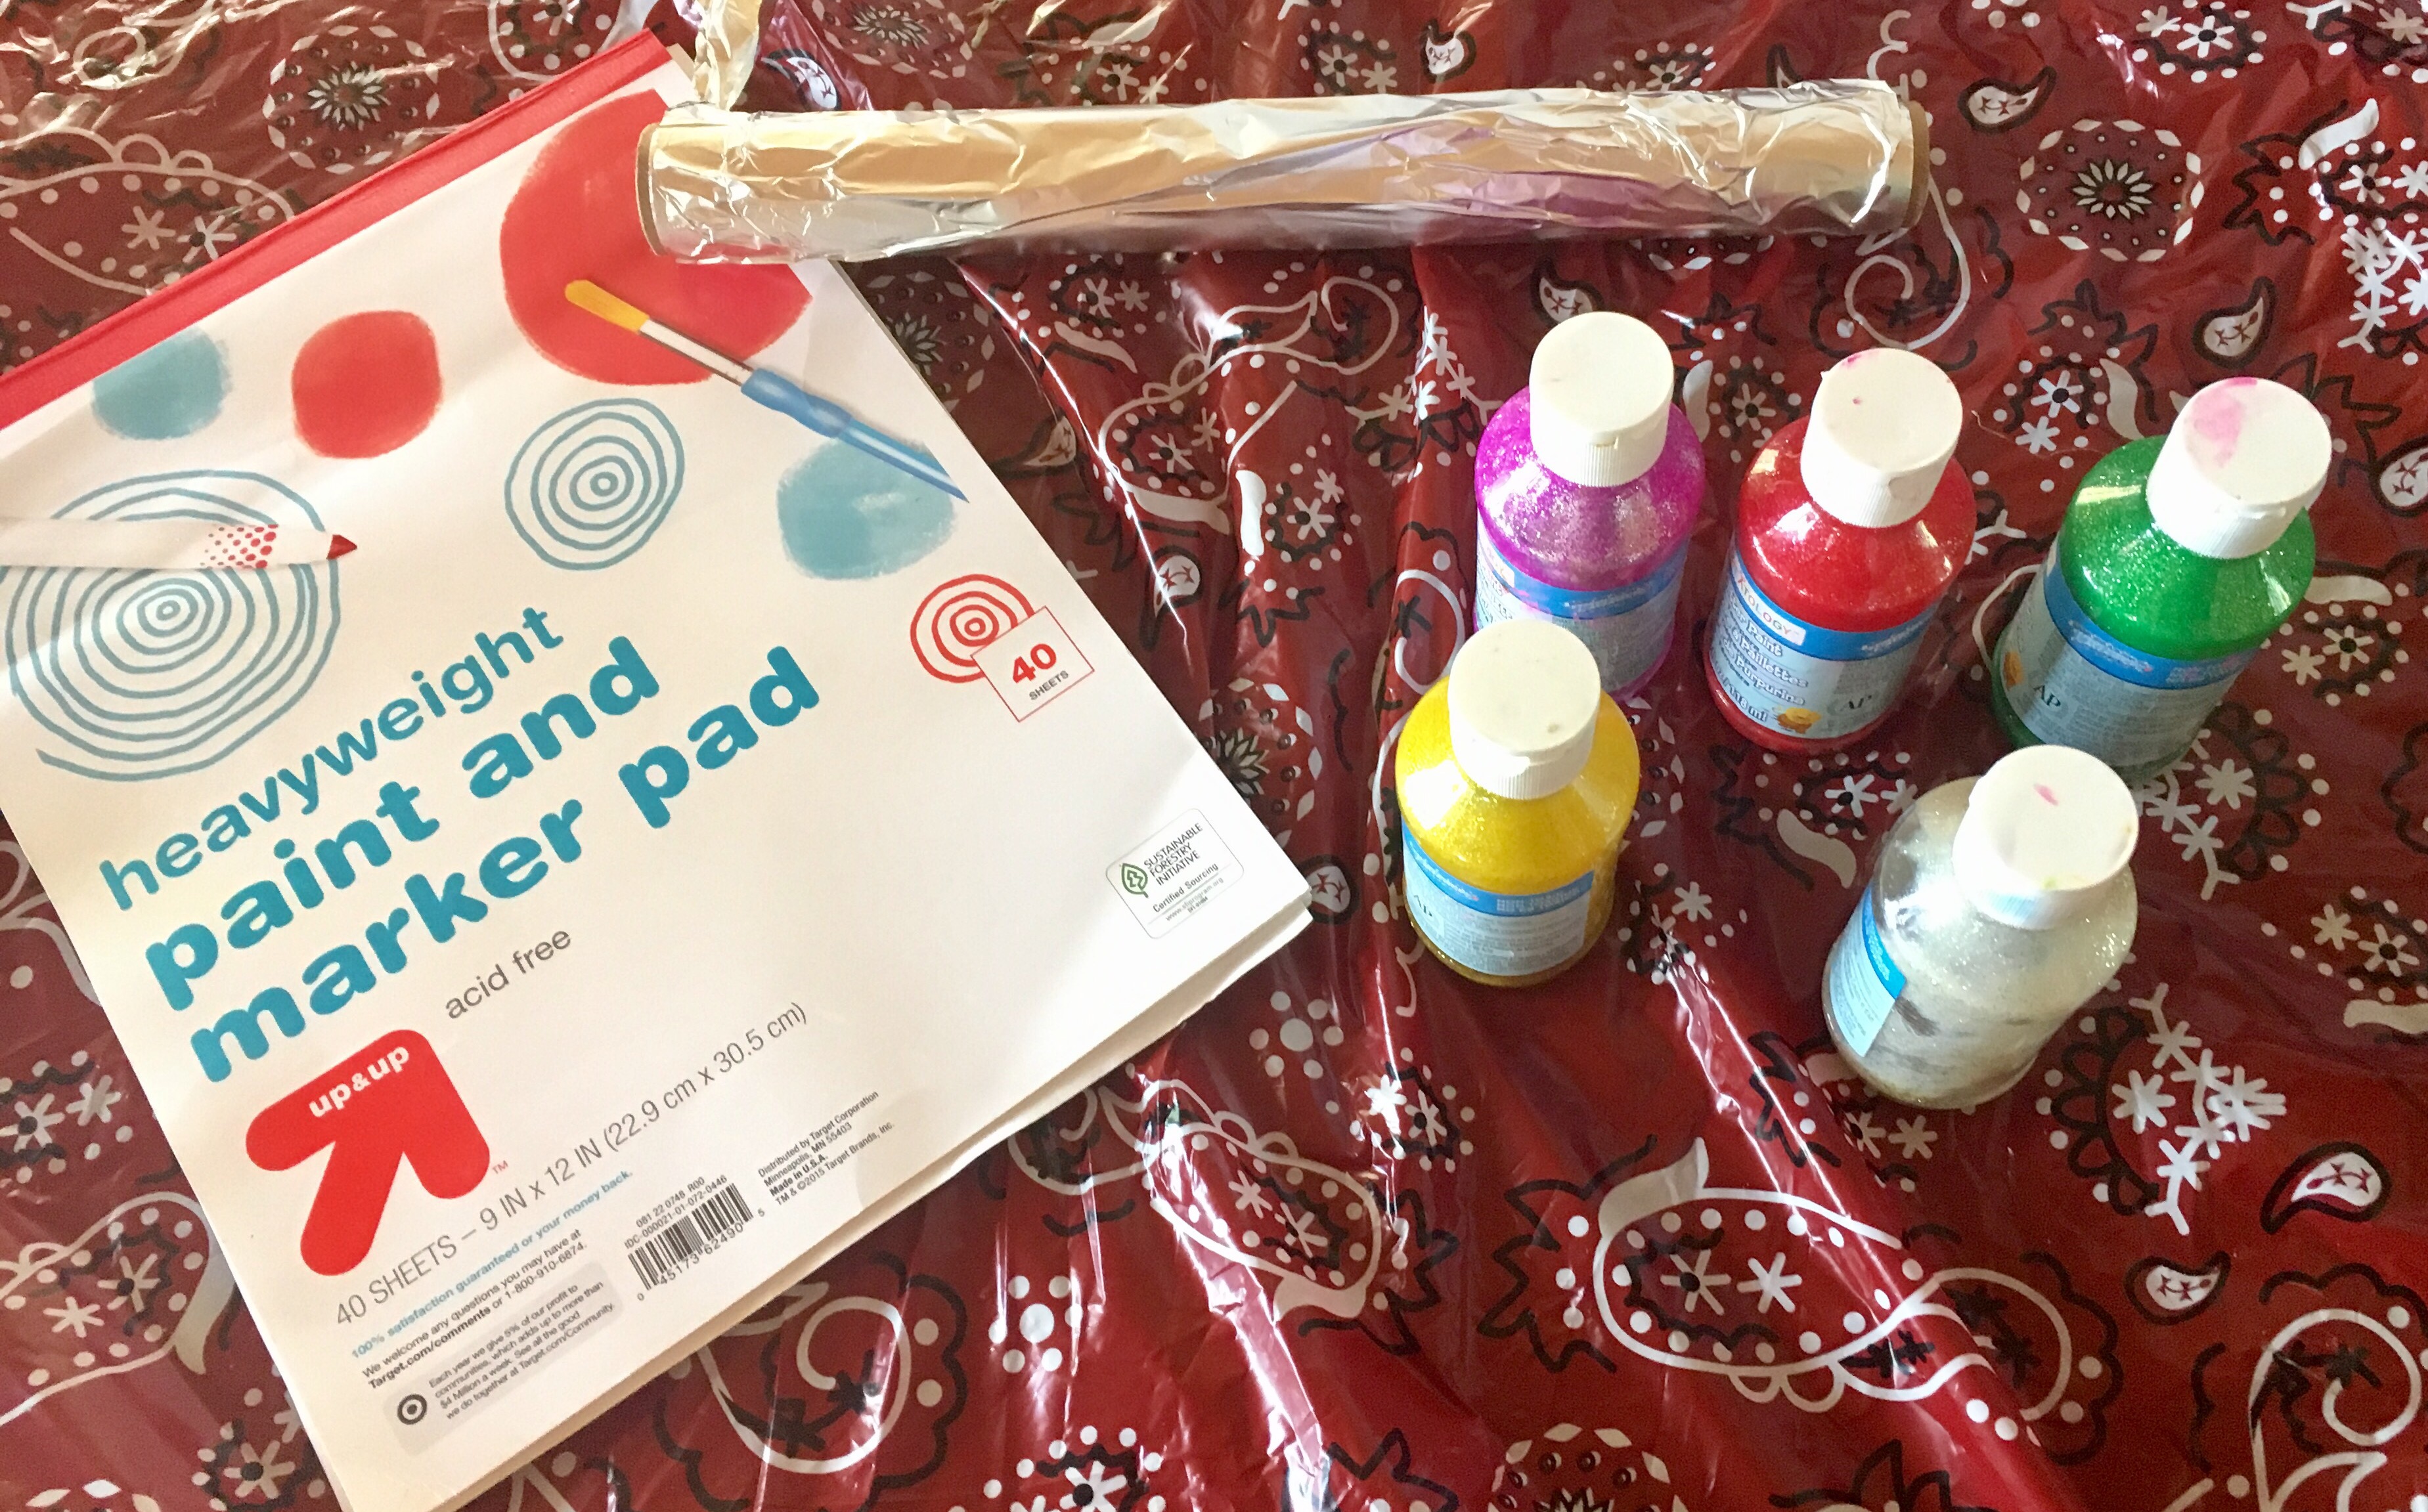
- Just as you would do for the cling wrap craft, squirt a few blobs of paint (in whatever colors you like) onto your paper — distribute the blobs evenly).
- Cover your paper with tinfoil (the tinfoil should be cut slightly larger than the paper so it can be folded over the paper’s edges.
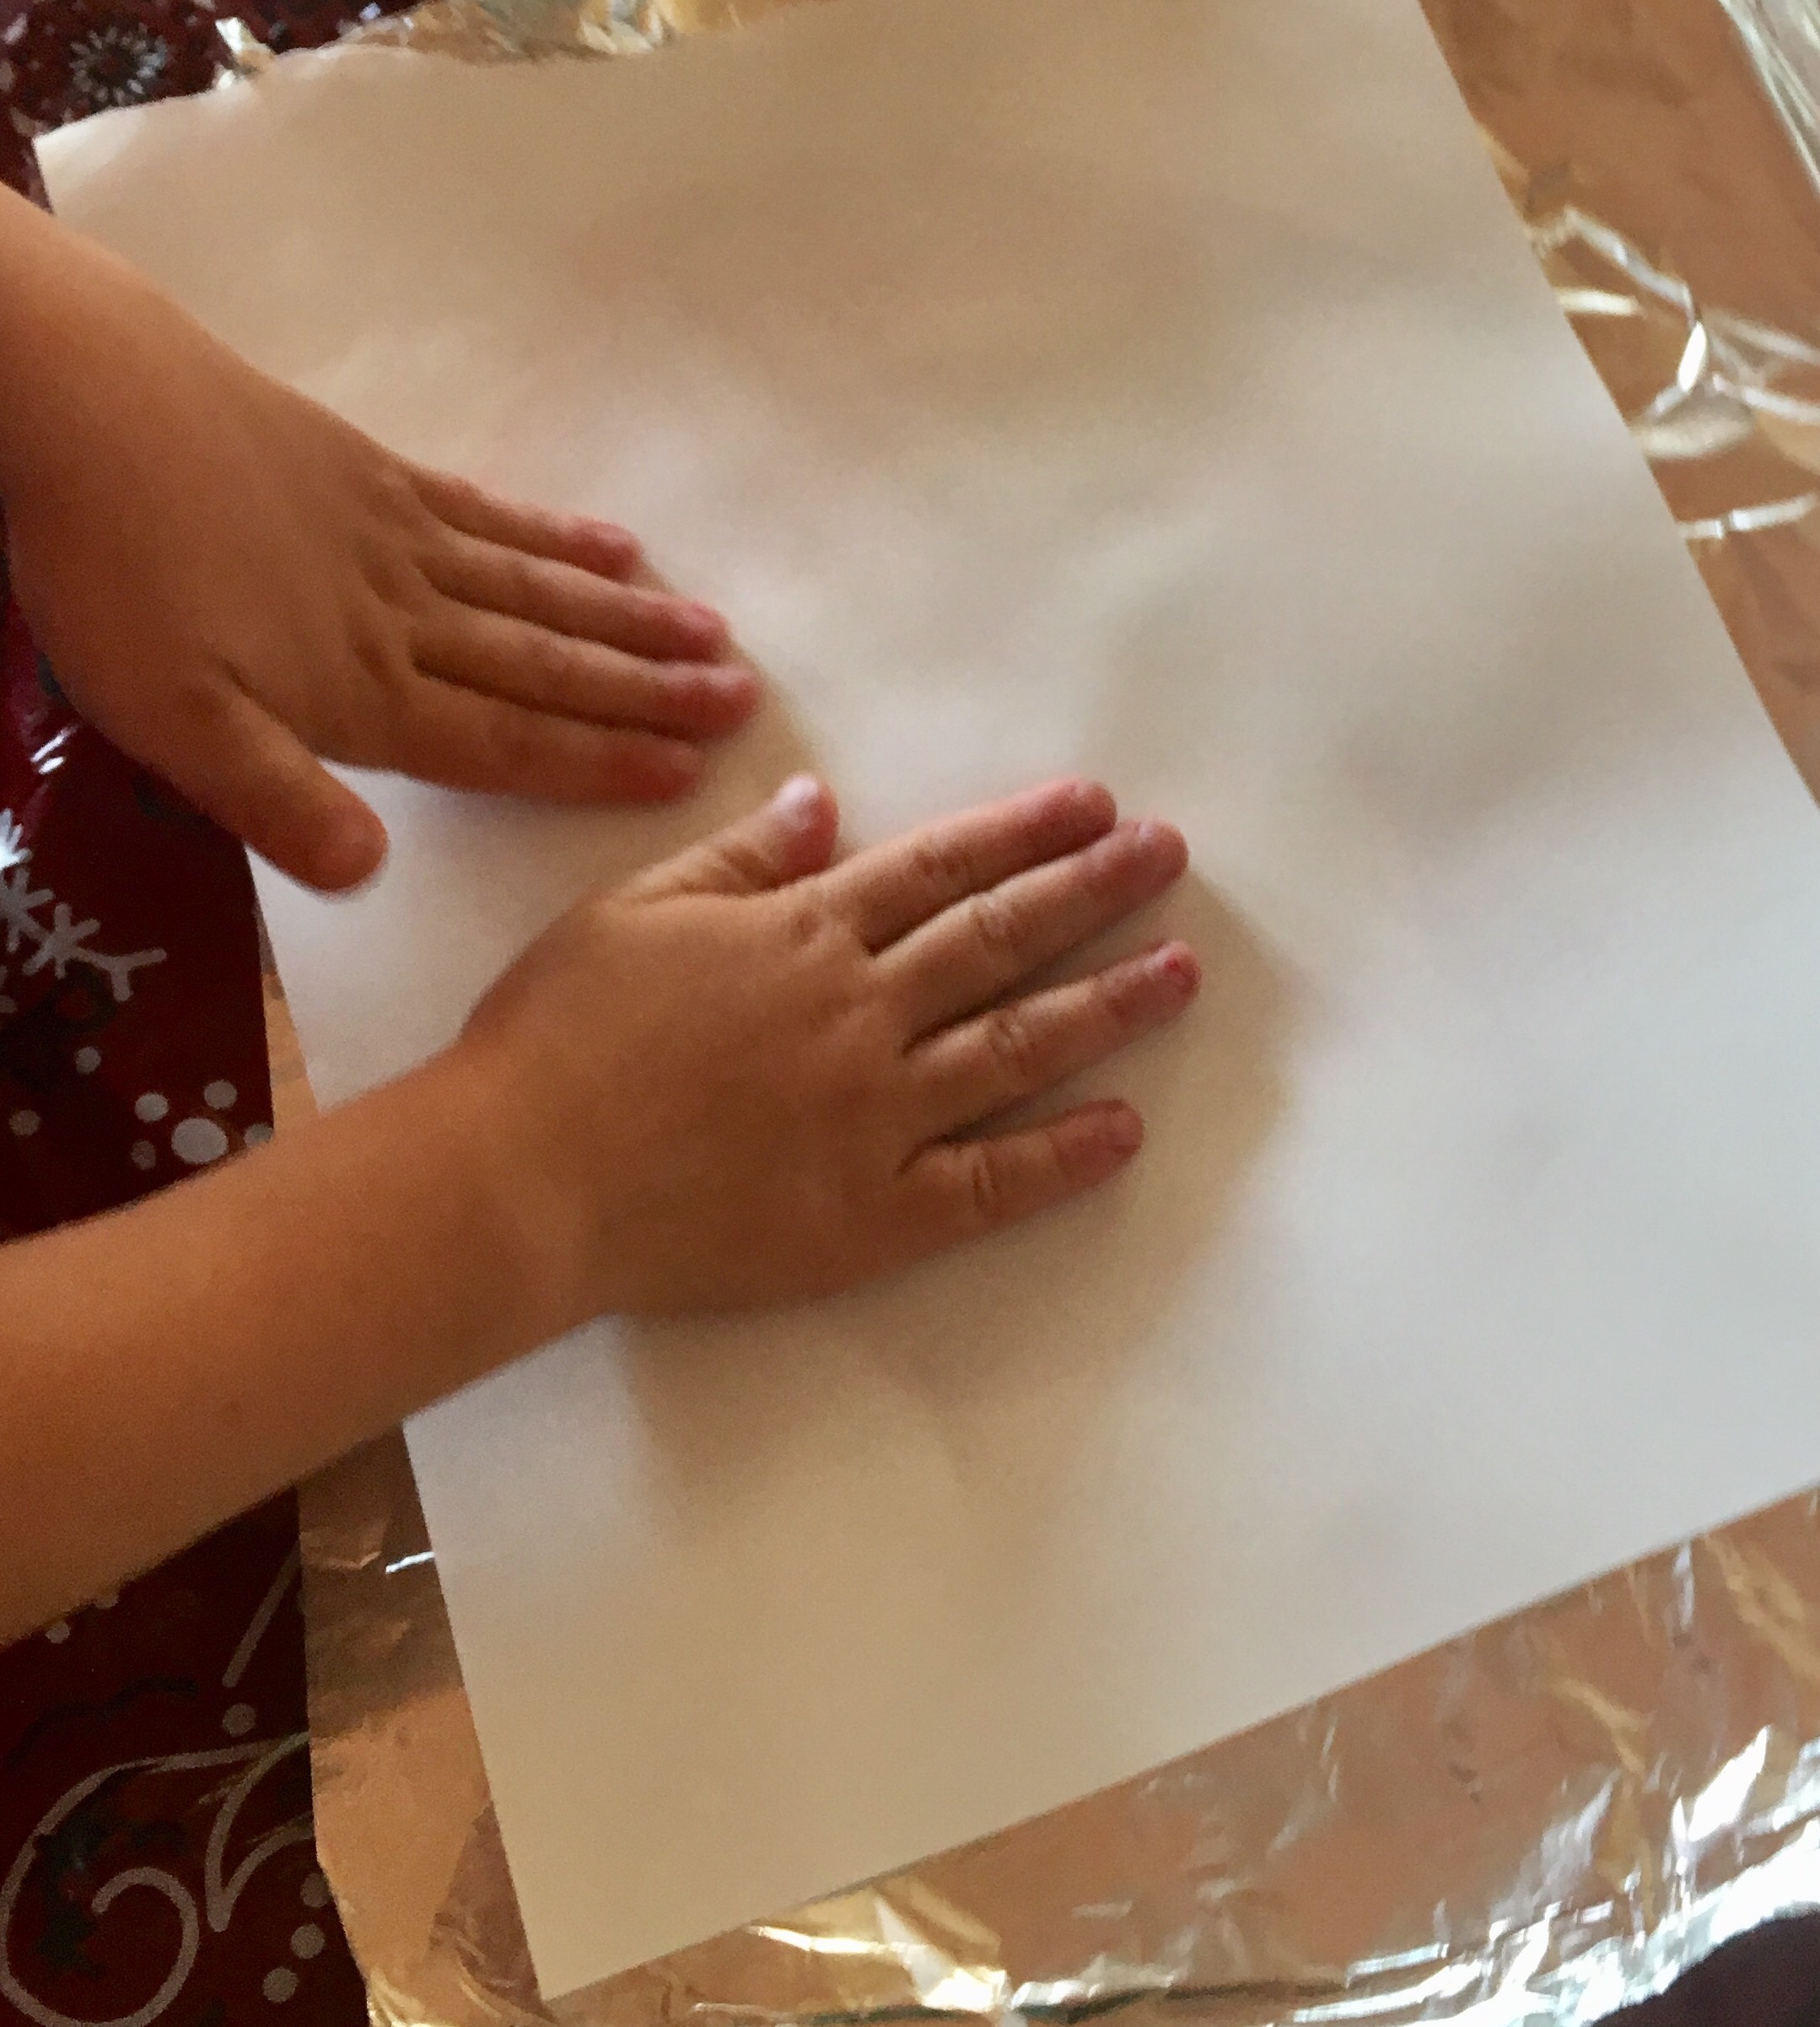
- Spread the paint around the paper by pressing and smushing the tinfoil with your hands, or flip it over and press the paper.

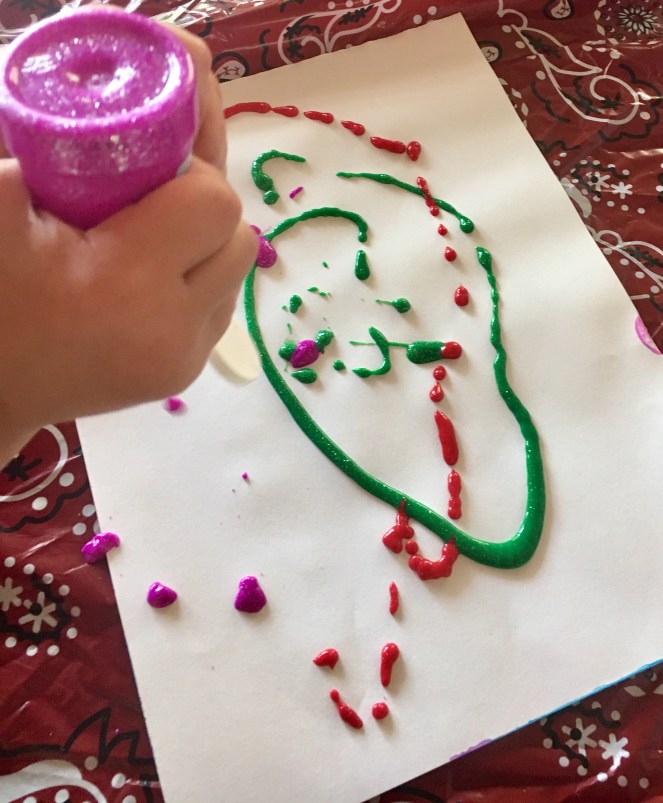
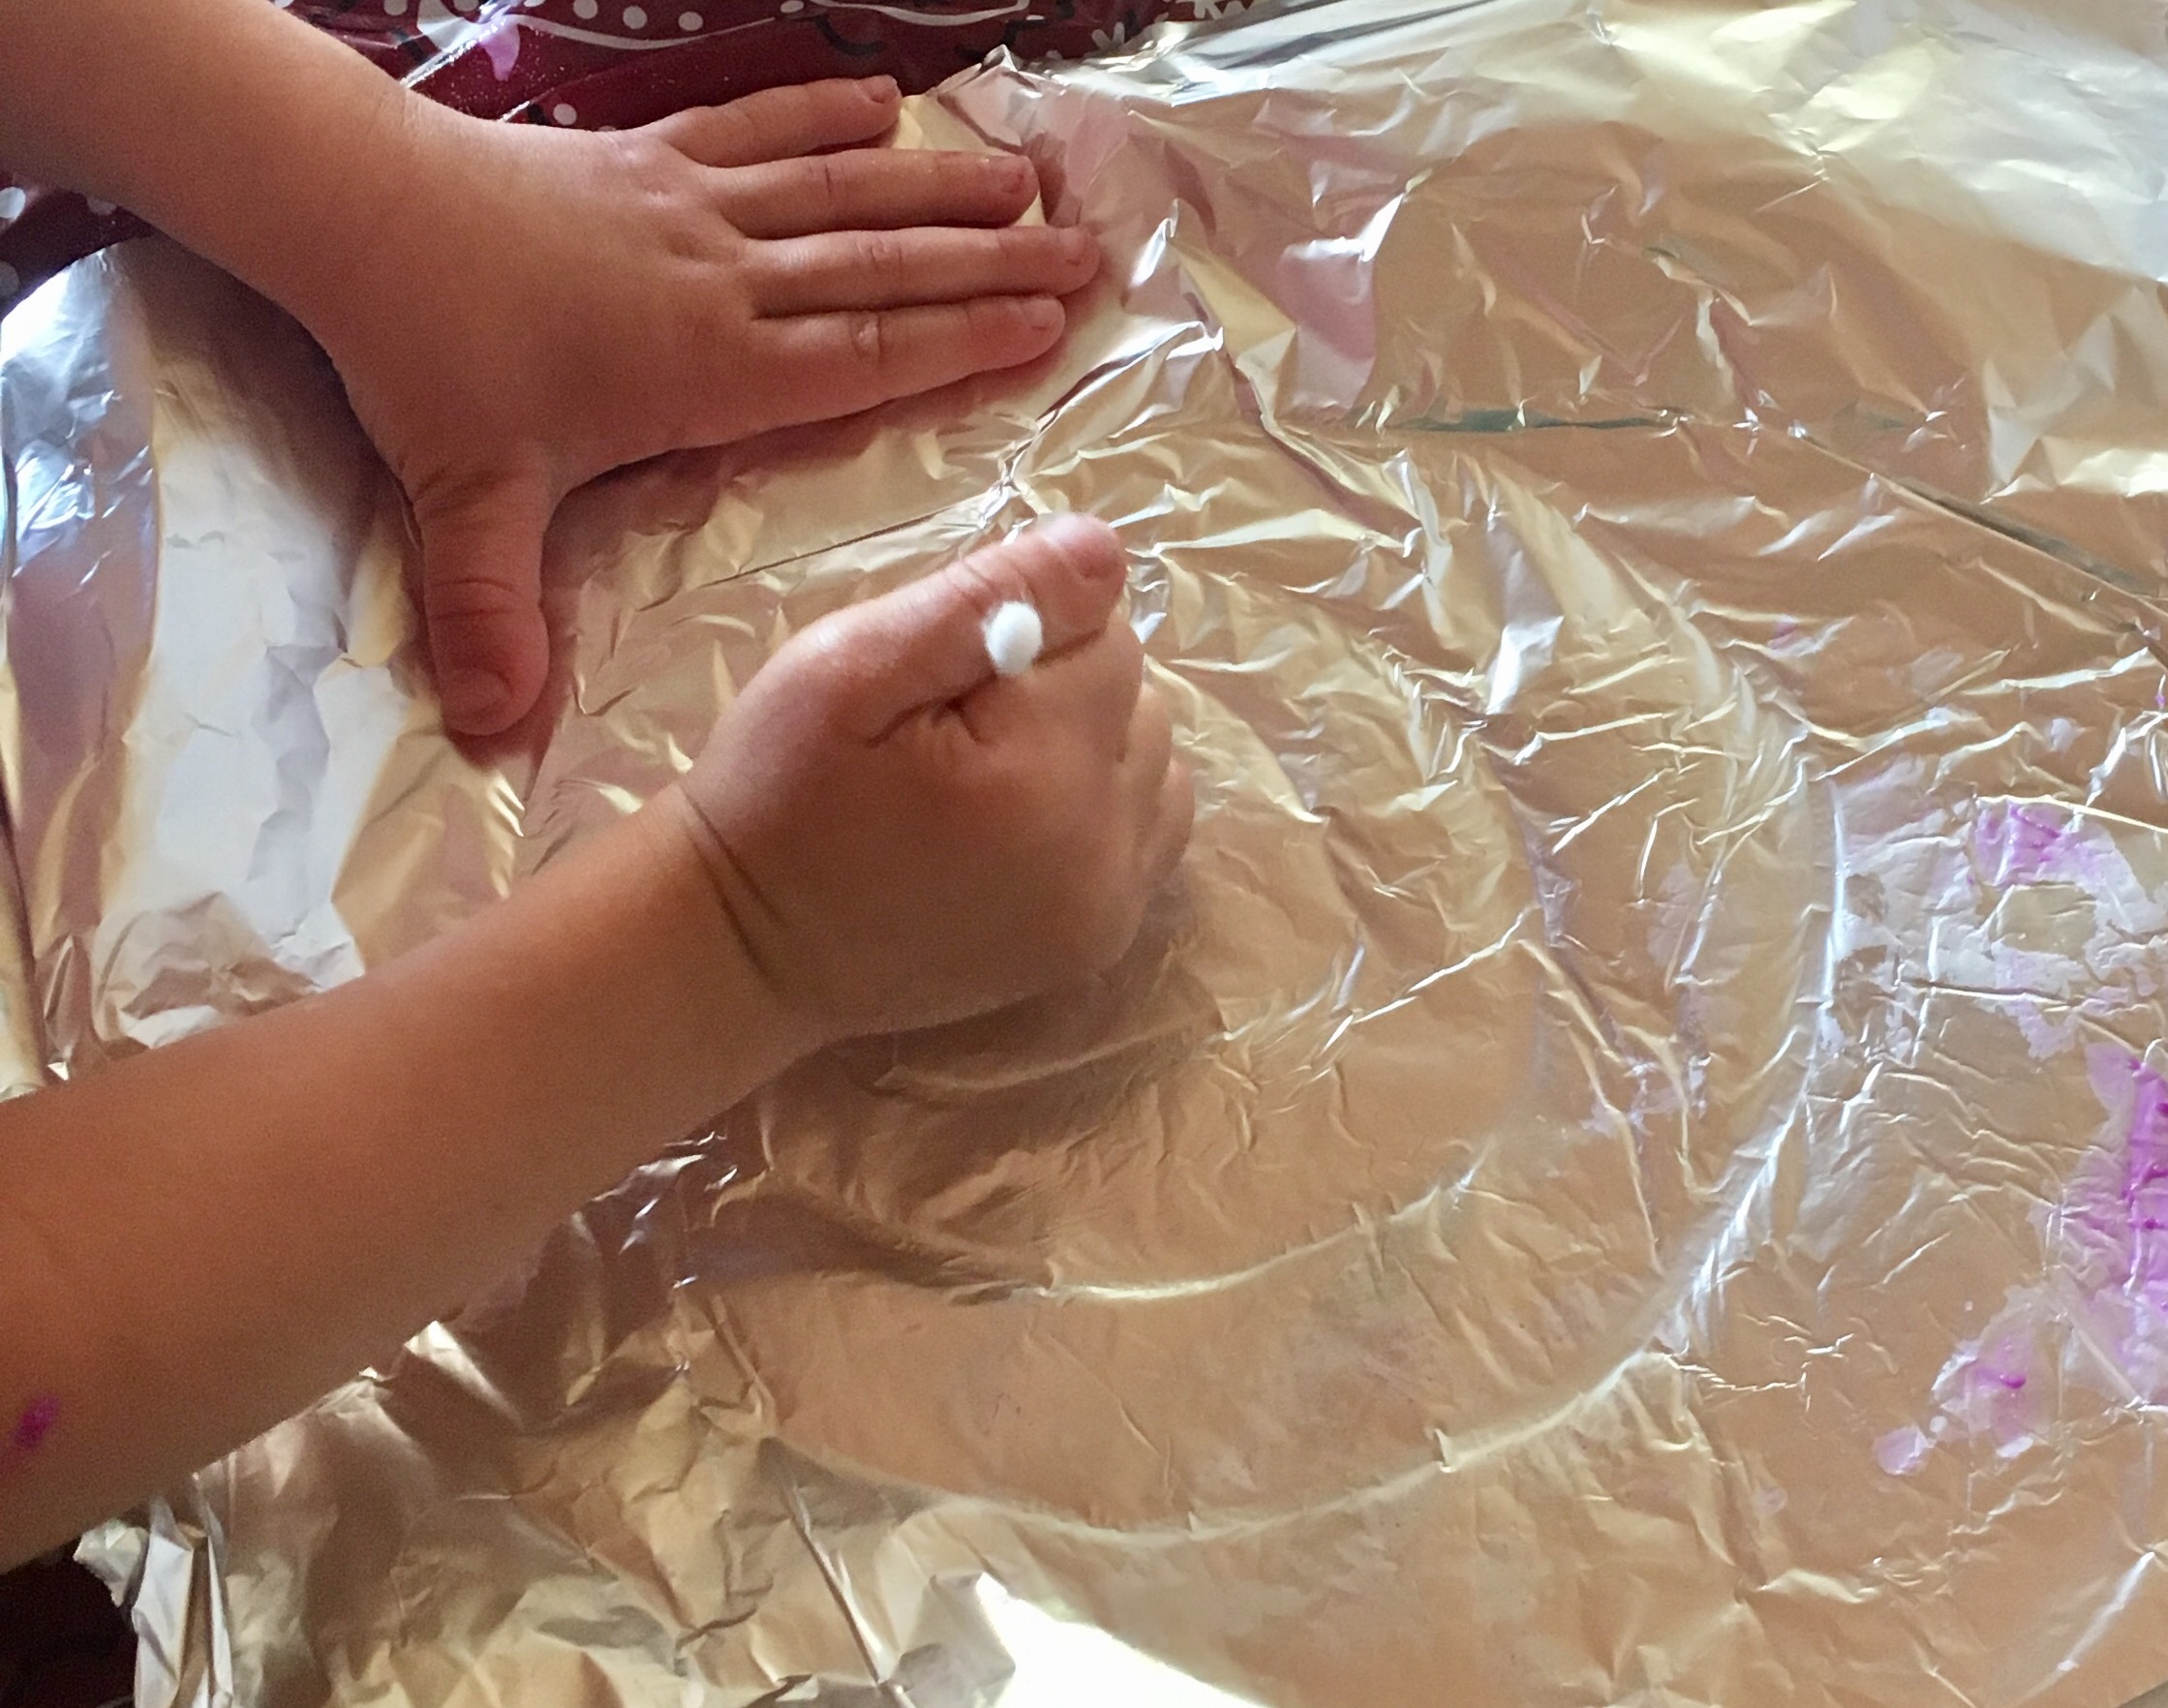
- With a cotton swab, draw on the tinfoil — try abstract designs, patterns or words.
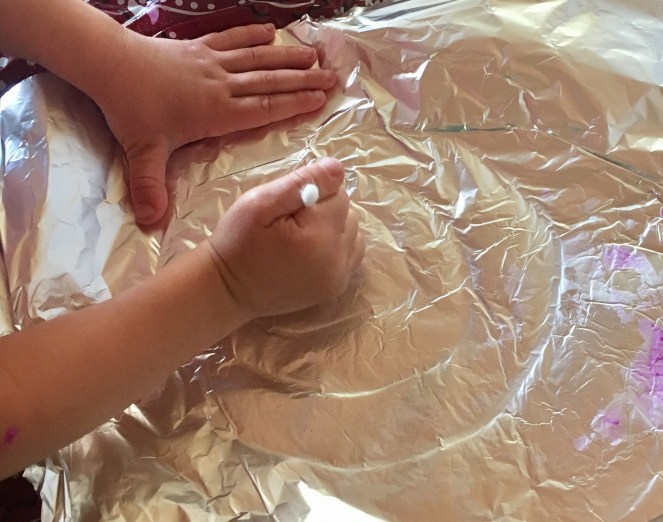
- Flip the tinfoil over so you’re looking at the back of your paper. Now, draw on the paper with a cotton swab (your markings will still be invisible for now).
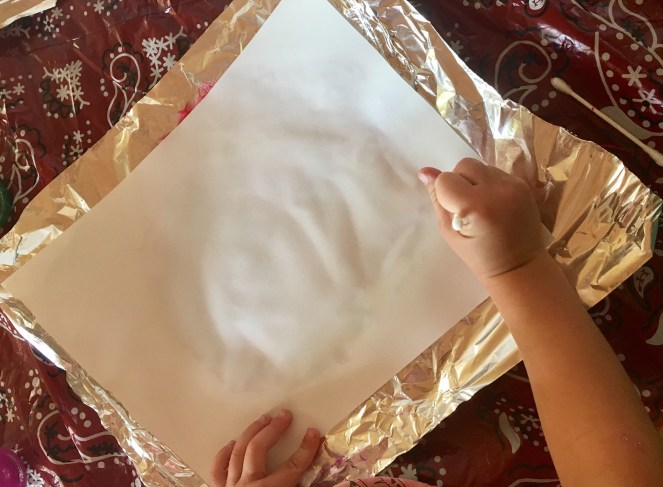
- Flip the paper back over, gently peel off the tinfoil, and study your painted print(s) in awe and wonder!

- If you have excess paint on the tinfoil, use it again and repeat the process — your prints will be different each time.


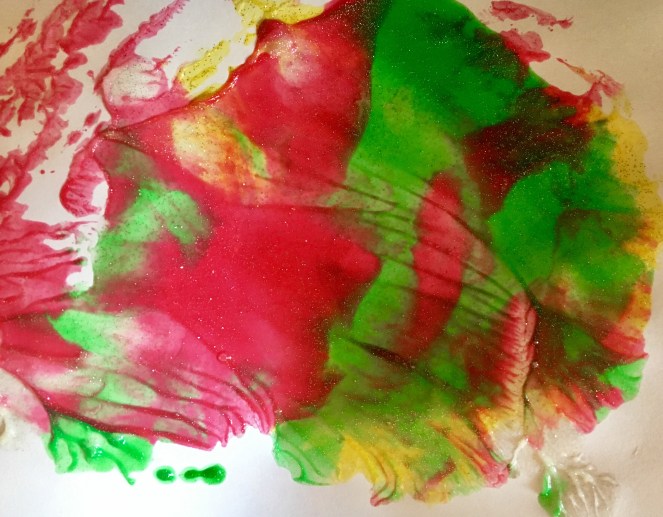


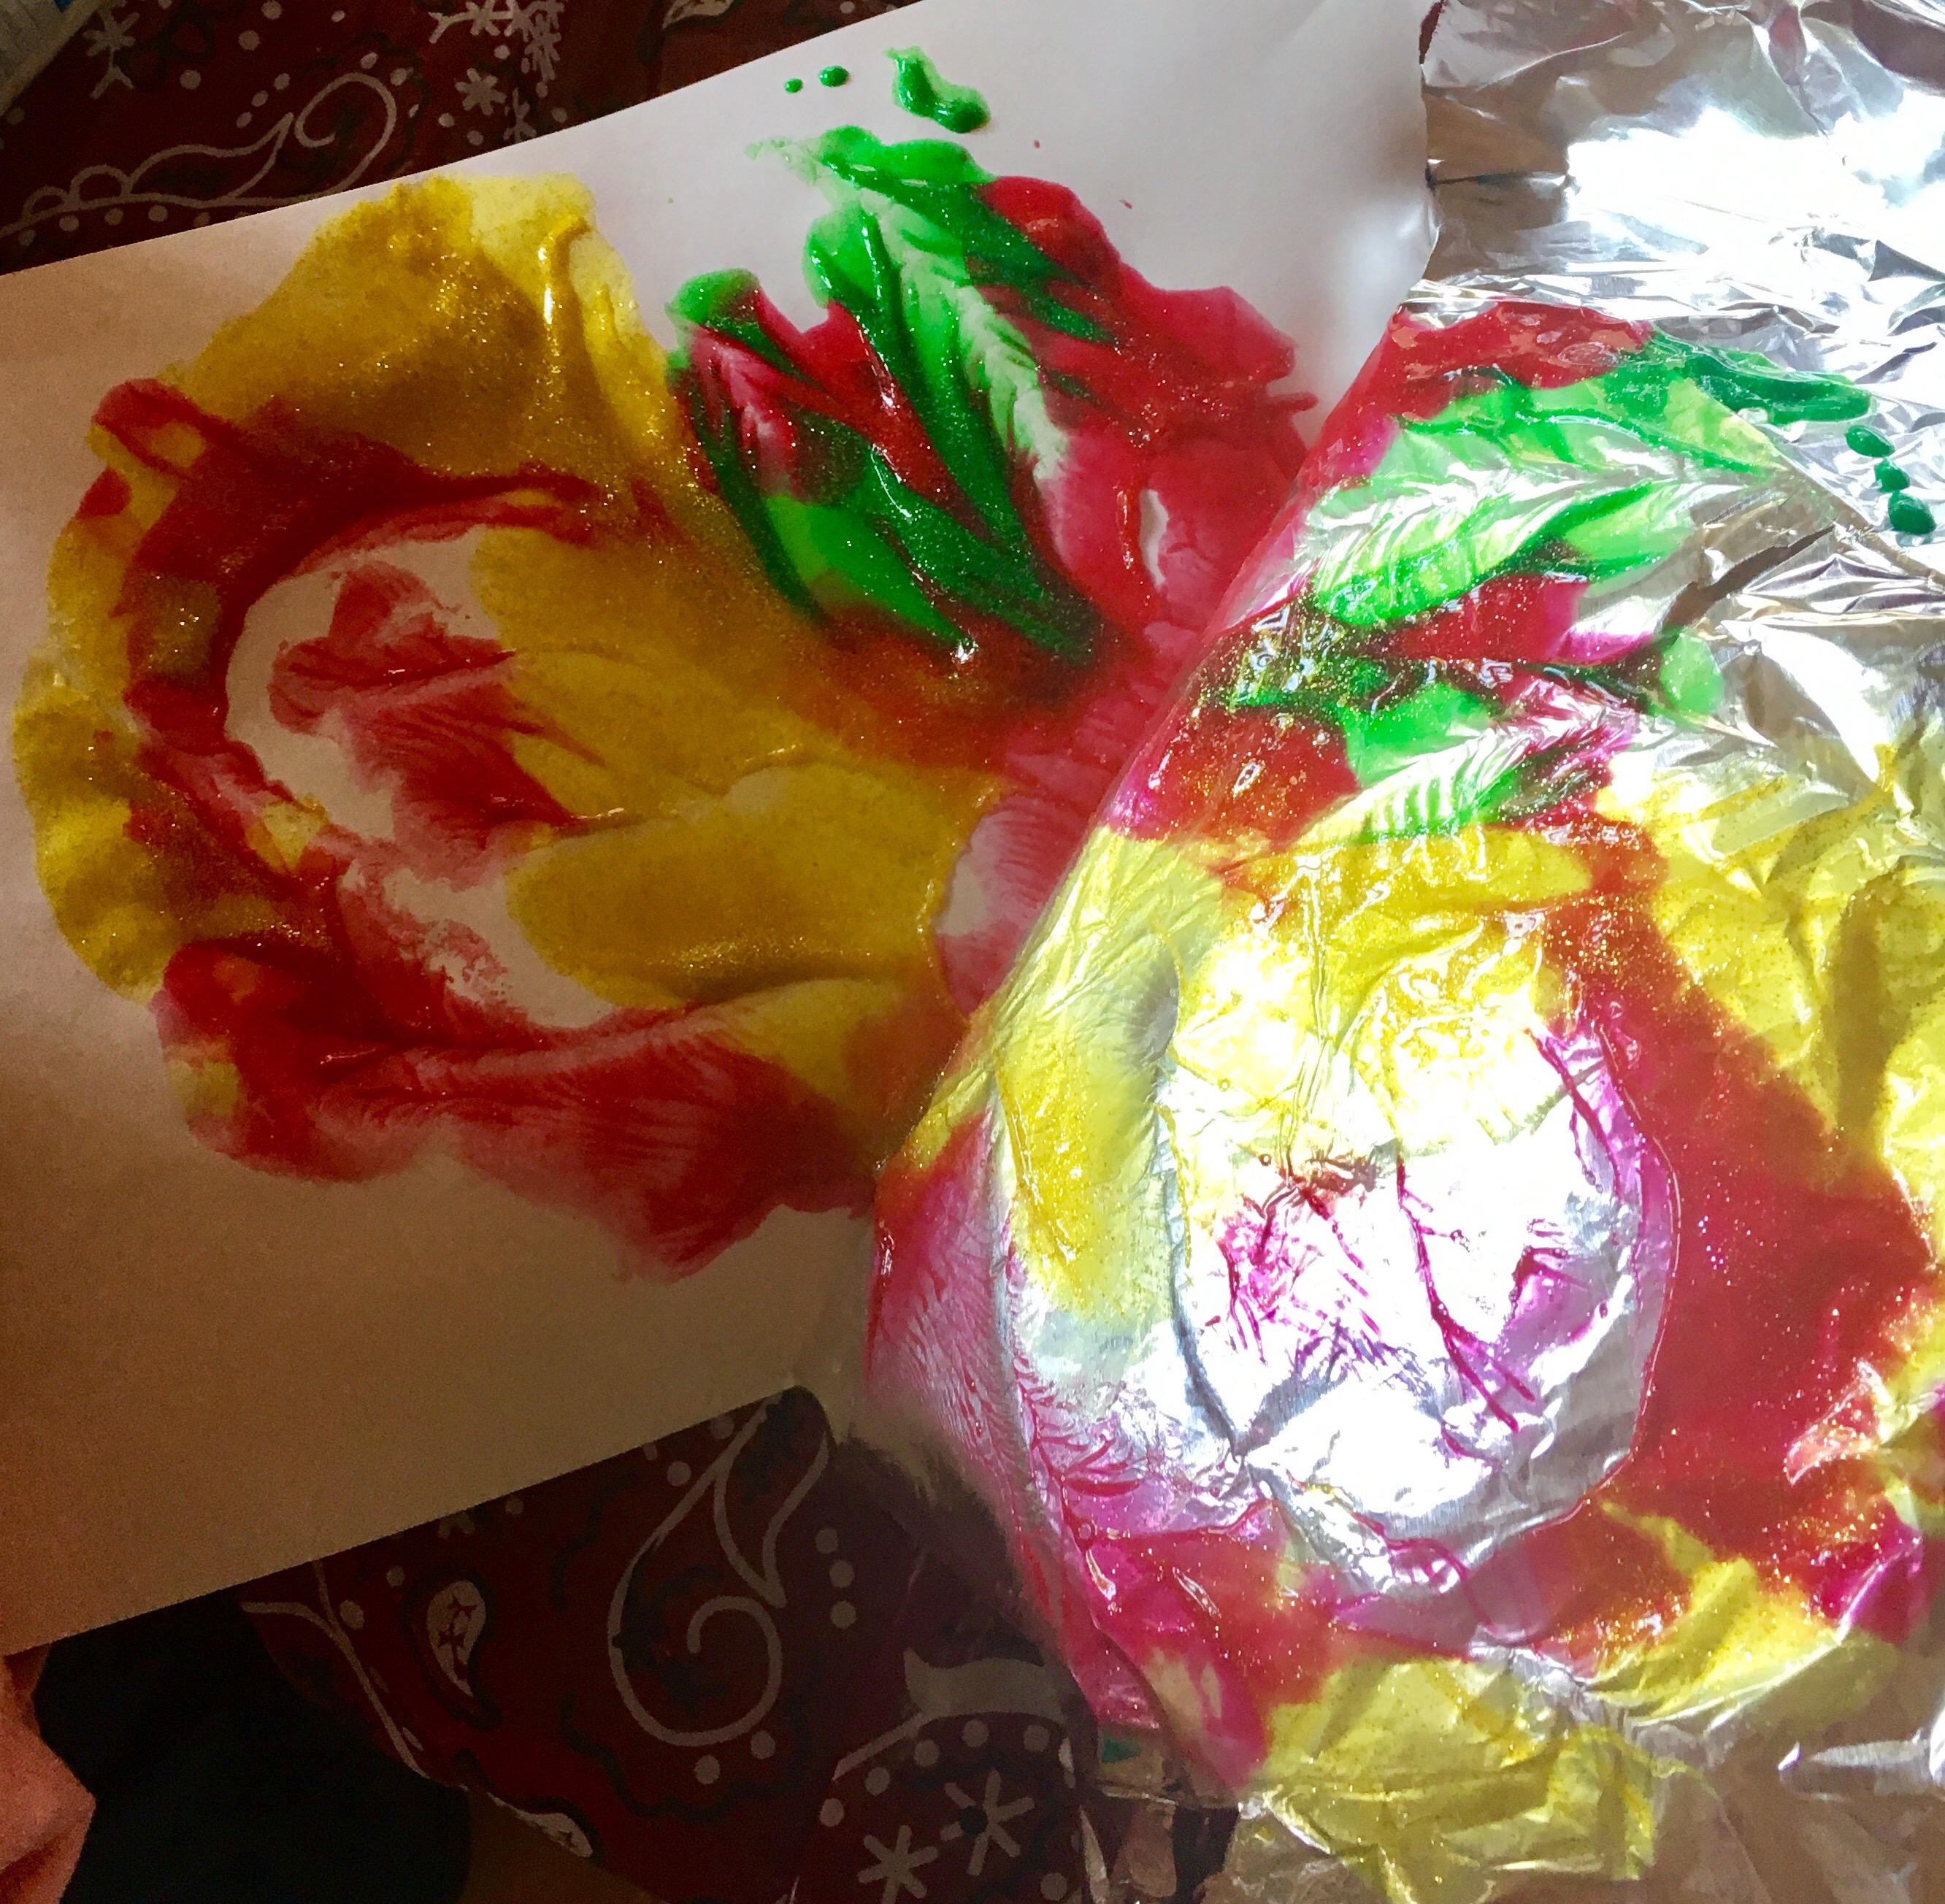
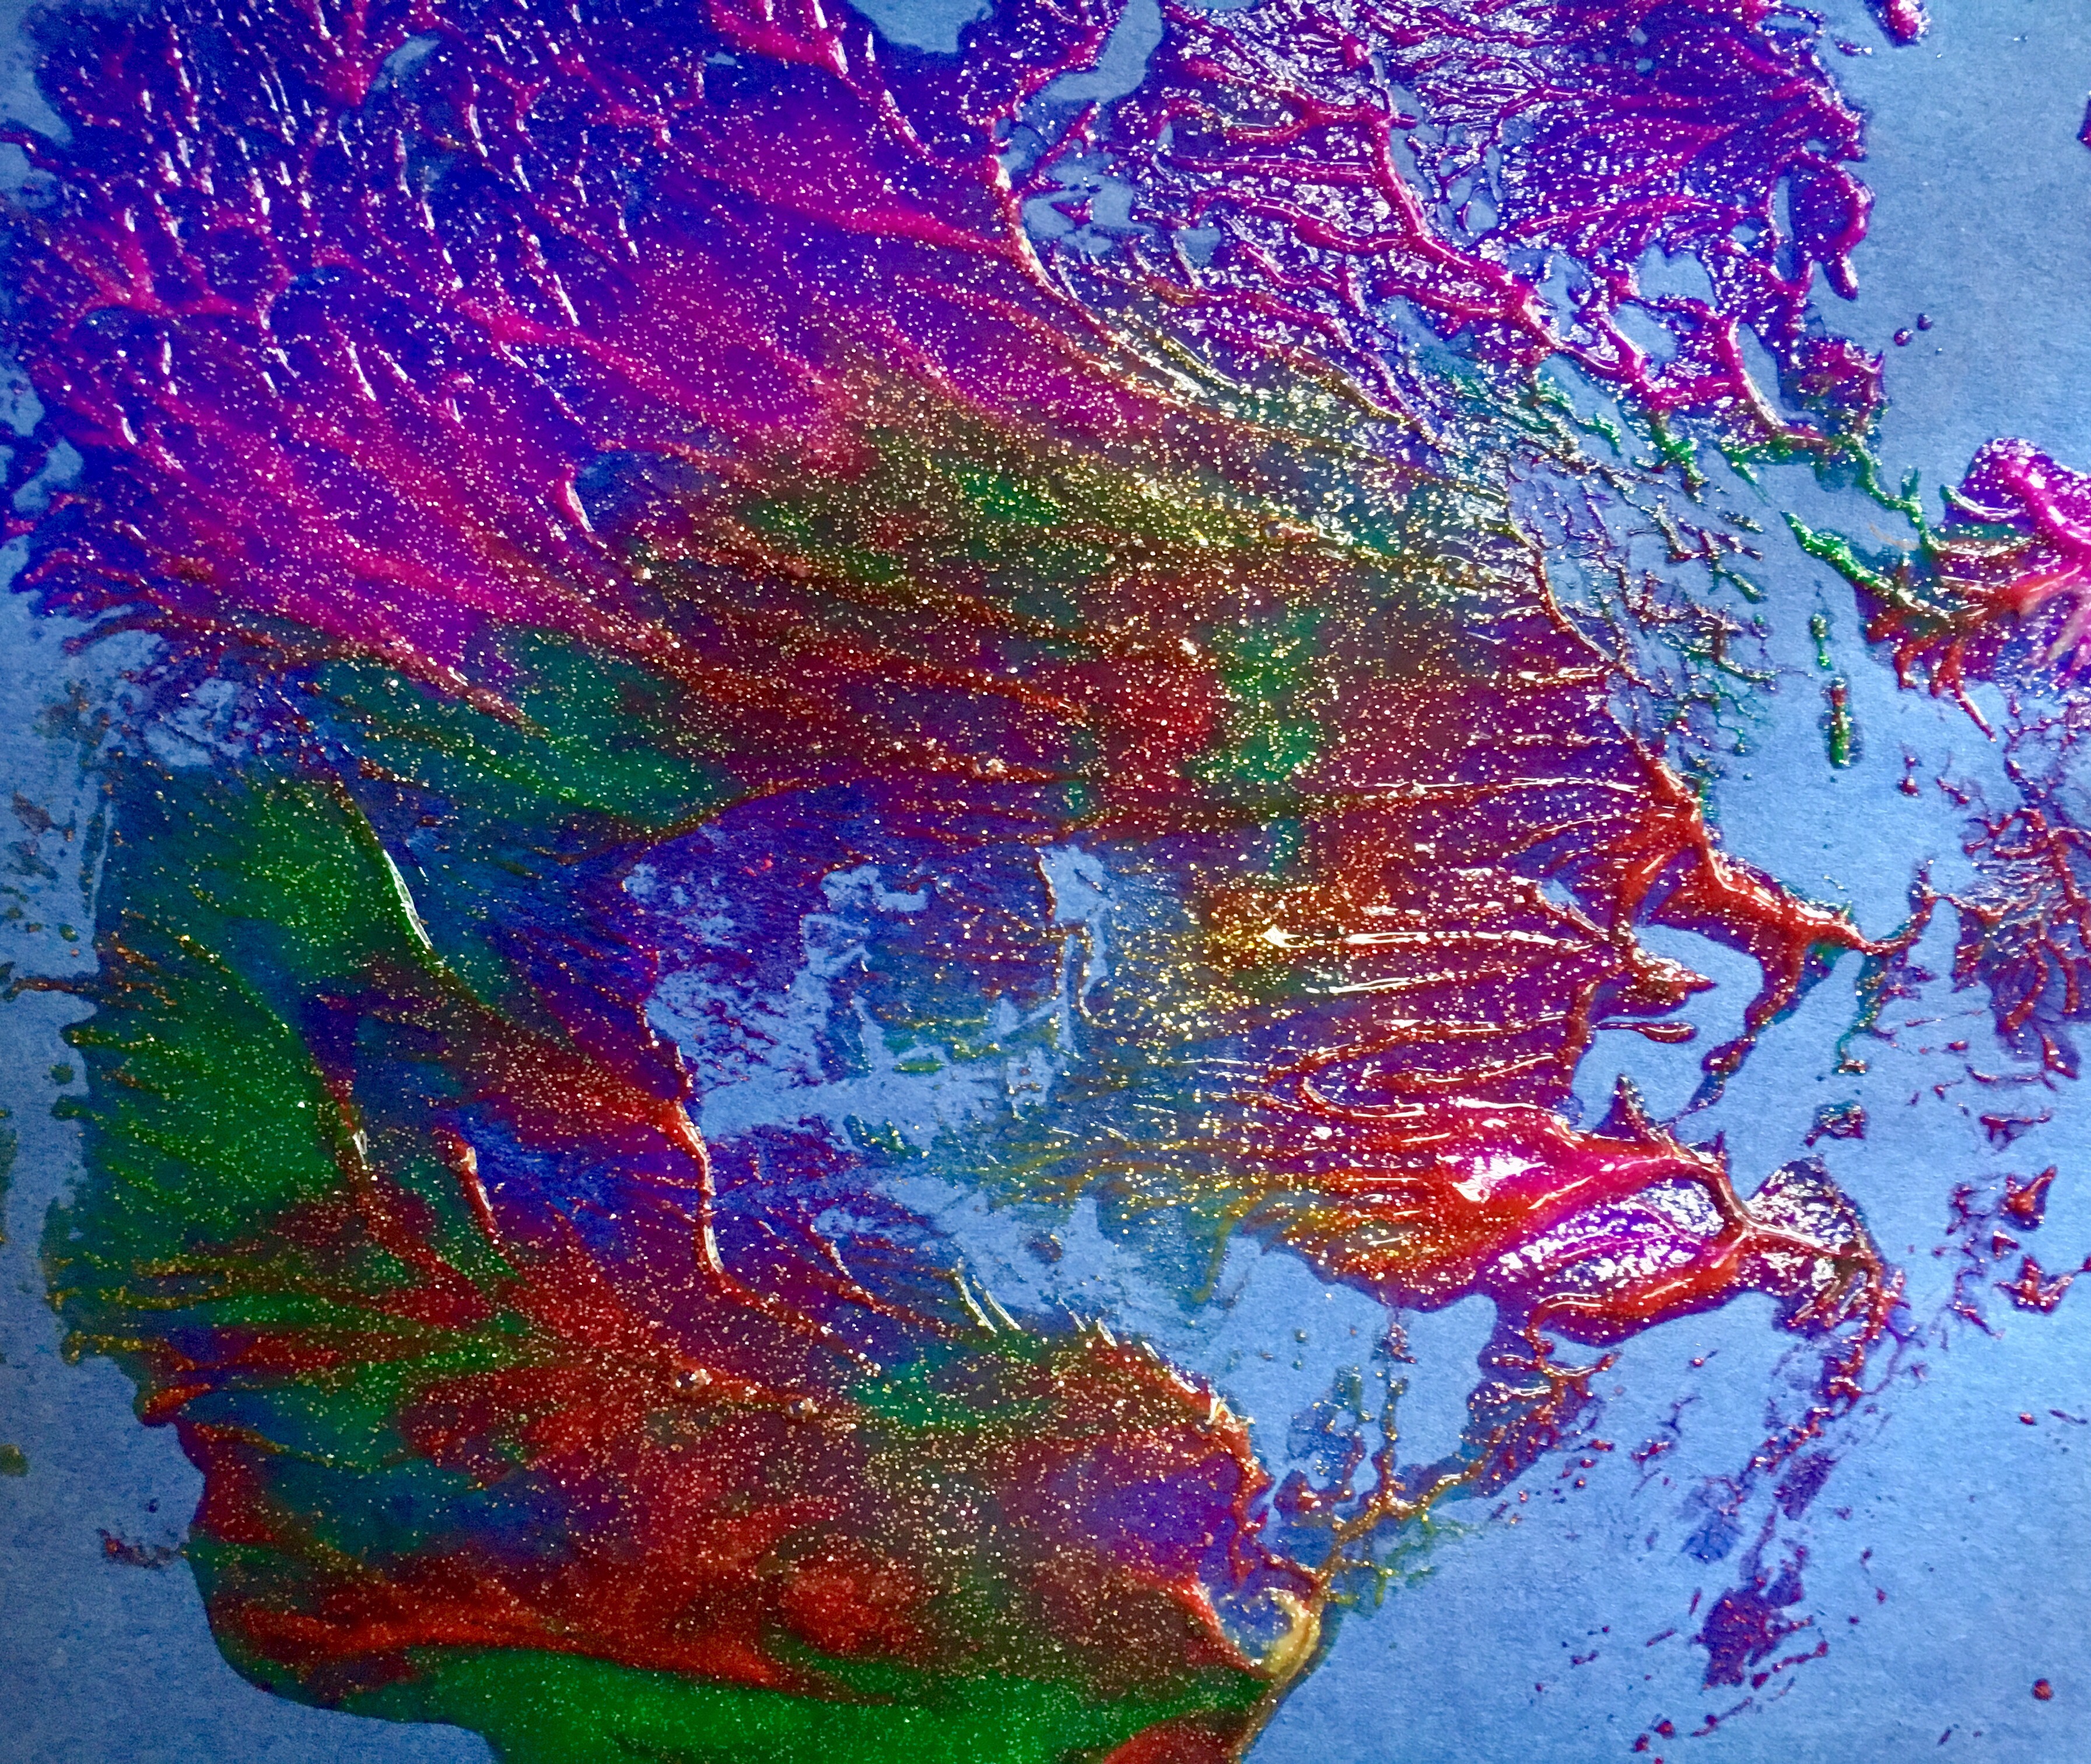


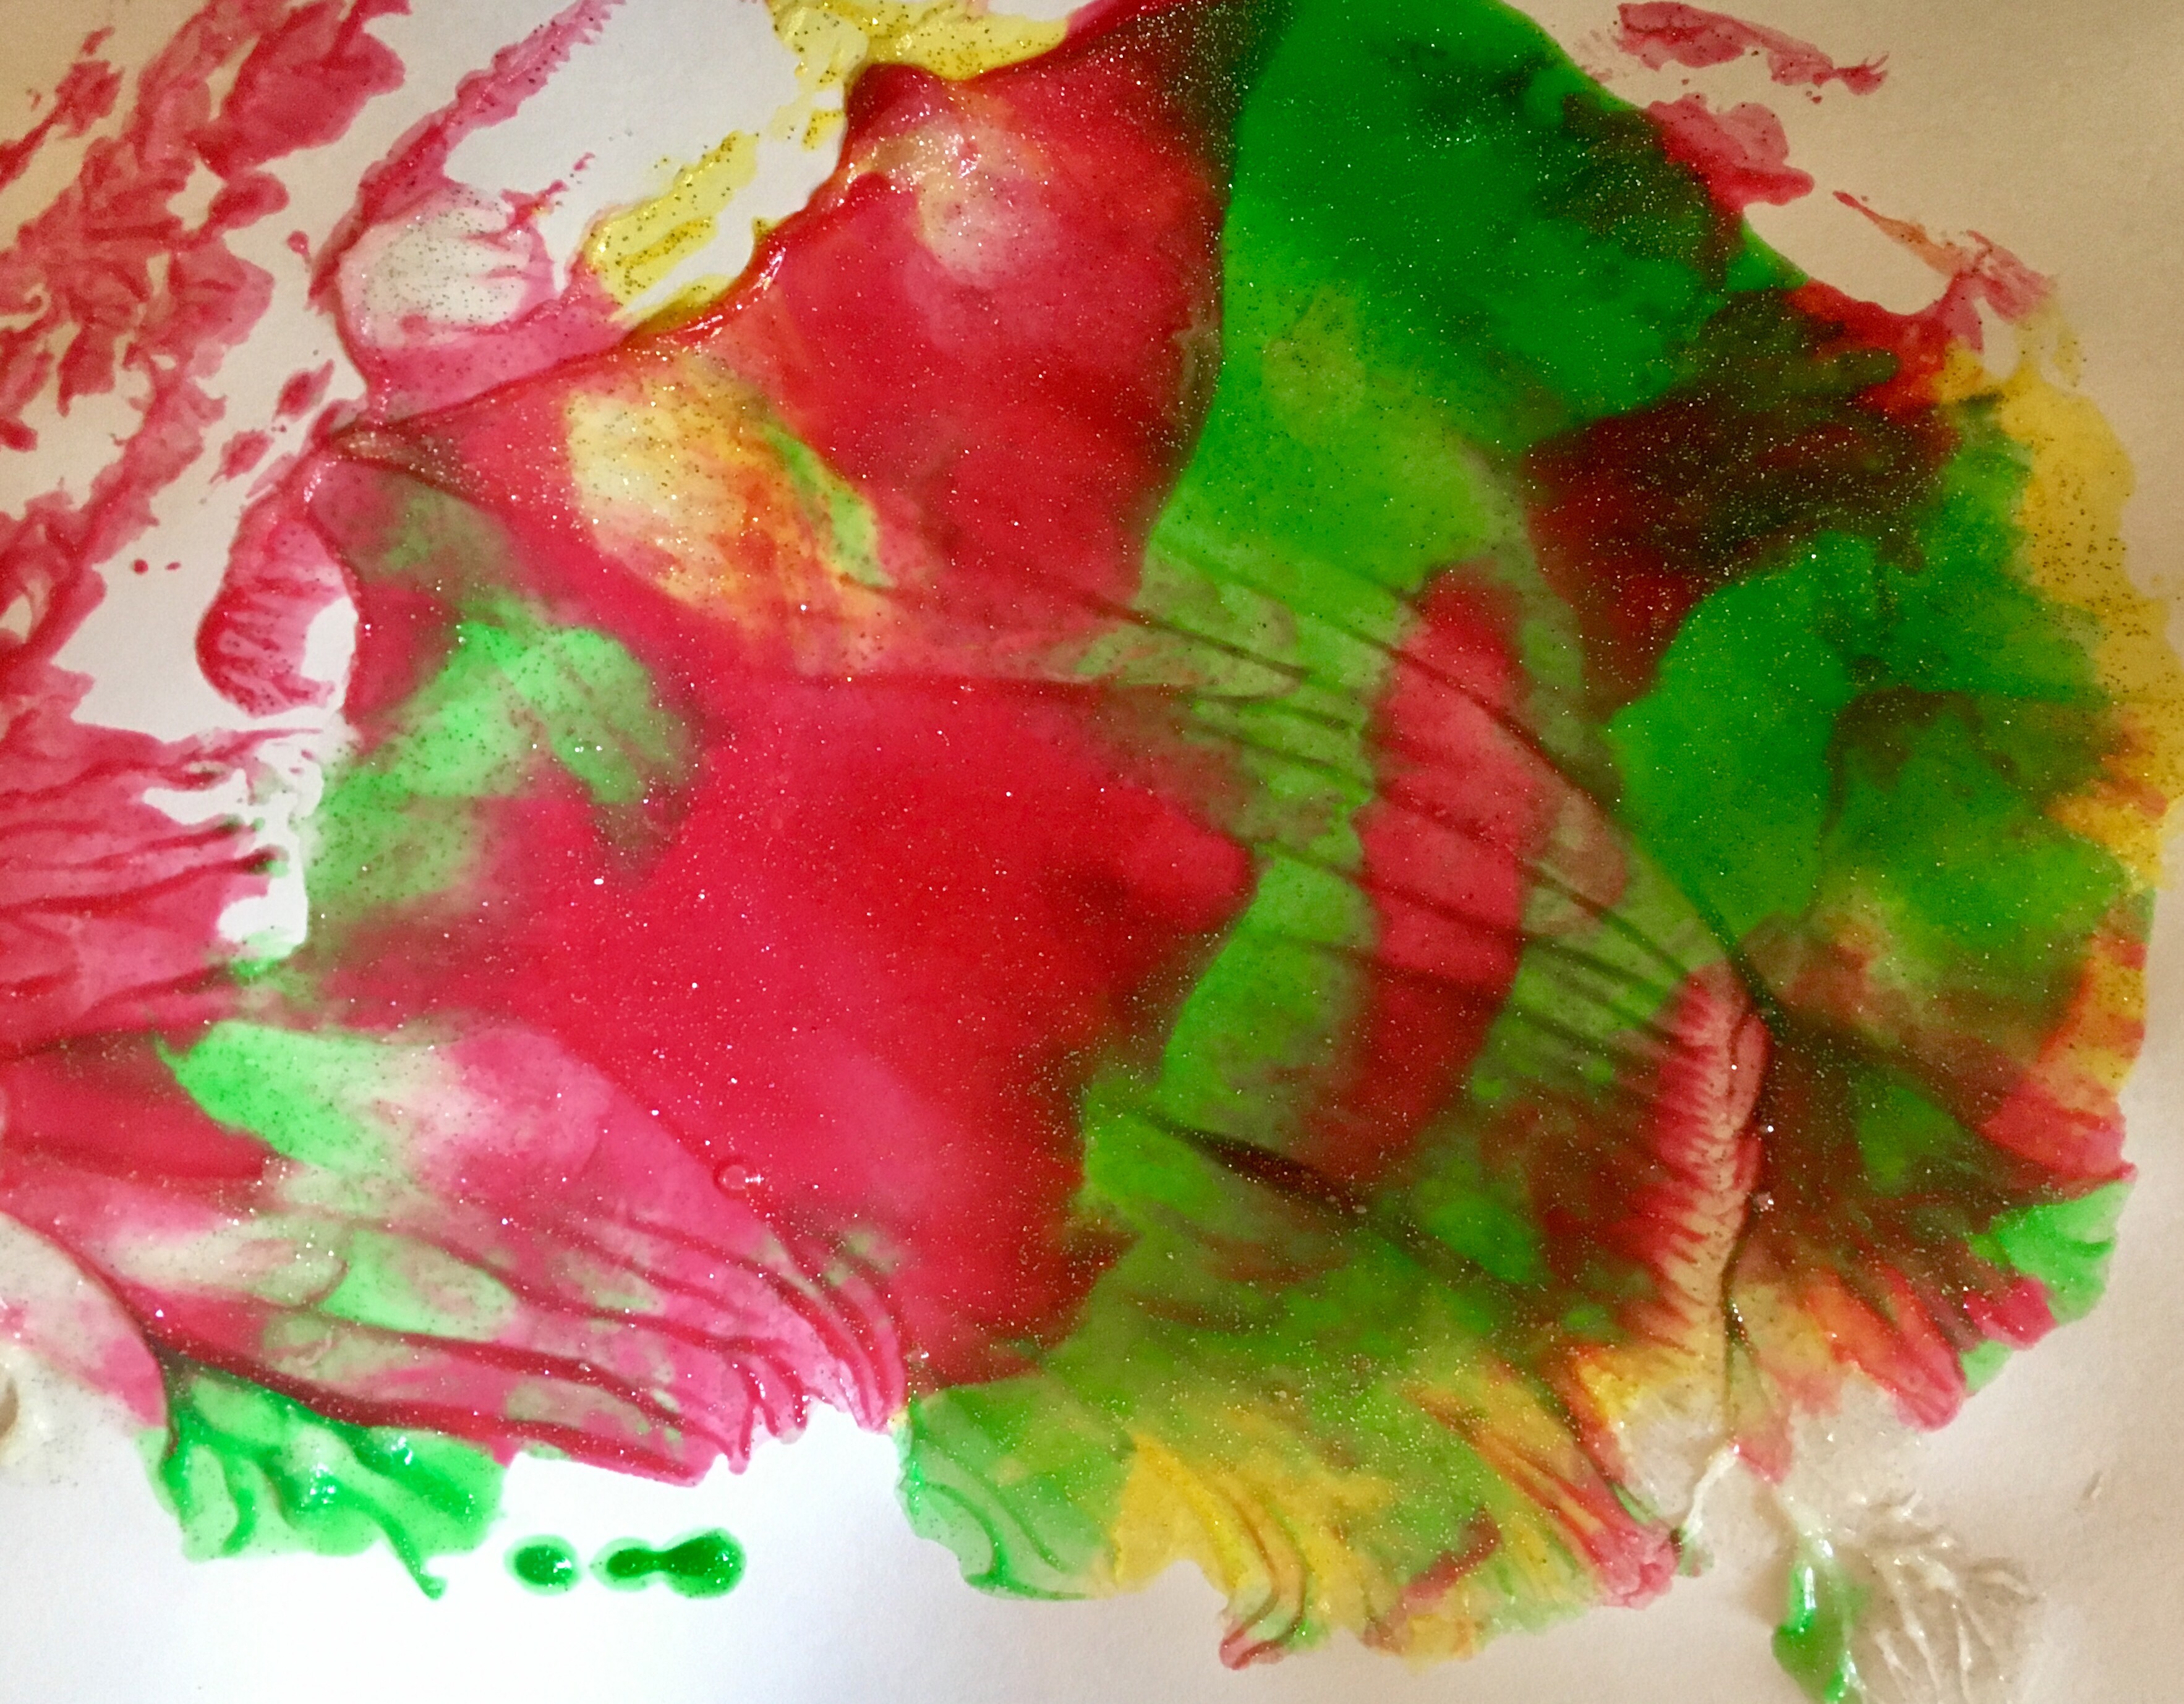
Not only will this activity generate wonderfully colorful, interestingly textured, and likely abstract works on paper, it teaches you a bit about monoprint-making. See, here, the tinfoil became a “matrix.” It’s the surface that bears your design, and from which your prints are made (think of the matrix as a stamp, and when you ink that stamp and then press it to paper, you have an impression of it). You acted as the printing press, by pushing the paint around under the tinfoil. With your excess paint left on the tinfoil, you can create more “impressions” in your series, but each image will look different — the first one made will probably be more saturated and have thicker paint than the subsequent ones.
So, get get ’em, young print-makers. I’d love to see images when you’re done!

I’ll be adding this one to my list as well!! Anything with paint and my 4 year old is sold.
LikeLiked by 1 person
Oh good! Share pictures when you do it!
LikeLiked by 1 person
Very cool!! I’ve never heard of the cling wrap on paper thing, so we’ll have to try both. Very nice images!
LikeLike
Love this! Will definitely try with Z. 🙂
LikeLiked by 1 person
These are so pretty, and creative!!!
LikeLiked by 1 person
Thank you! Btw, I JUST arrived home from our vacation to find that the figurines in the princess globes broke off — I think my cat knocked them over. But I don’t think they’ll make a mailing safely once reapplied. I’ll look around to see if there’s another semi-desirable thing to donate. Sorry!
LikeLiked by 1 person
Oh, I’m sorry! Did you have a great vacation?
LikeLike