
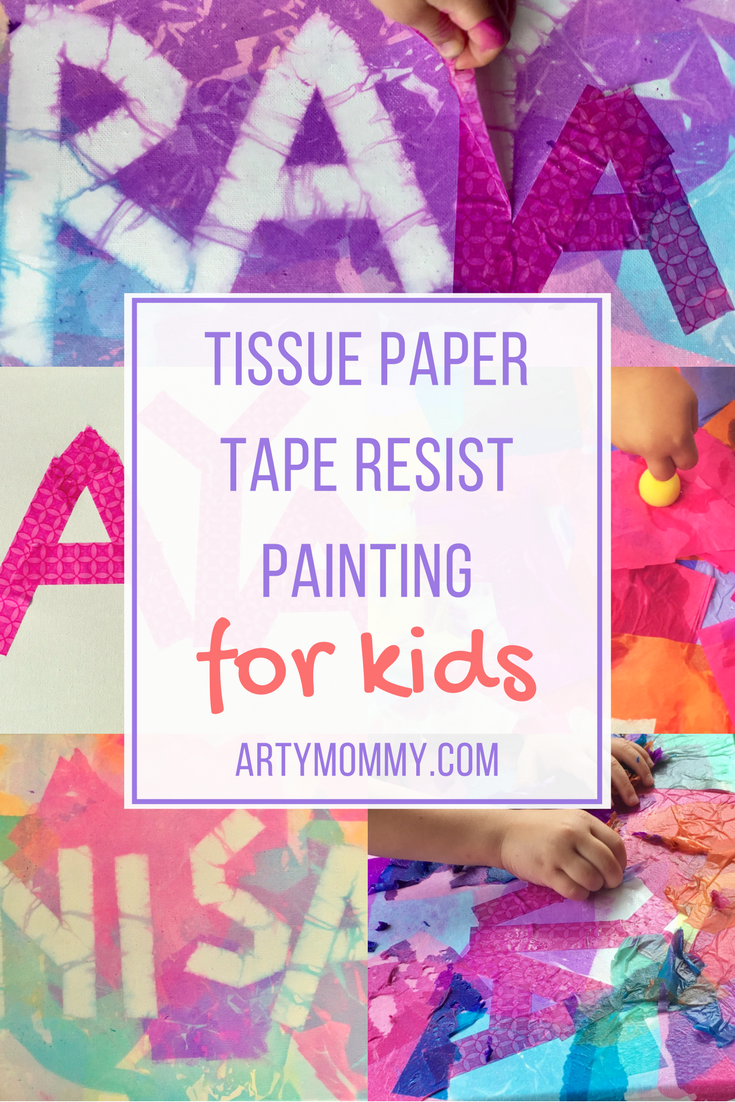
 Since we’re still on our summer “holiday” visiting family back east, most of the time I’m responsible for only one of my two children. Right now, for example, miss R is playing a game with her MiMi while I sit in the sun room watching, listening to and smelling the torrential rain just outside the screen. Baby K is dozing in the Ergo while I rock peacefully in a glider and catch up on iPhone fun. Pure loveliness. Now, while I could be perusing social media (read, pinning my heart out), I’m too proud of and excited about the art project we completed this morning. I am floored by the results. This activity — let’s call it “Tissue Paper Tape Resist Painting” — now ranks in my top five kids craft projects. Alongside the monoprinting with tinfoil project, this is my favorite self-invented process. So yeah, my free hand is patting my sore back right now.
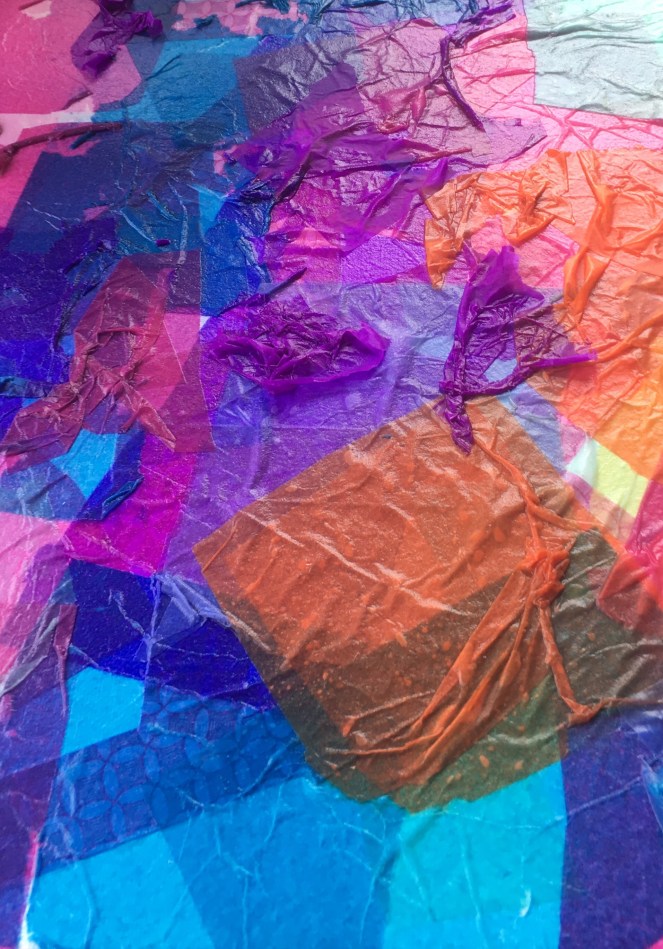
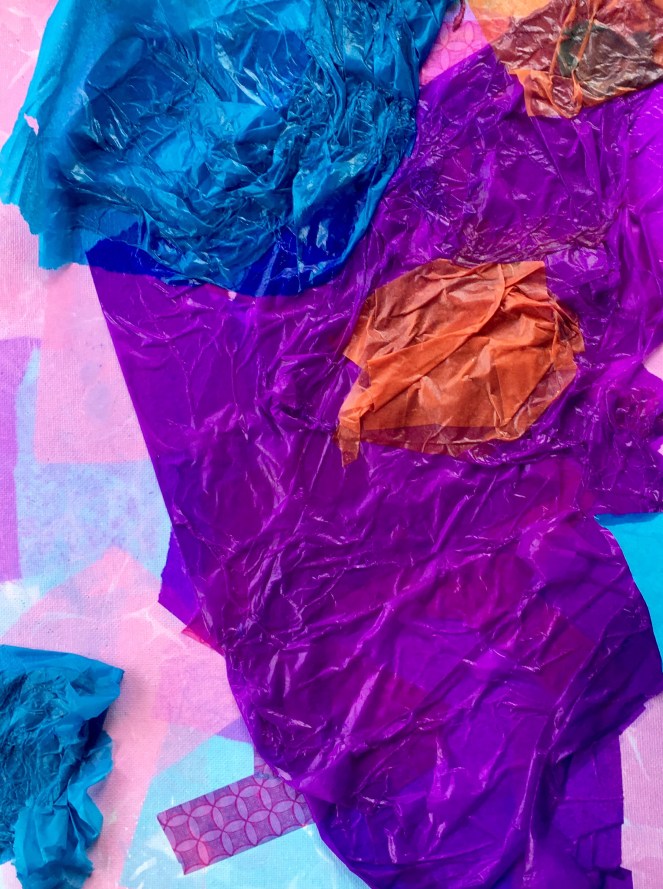
Here’s what we came up with: 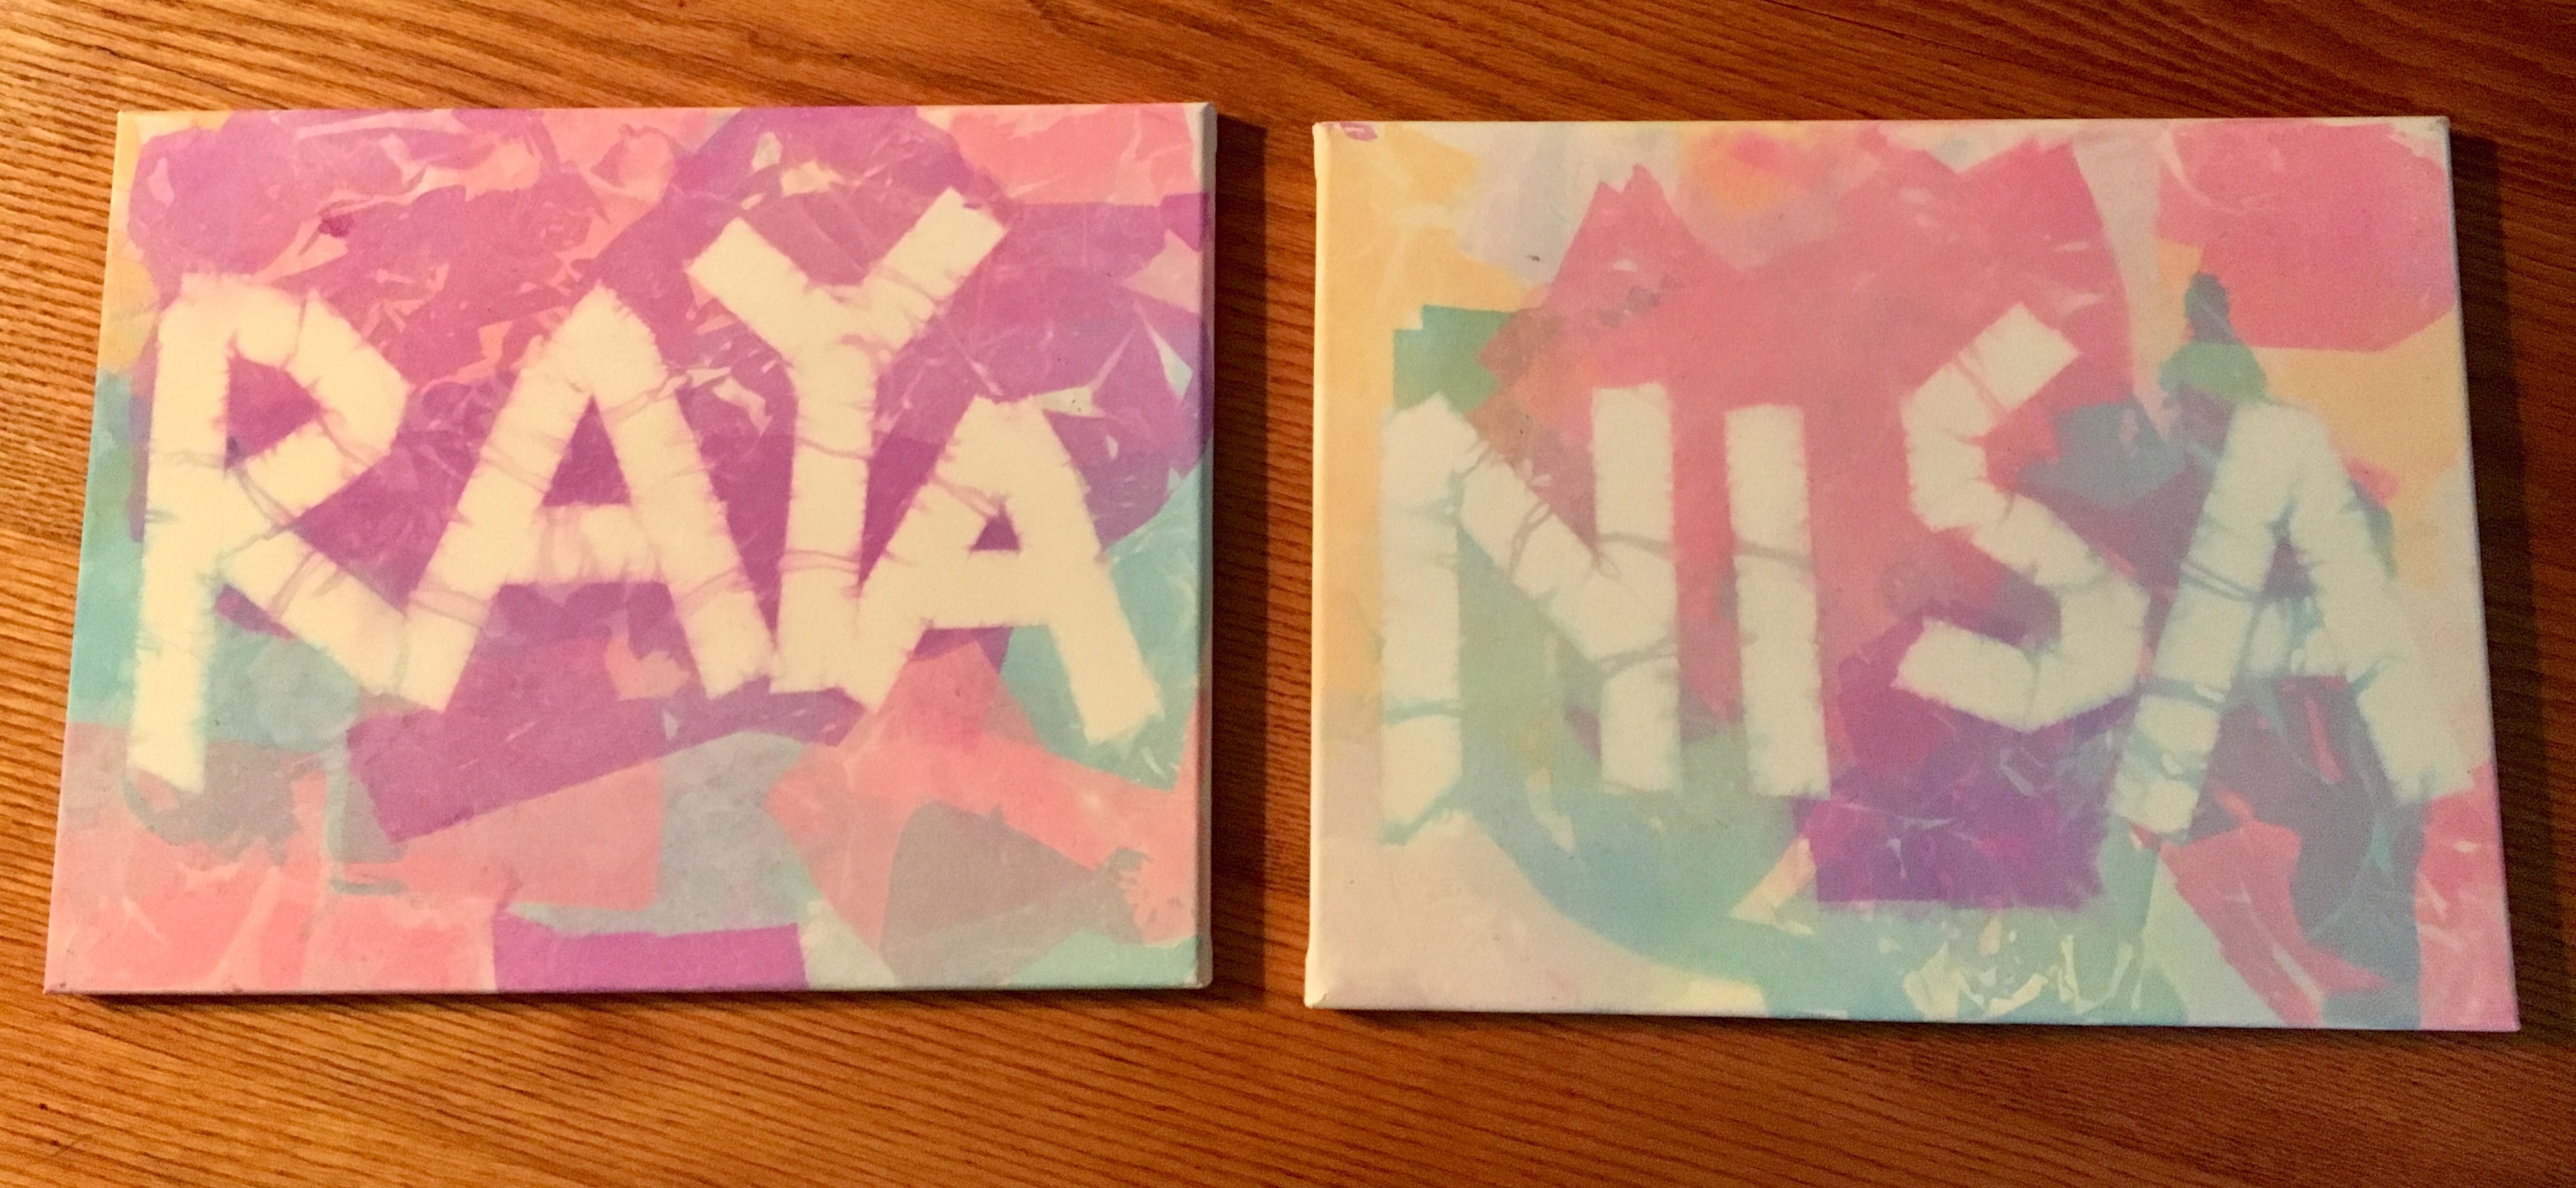

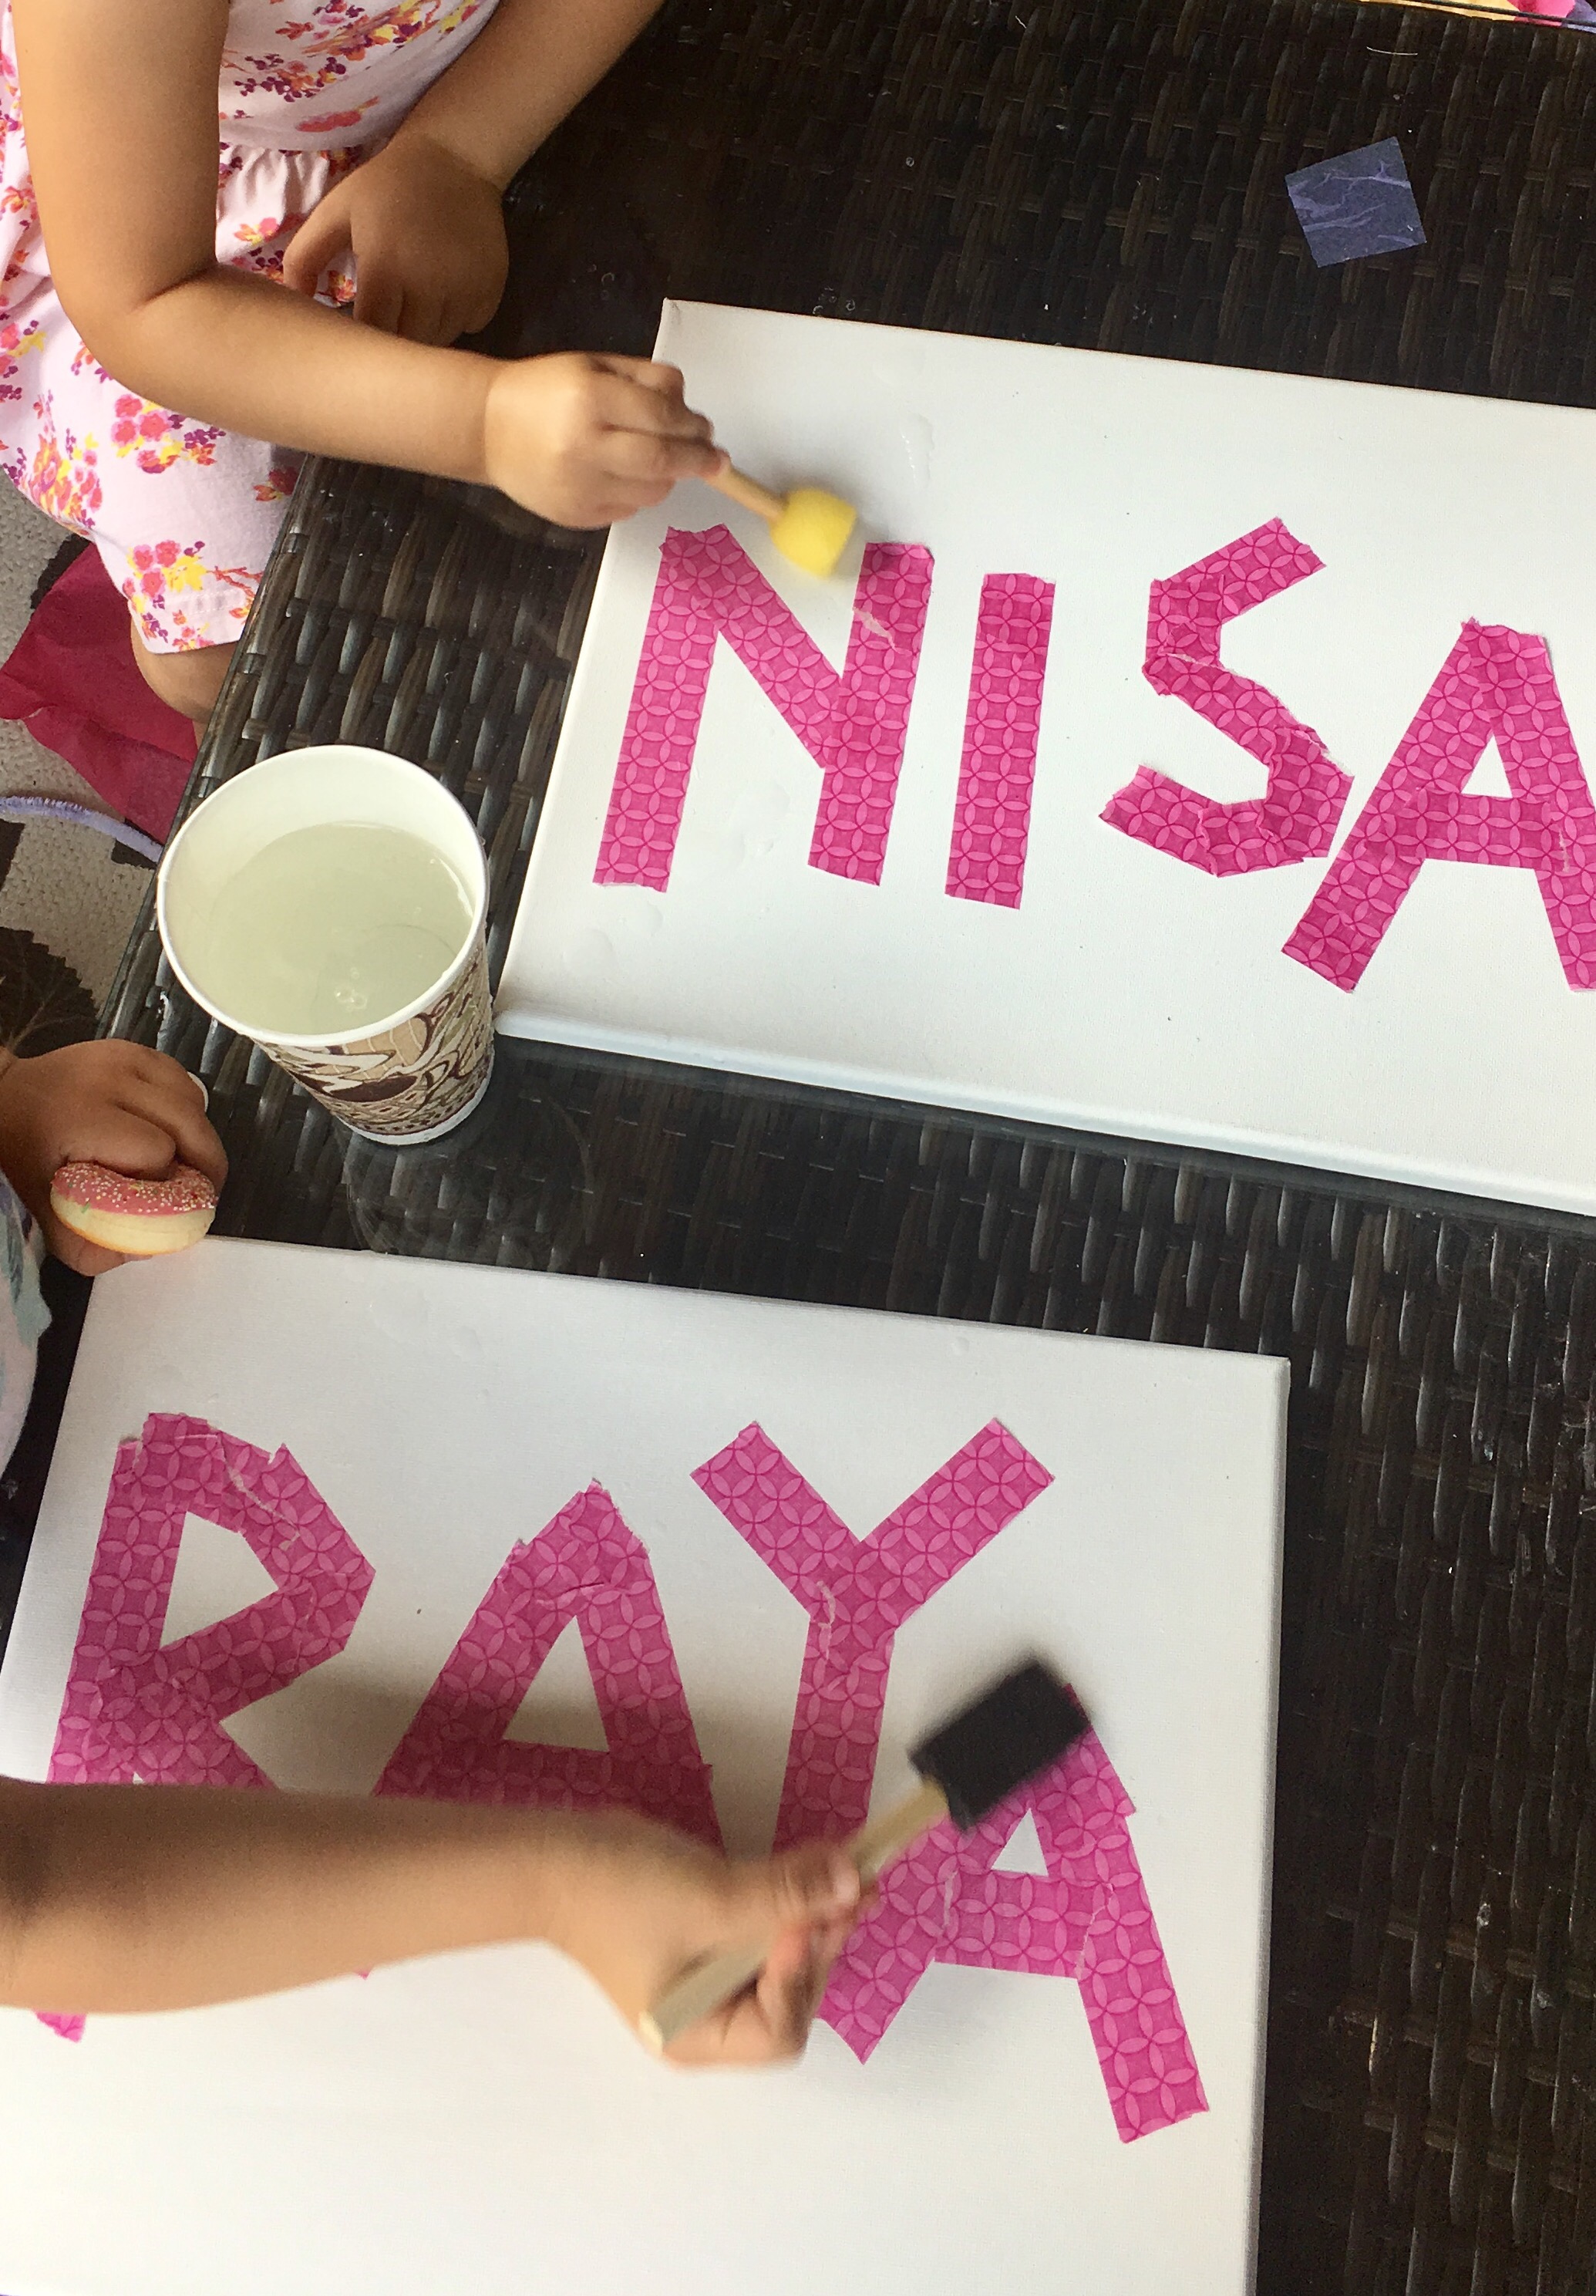
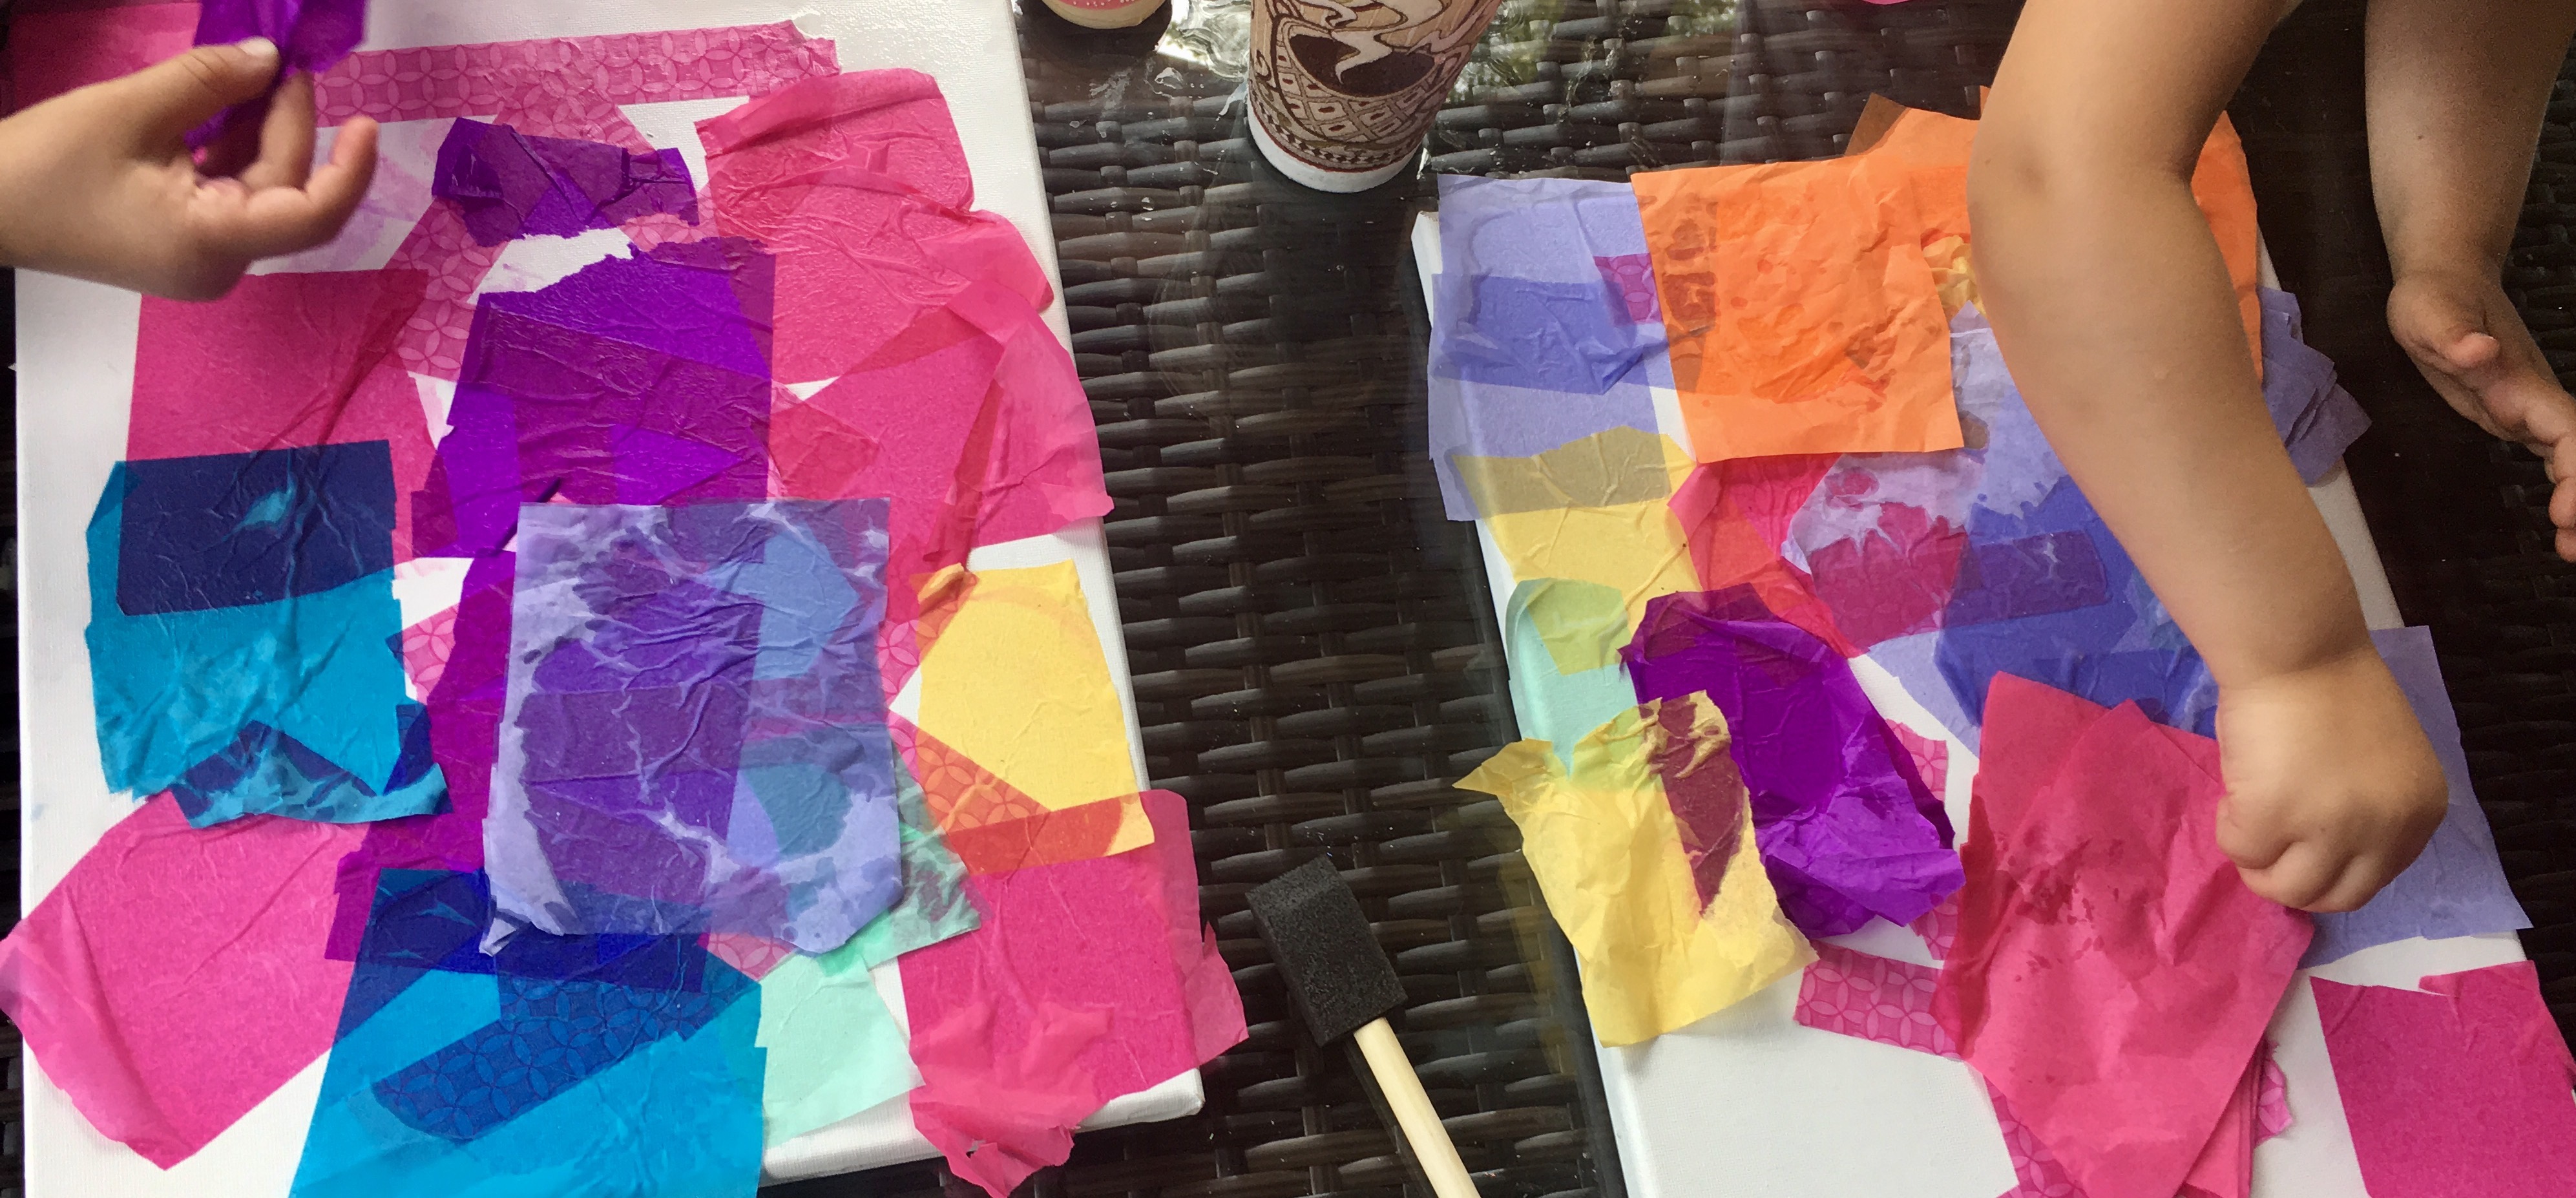
And how we got there:

Materials Needed:
- Blank canvas
- Masking tape
- Scissors
- Tissue paper
- Foam brushes
- Tissue paper in a variety of colors
Step-by-Step Directions:
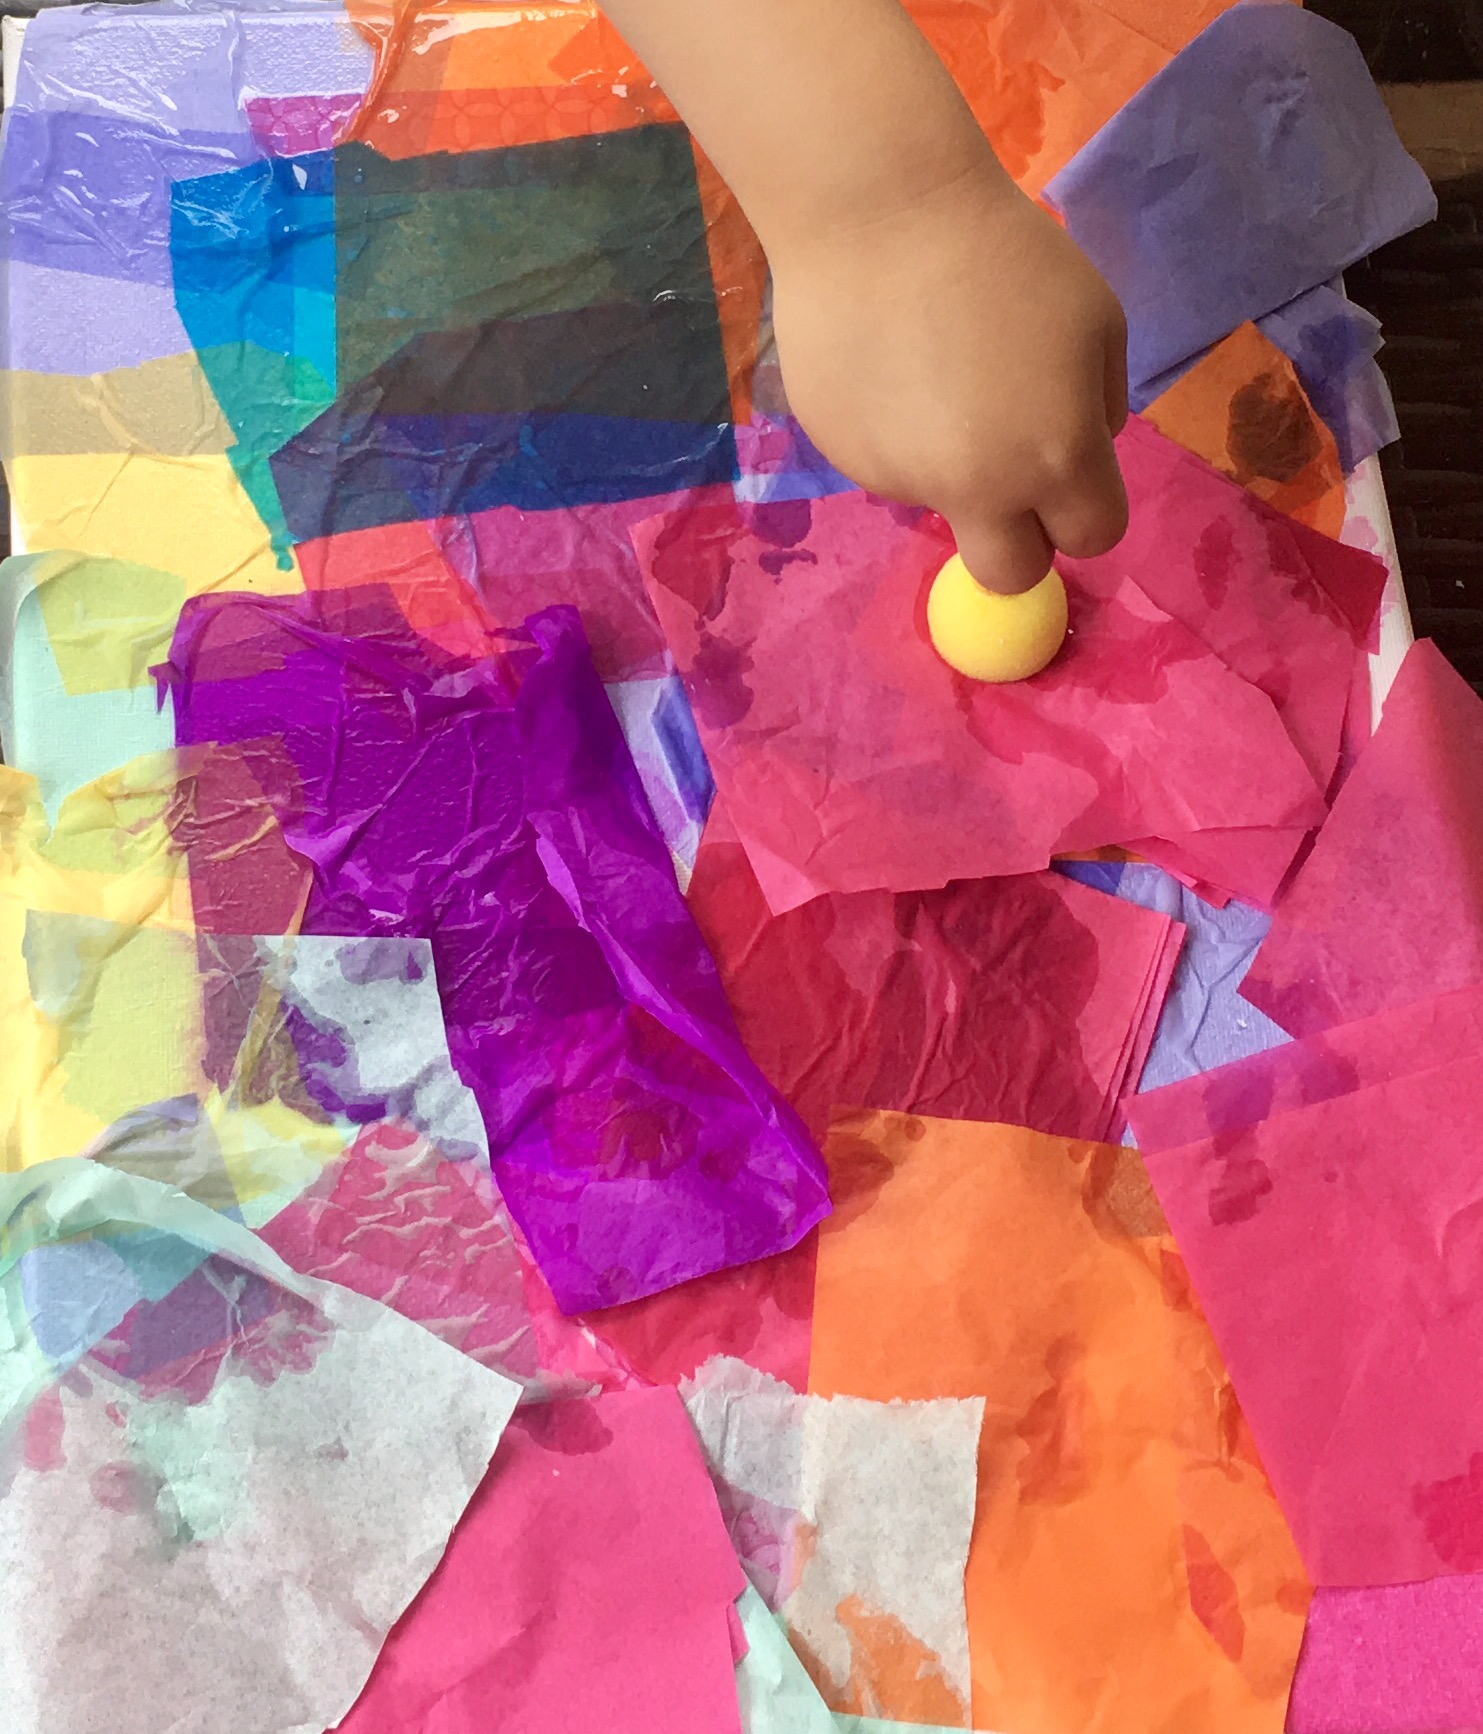
- Cut up various colors of tissue paper into square-ish pieces (the size is up to you, but the pieces should be small enough to fit a couple dozen of them on the canvas).
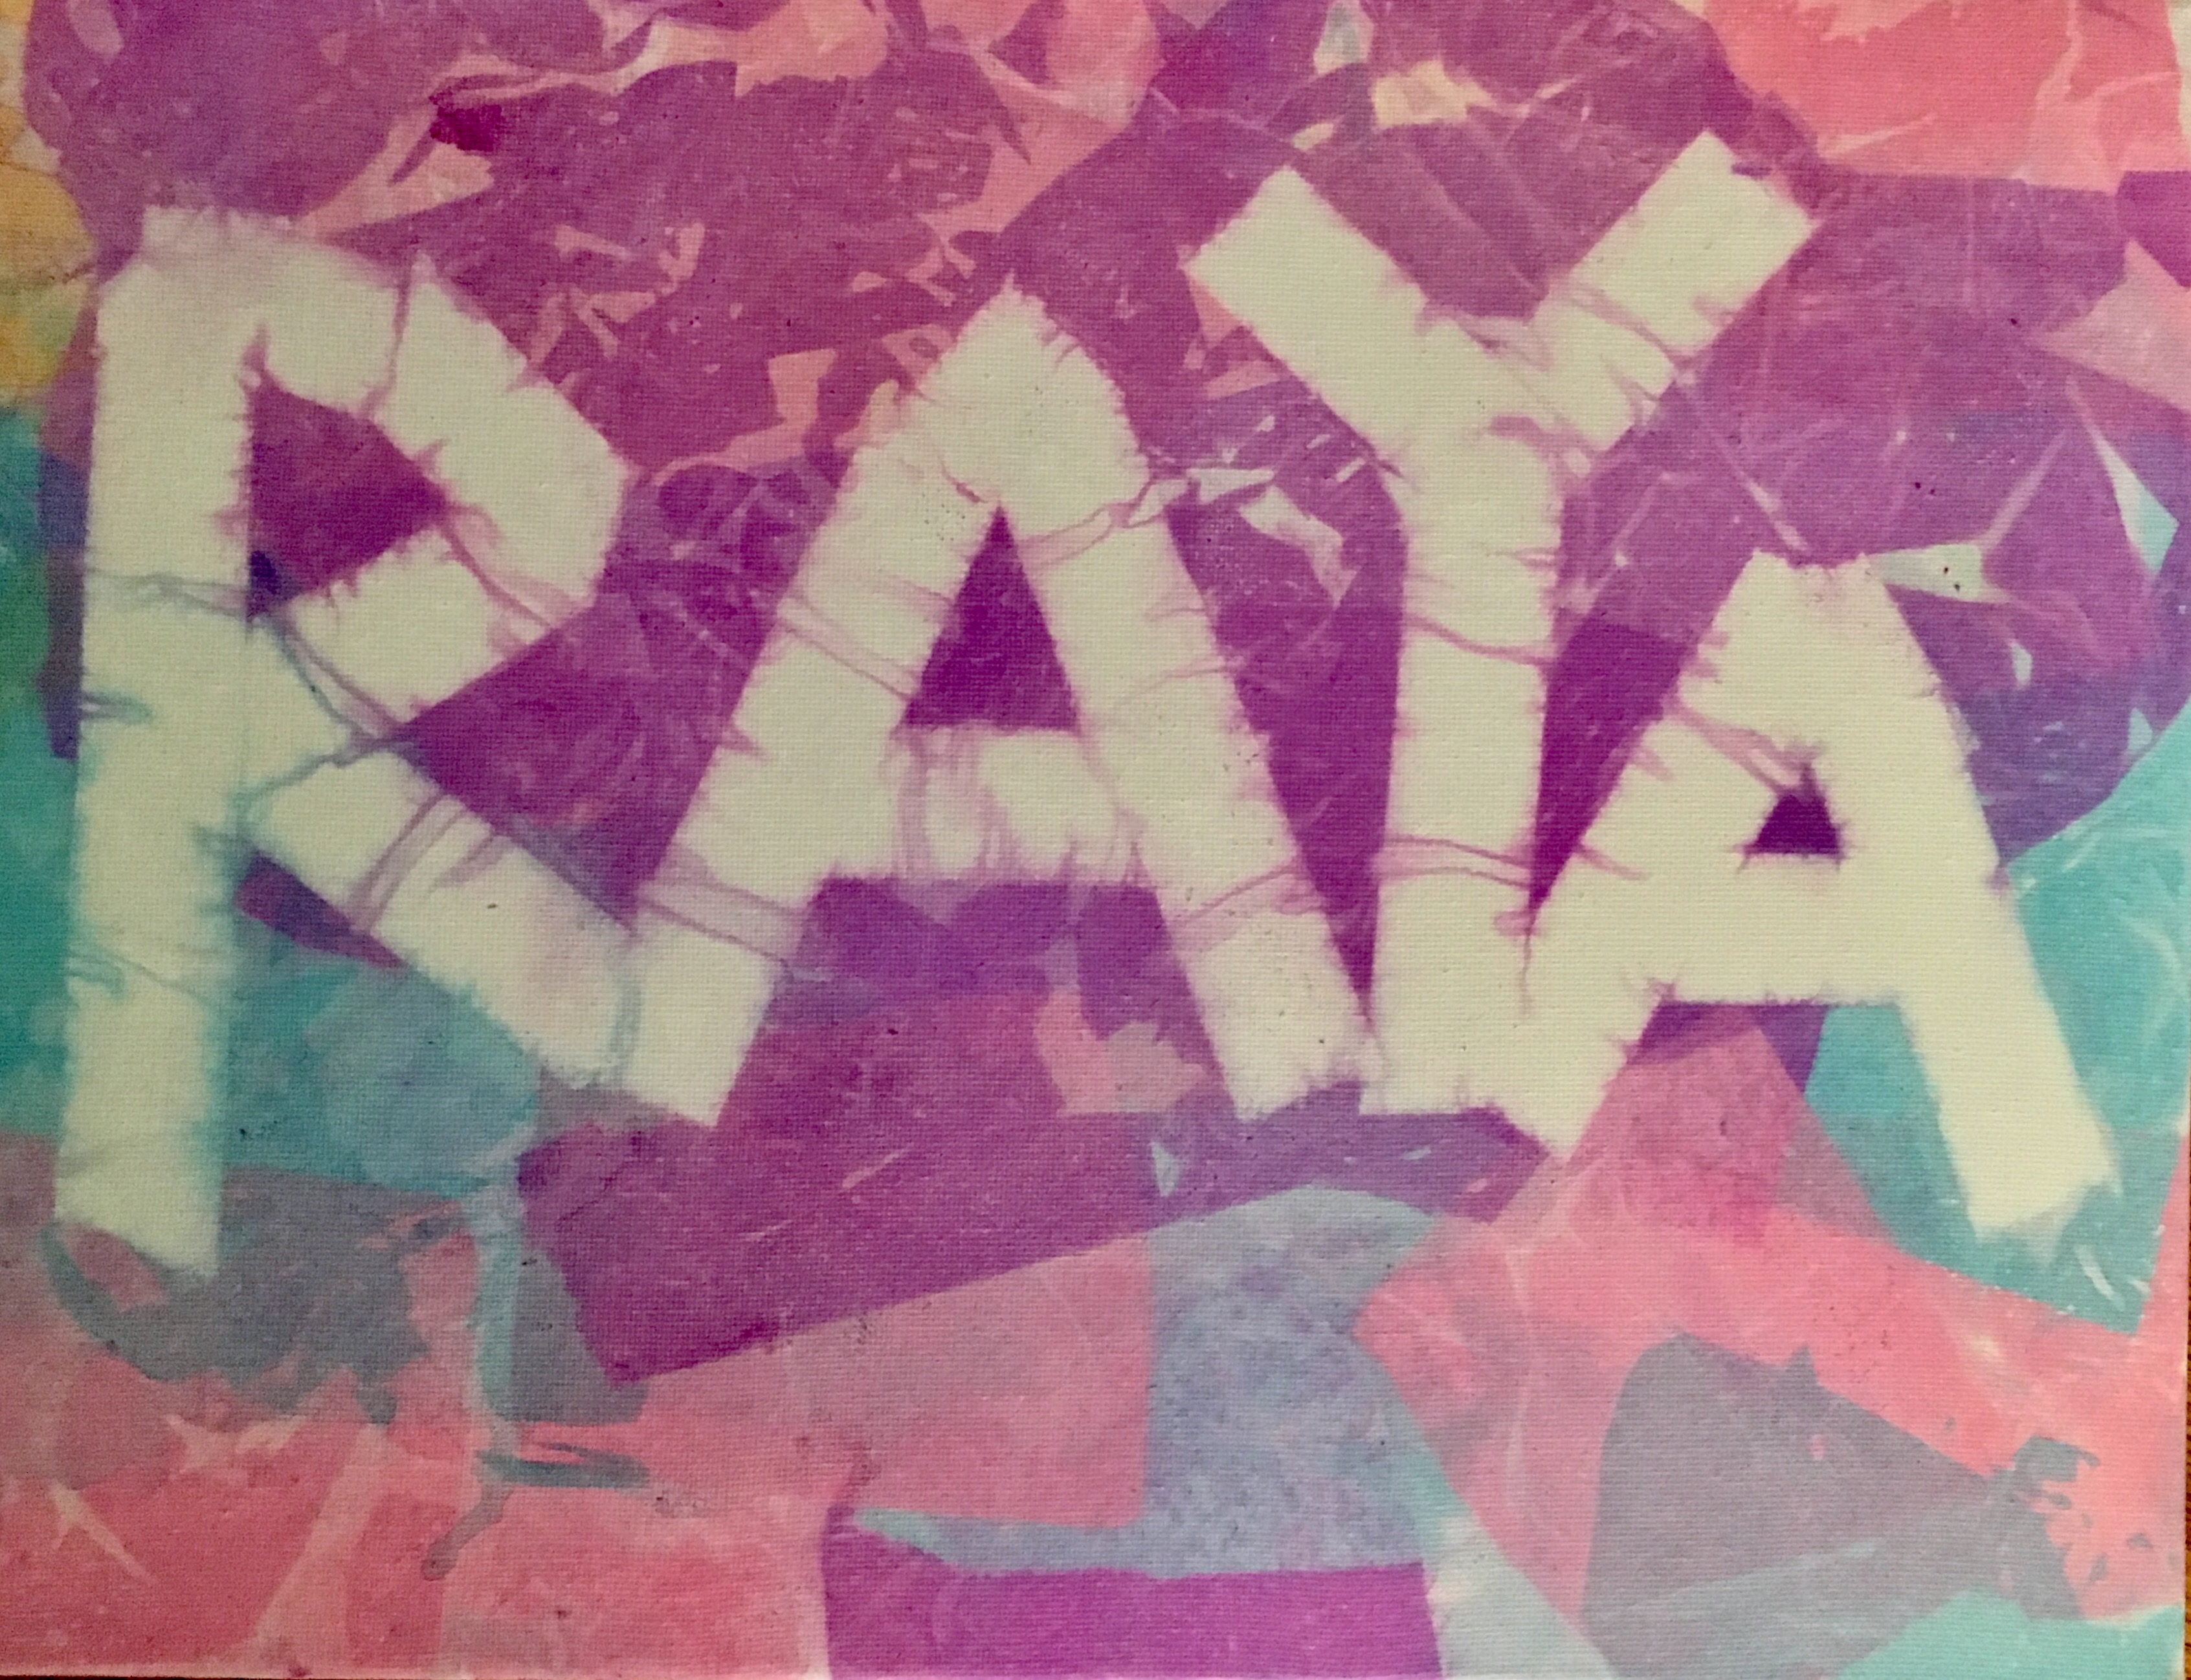
- With masking tape, write your child’s name (or any other word or design you fancy). This is a good opportunity to work creatively on letters and writing.

- Dip a foam brush in water and wet the canvas thoroughly.

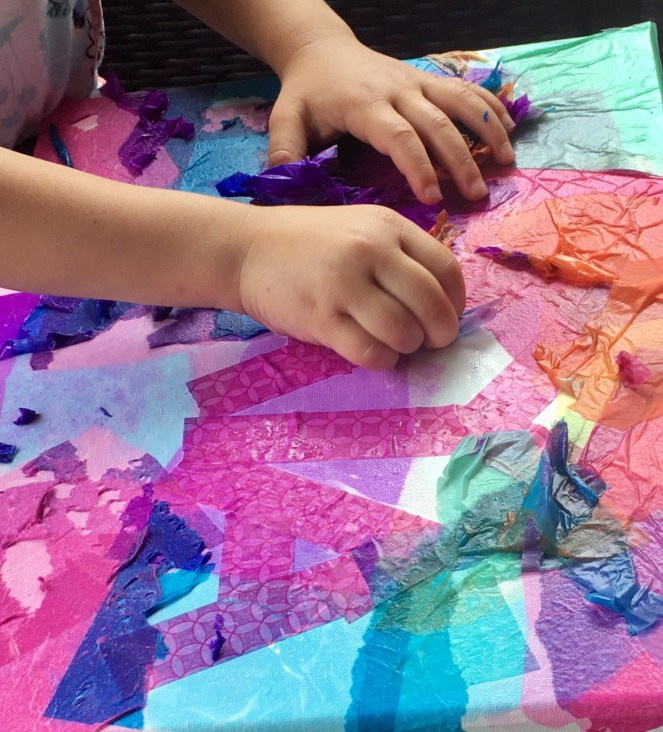
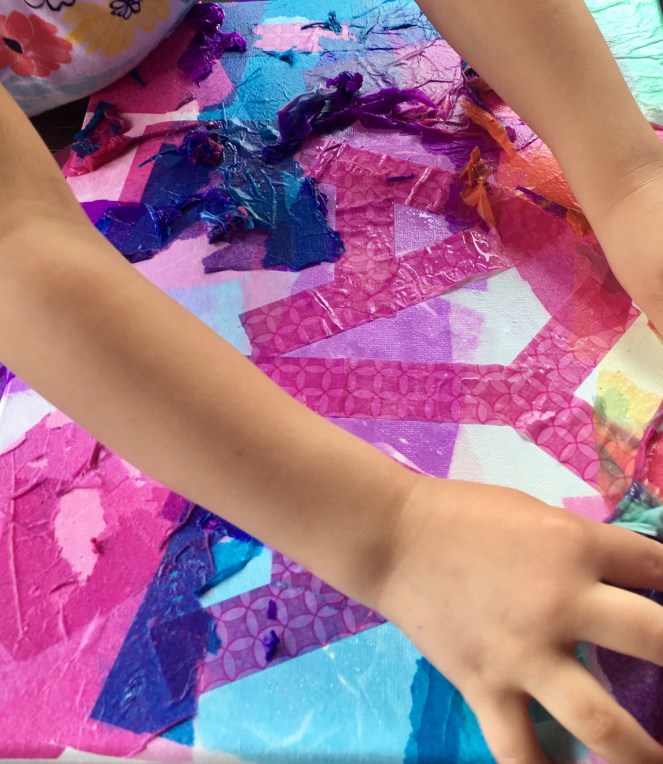
- Cover the canvas with the tissue shapes completely — be creative with your placement. The tissue paper should cover up all of the tape.


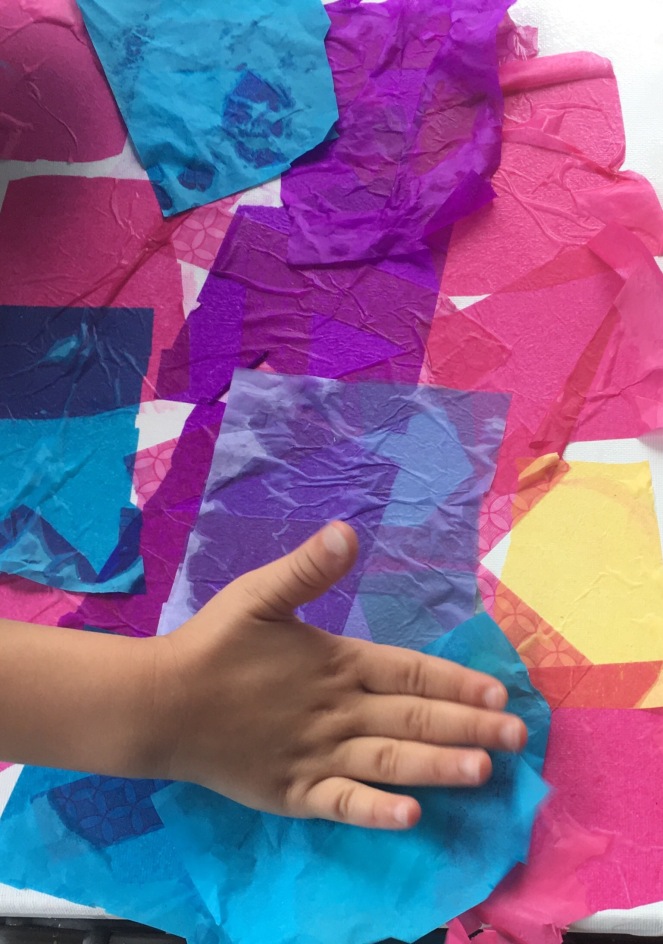
- Using the foam brush, “paint” another layer of water over the tissue paper until saturated.

- Let sit for a few minutes. Gently peel up a piece of tissue paper and check the progress of the color transfer (just like you would a temporary tattoo!!). Once you’re satisfied, peel it all off! The kids really enjoyed this part.
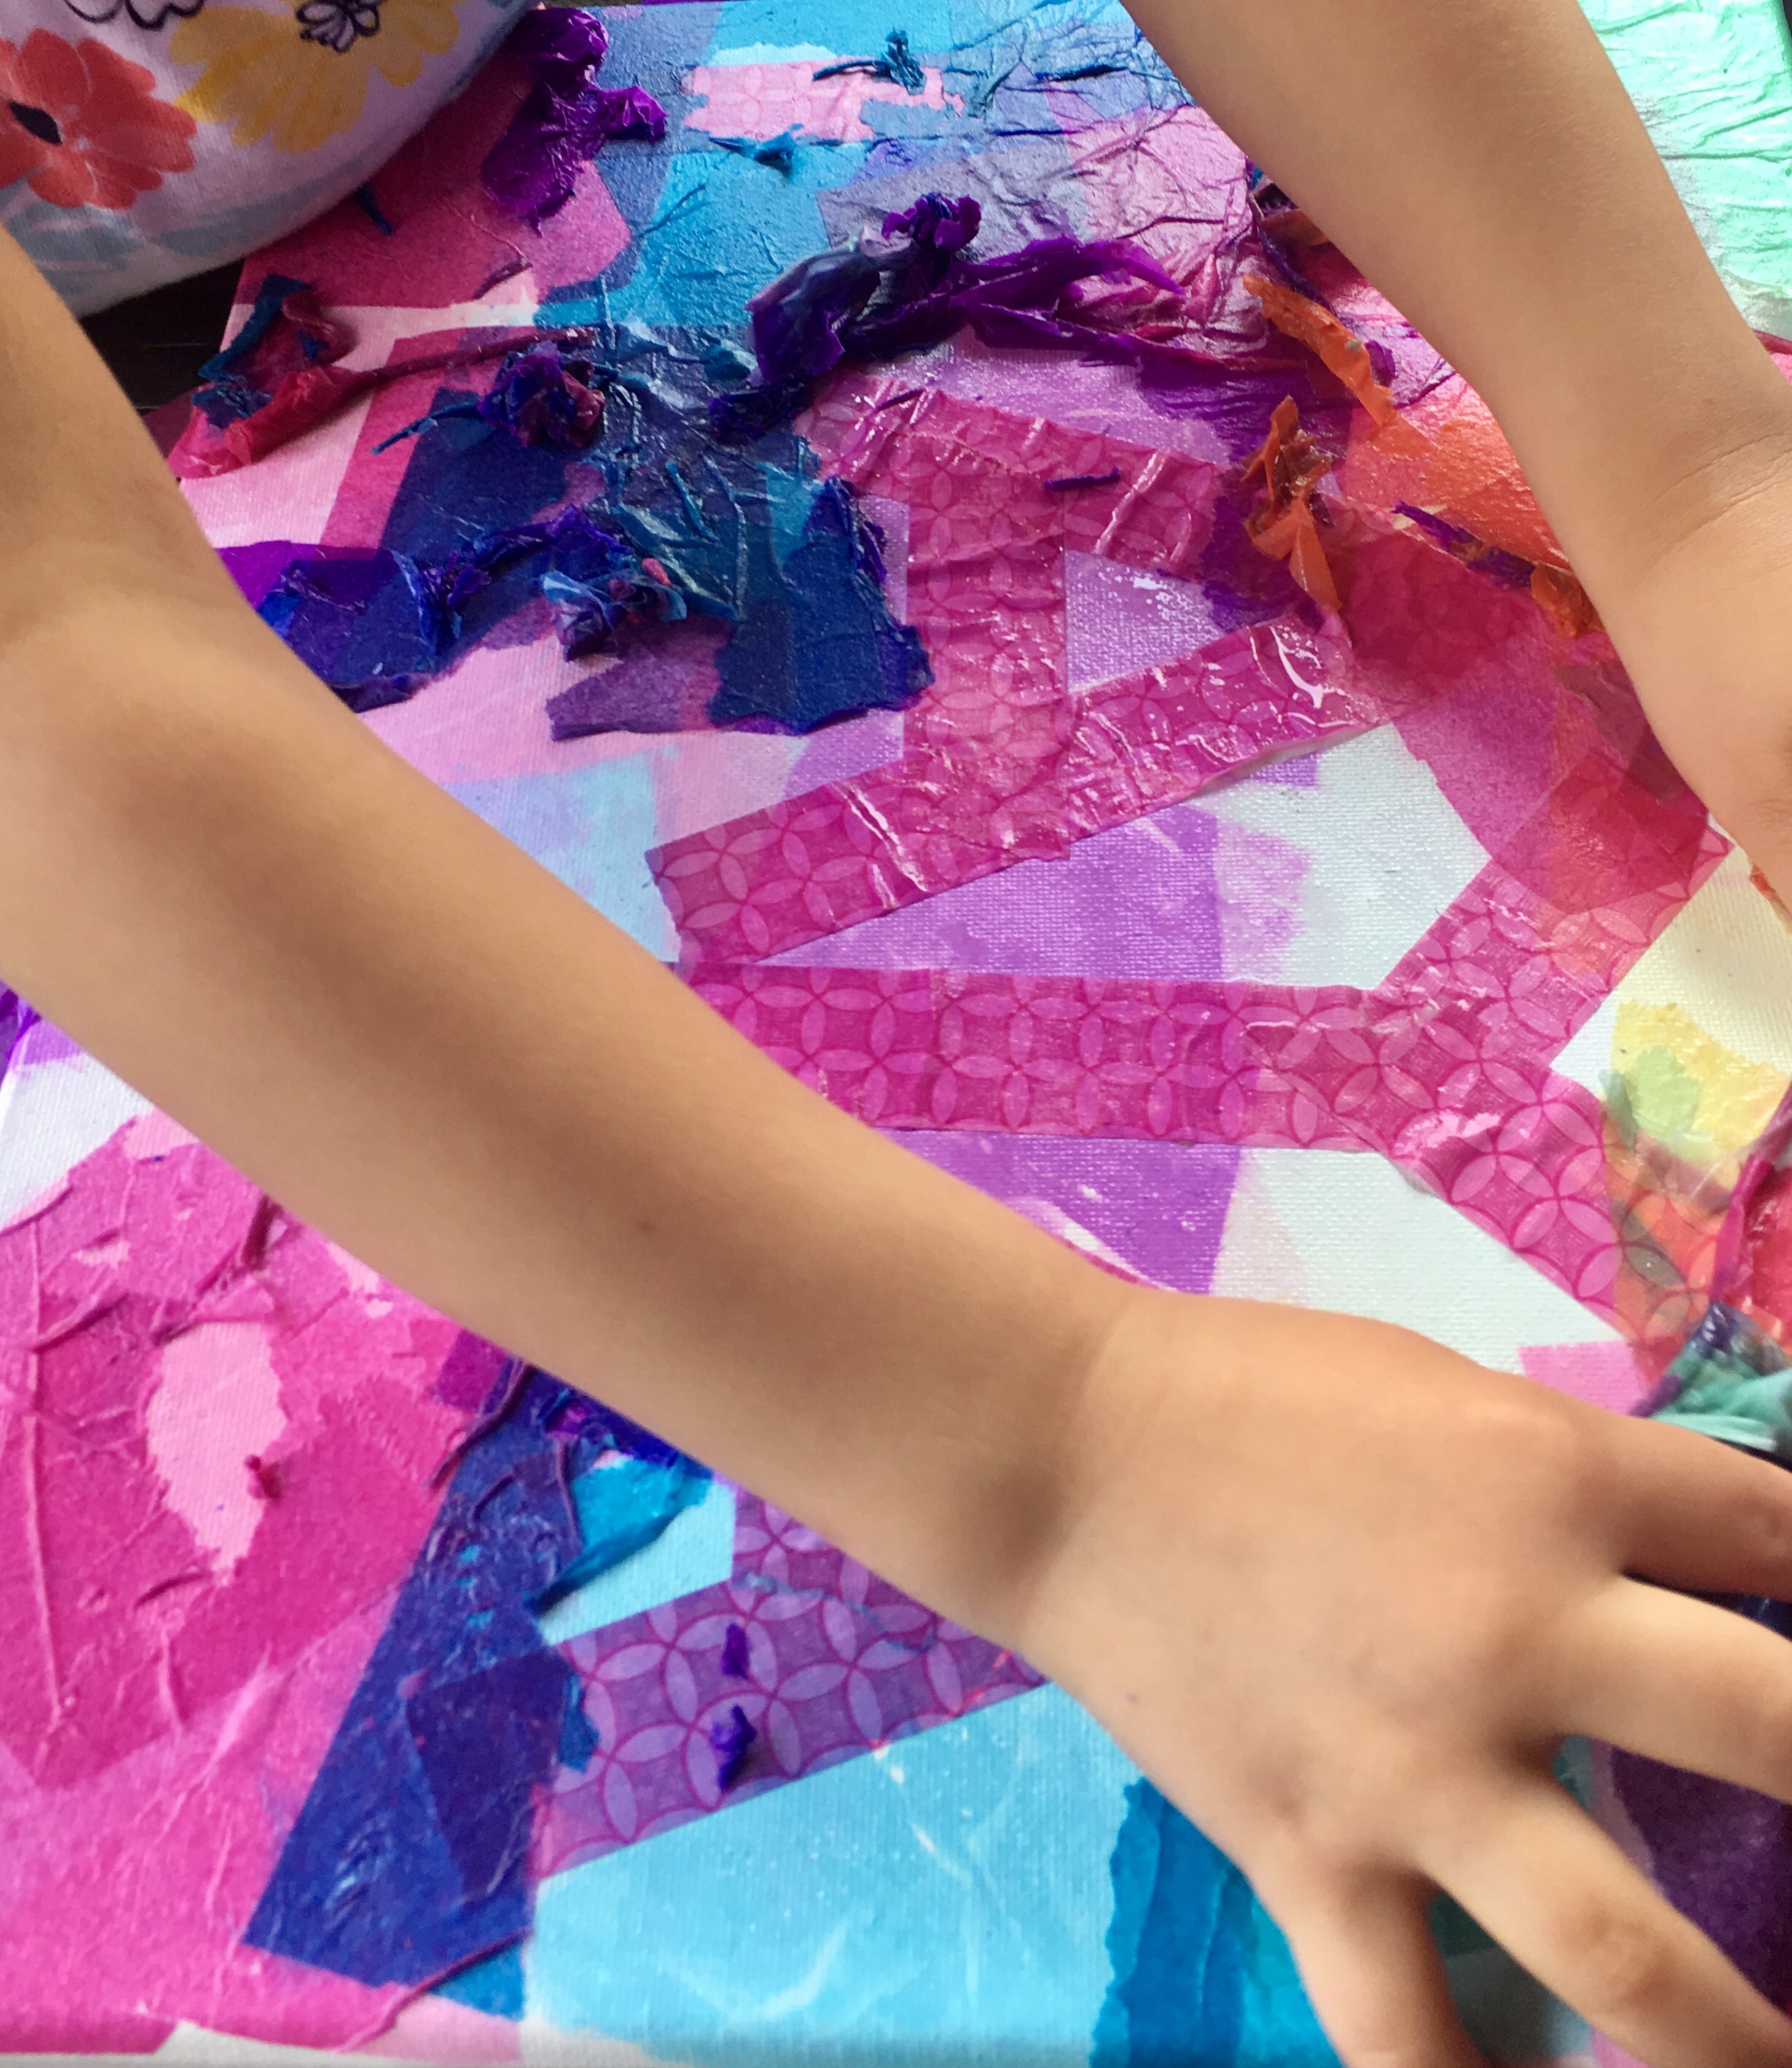
- The canvas will be beautifully dyed in a bevy of shades. It will have a batik-like quality, with interesting textures within the color blocks. If you notice any light or uncolored areas, dye them by adding more tissue paper, wetting it and removing it again. You want the areas immediately surrounding the tape to be fairly dark.
- Now, time for the finale and second big reveal — the tape peel-off. As you remove the tape from the canvas, you’ll see gorgeous bright, white letters with delicate tie-dye-like designs within the letters’ edges.
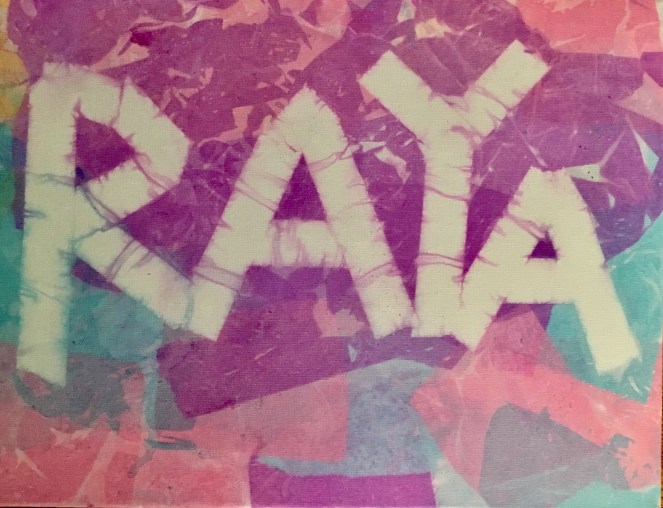
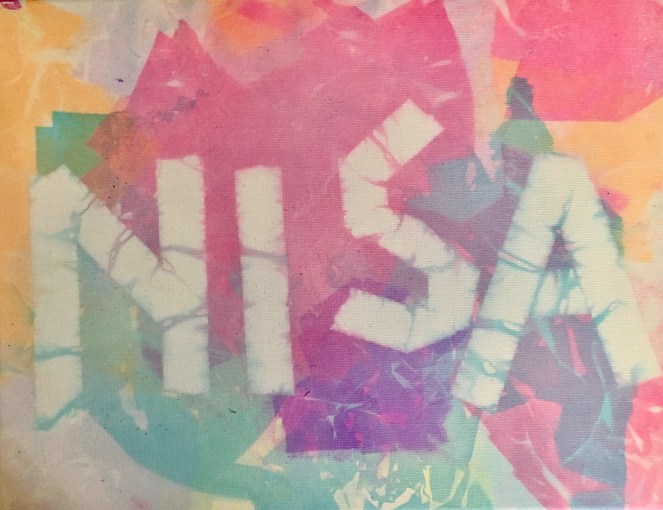


The girls have been carrying their canvases around the house proudly, explaining their technique to anyone who will listen. I urge you to try this, and hope you’ll let me know how it goes. Have you developed or explored other tape resist projects with your kiddos?


Ohhh love this idea! Definitely going to try it with my little one! (we must be enjoying the same storm… its really coming down out there!)
LikeLiked by 1 person
Yes, still stormy. The kids finally stopped carrying on and now are sleeping angels, so I get to enjoy it in peace! Please do try the activity — so awesome!
LikeLiked by 1 person
Wow! Great and what fun!
Sent from my iPad
>
LikeLiked by 1 person
I love this!!!!!! Your girls did such a beautiful job, wow! Keep the great ideas coming, mama!!!
LikeLiked by 1 person
Thank you!! I was so happy with the results. Hope your summer trips are going well!
LikeLiked by 1 person
So far … We had to push Canada back a week, but we went to Sesame Place instead….
LikeLiked by 1 person
Awesome! Btw have you seen that Dollar Tree has the little tissue squares for crafting? A buck for over 1000 pieces. I snatched those up!
LikeLiked by 1 person
Such an awesome suggestion! Thank you. So much better than the $7 I spent at Michael’s 😂😂.
LikeLiked by 1 person
I did this and used tissue paper from the party section in Wal-Mart but only the dark blue transferred. The paper and canvas were all saturated, I was so sad and disappointed. Where did you get your tissue paper?
LikeLiked by 1 person
Oh? That’s such a bummer 😂. I got the tissue paper from Michael’s. It was close to $7 or $8 for a big pack, but we have a ton left over and there’s always the 40% off coupon.
LikeLike
That’s super cool – I love how it looks tie-dyed (my fav!). We’ll have to try it – thanks!
LikeLiked by 1 person
Thanks! The pieces turned out beautifully! Followed your blog.
LikeLike