
My last post, about holiday craft ideas for preschoolers, encouraged me to continue on with our Christm-artsy ways. R holds a deep yet giddy love for any kind of dough (I’m pretty sure she shares this affection with most 4-year-olds), and we hadn’t yet gotten our hands sticky with salty goo this year. She wanted to make a fingerprint-salt dough-picture frame, and yesterday we found the perfect recipient for it. Sadly, we were just informed that one of R and K’s great grandmothers (yes, they still have two strong and beautiful gg’s in their lives) is sick with pneumonia and in the hospital. We believe that she’ll absolutely pull through this (in her 90 + years she’s overcome much worse), but R wanted to send her a care package that features our beautiful little salt dough photo frame. It’s en route to Massachusetts as I type, alongside a stuffed horsey that can offer cuddles, a few pick-me-up drawings, and a blank sheet of paper + a marker to alleviate boredom — R gathered and assembled all these items by herself.
We did a Raya’s World video (I must say, R is pretty darn cute in it — see above!!) outlining this project, which generated several magnetic ornaments in addition to the adorable bedazzled frame. In case you’re in the mood for some sensory play, I’ve included instructions (flush with pics of my kid in action) for this easy peasy activity below.
~~~~~~~~~~~~~~~~~~~~~~~~~~~~~~~~~~
Preheat oven to 175 degrees and assemble ingredients:
1 cup flour
1 cup salt
1/2 cup water Mix in a bowl until it becomes doughy and moldable — you want to be able to roll the mixture into a ball.Roll out your ball into a flat surface, about 1/2 or 1 inch thick.
Cut a picture frame shape into your dough. You can make it as large or small as you like. R mostly wanted to play with the dough and create a lot of little cutouts, so we kept it small.Remove excess dough from the edges of the frame and shape it into another ball that will be rolled out. Have your way with the dough using cookie cutters, stamps or your own fingers.Use your fingers (or your child’s fingers, I should say) to make fingerprint indents on the frame. This way the frame will forever be signed by your child. Poke two holes at the top corners of the frame (I used a toothpick) so you can later thread ribbon through them. If you want to hang your other ornaments, punch holes in them as well.Bake your creations in the oven for three hours at 175 degrees. Allow to dry further for several hours or overnight. Once dry, decorate away!! Use paint, glitter glue, gems stones, whatever! 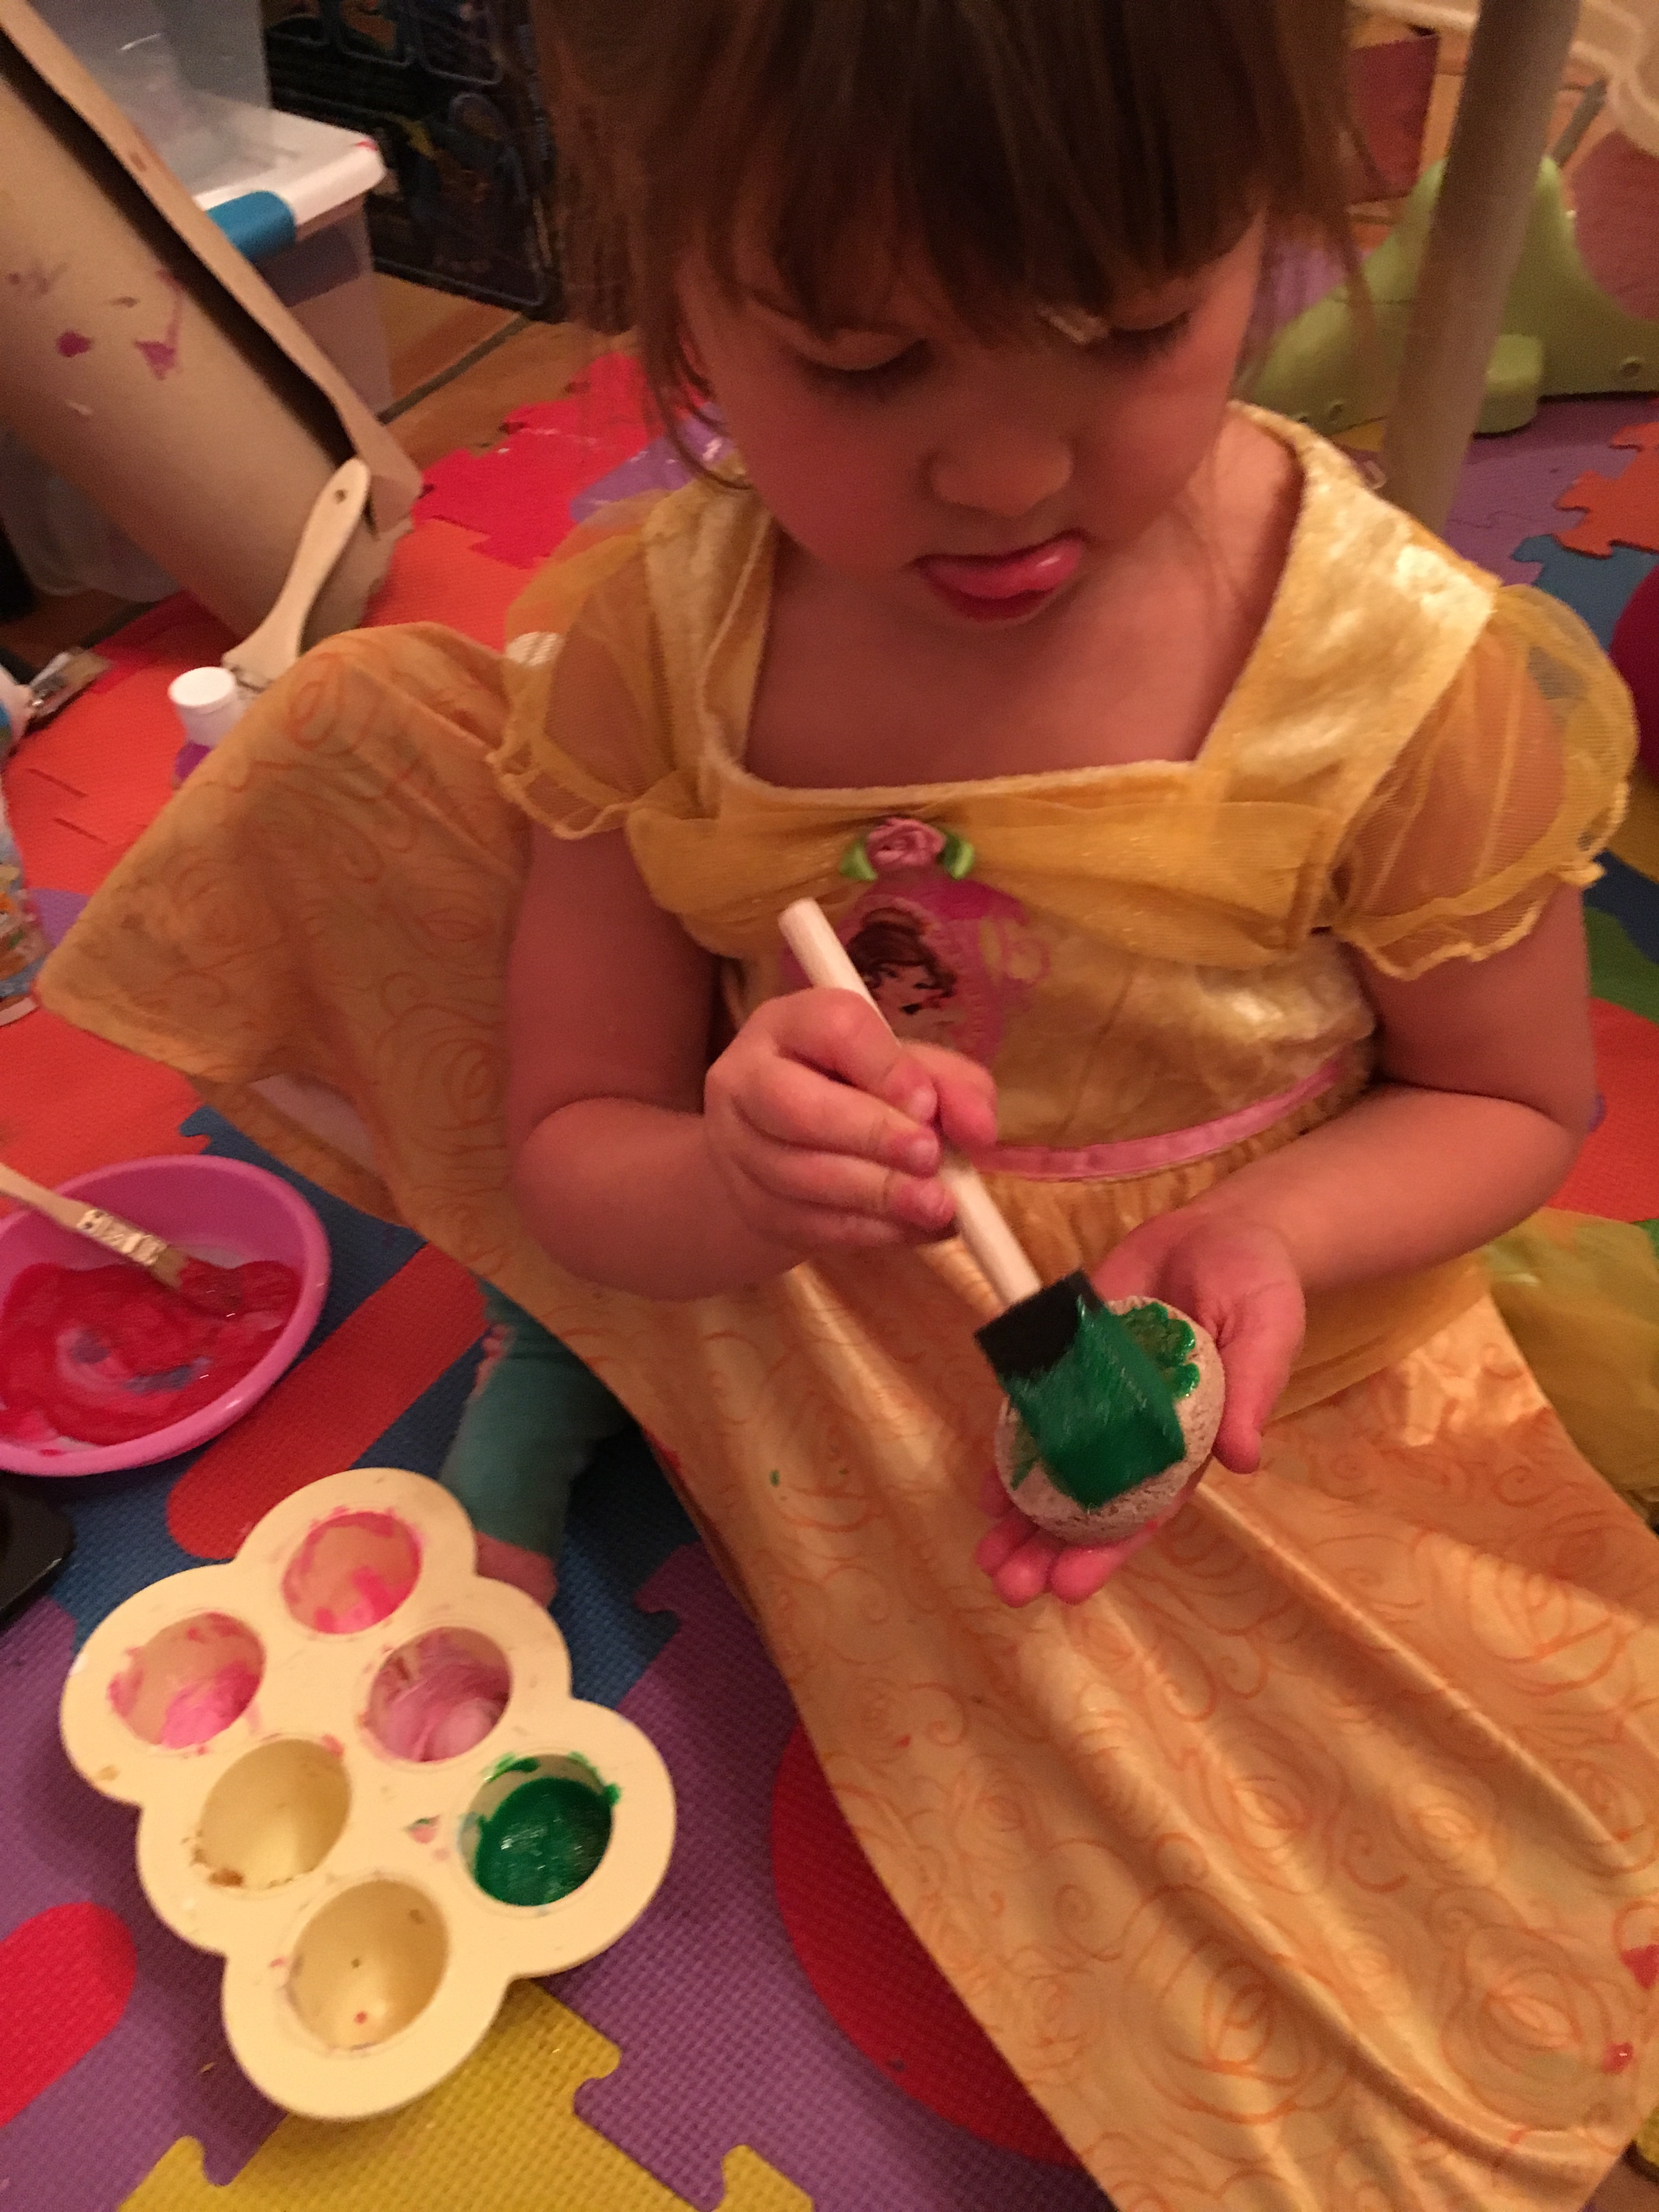
 Coat the frame and ornaments with mod podge to protect them and ensure a long life. We made our ornaments magnetic by attaching strips of magnet to the backs of them. Since we put holes in our frame, we inserted twine as a hanger.
  We then cut a picture to fit our frame, glued it on and voila!! Done! And ready for great-grandma.
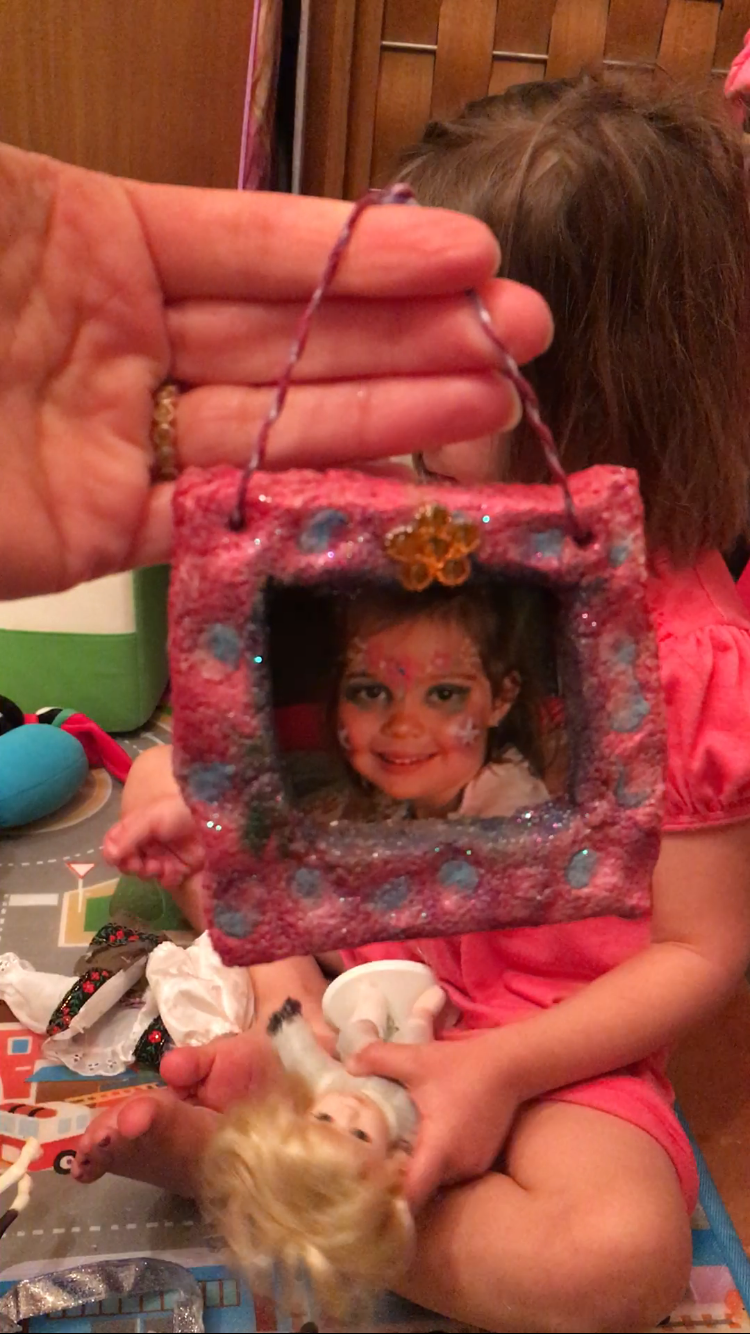
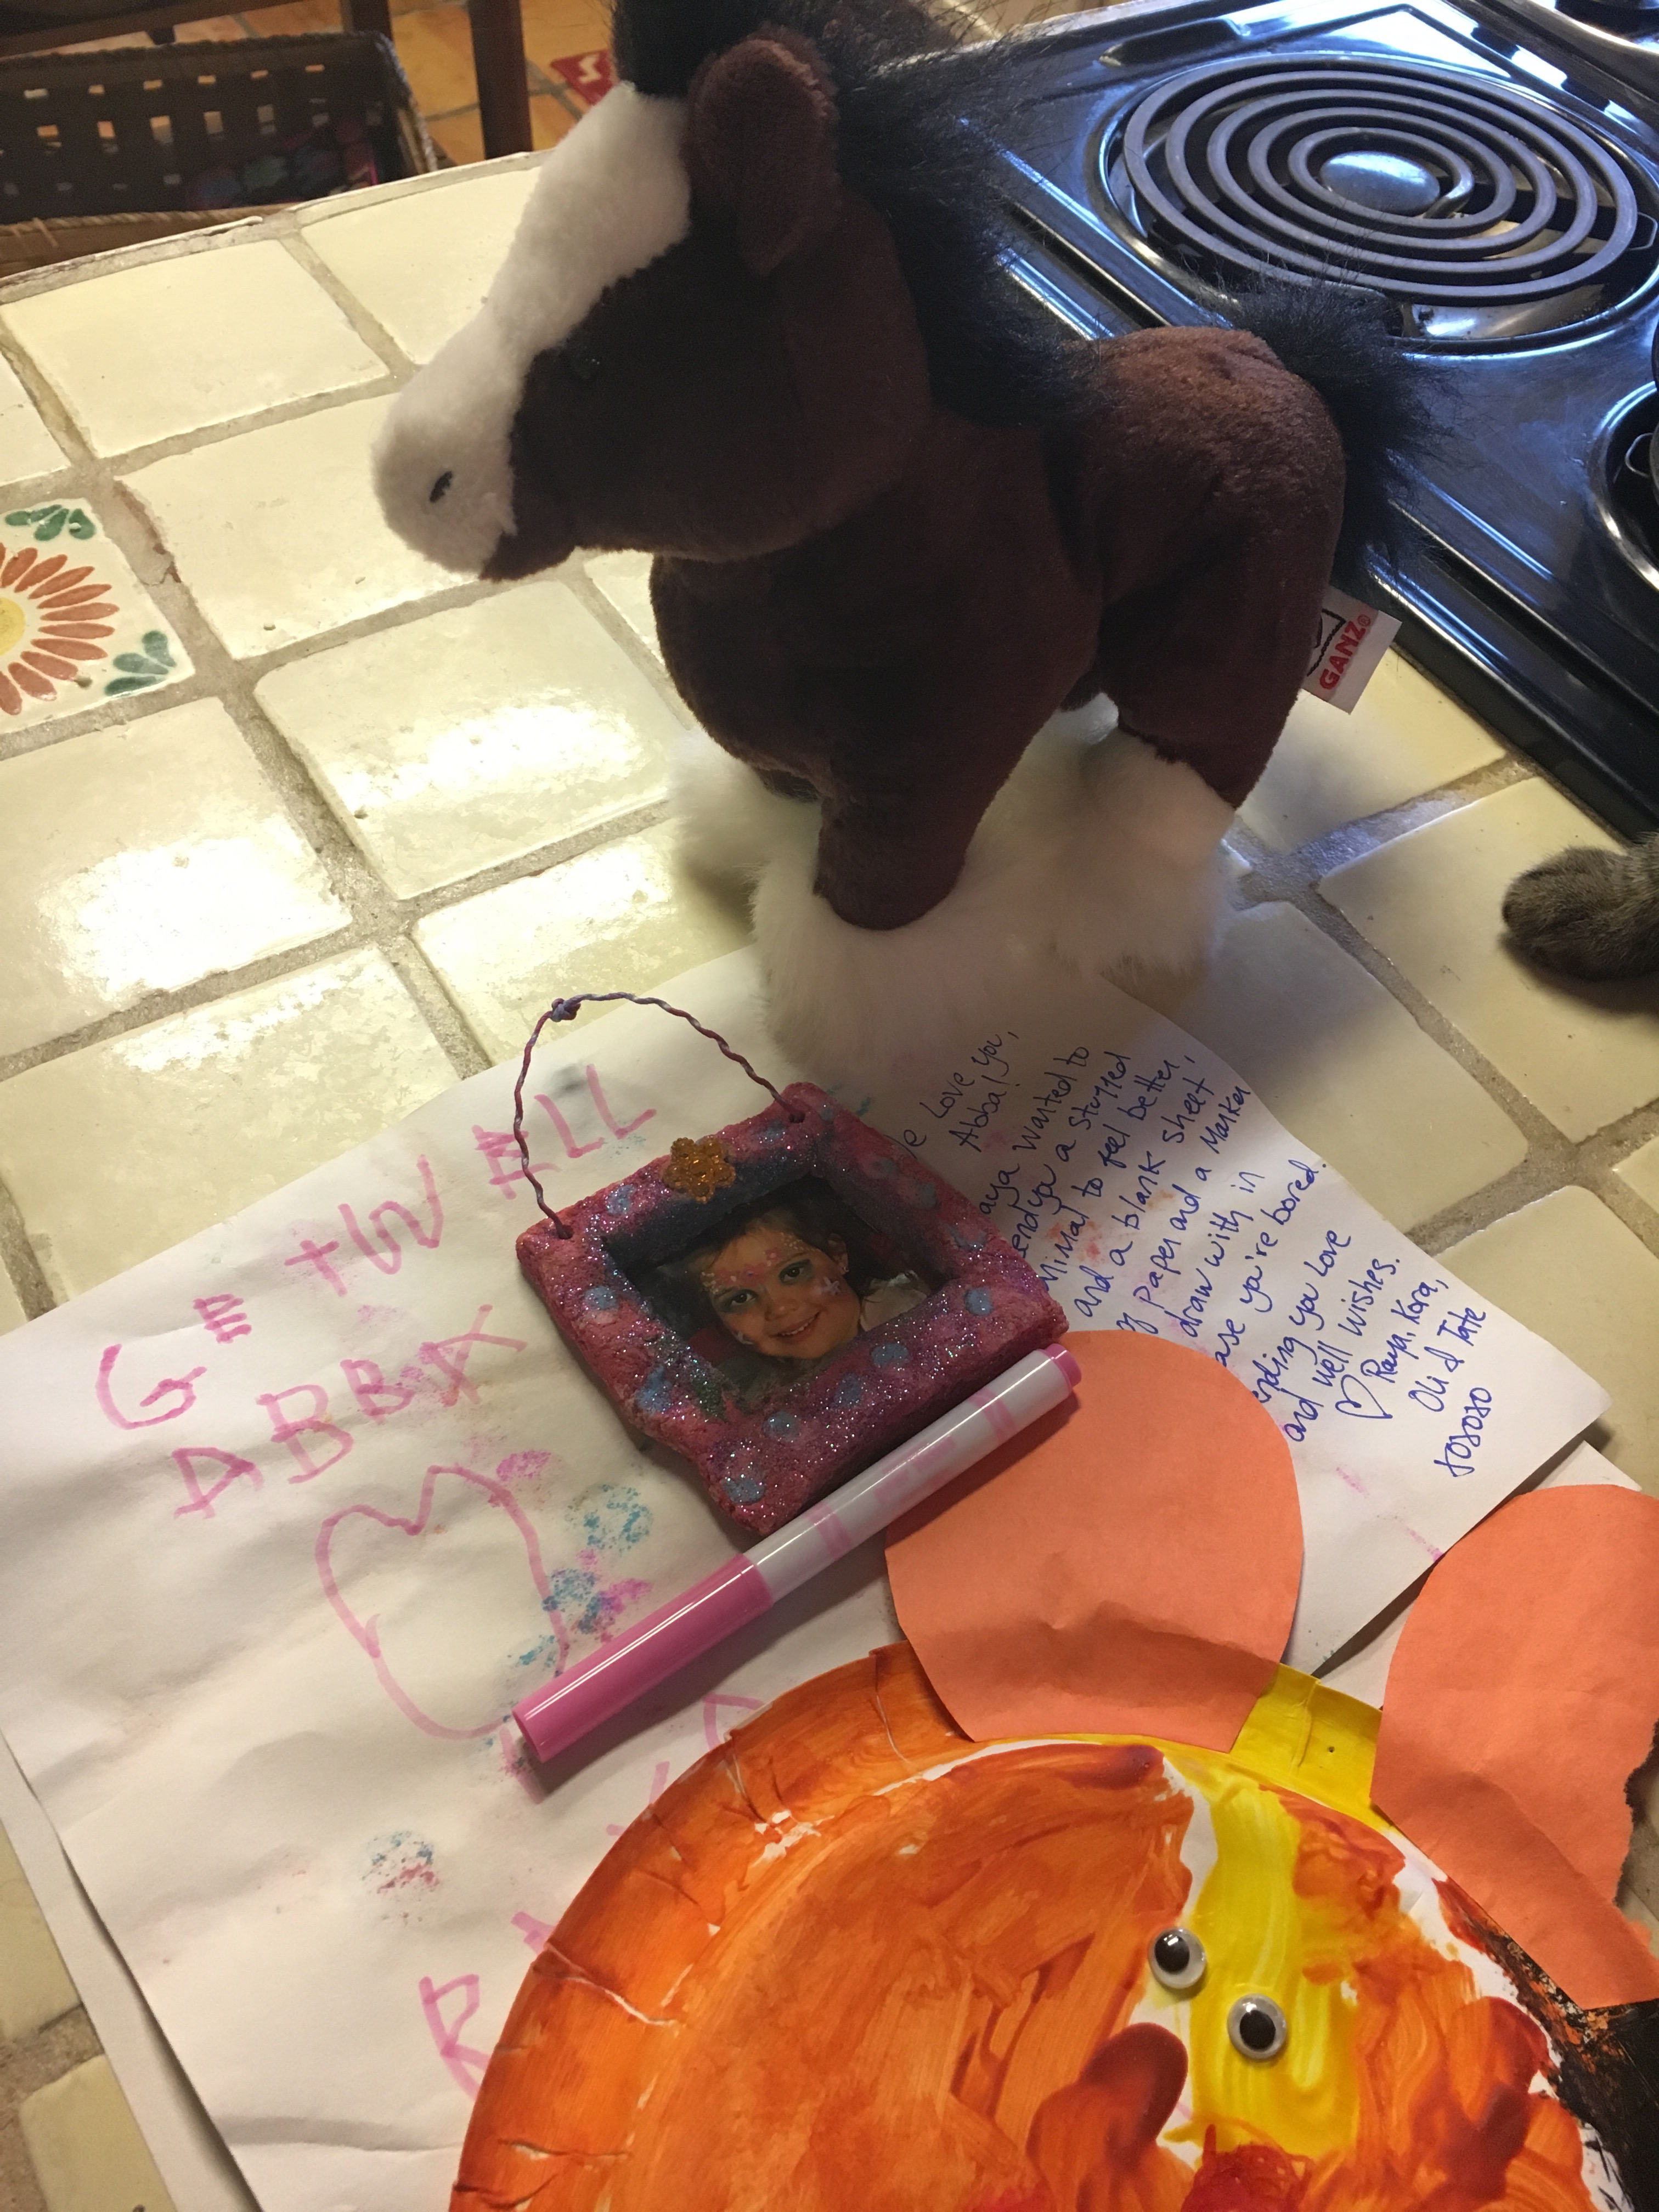 ⬆️⬆️ Care package in progress 💖
Have fun being crafty and cozy this holiday season! What are you doing to keep creatively busy??

Love this!
LikeLike