 Hello, hello! This is a quickie follow-up to yesterday’s Translucent Twist Up.
  As you know, I found myself overjoyed with that project’s harmonious mixing of glue and food coloring — yeah, my excitement gage must be pretty artymommy-centric right now. R and I wanted to further explore the wonders of colored glue, so we experimented with a couple more surfaces. And I highly recommend trying the following one out alongside the Twist Up. Ok, so here’s what we made:

And this is how we got there:
SUPPLIES:
- plastic lids (from any old food container that you’ve been saving around in your art materials or tupperware collection)
- school glue
- food coloring
- glitter or glitter glue (optional)
- toothpick or skewer
- hole punch
- string/ribbon
PROCESS
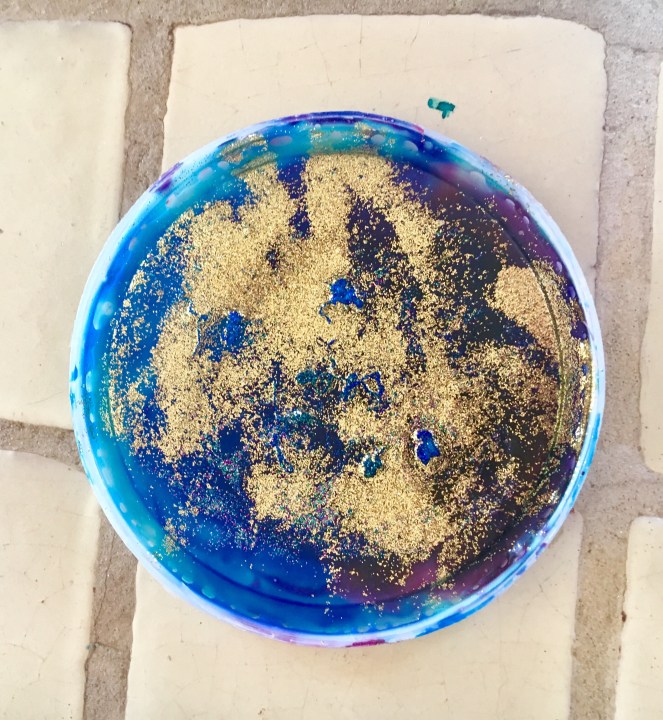
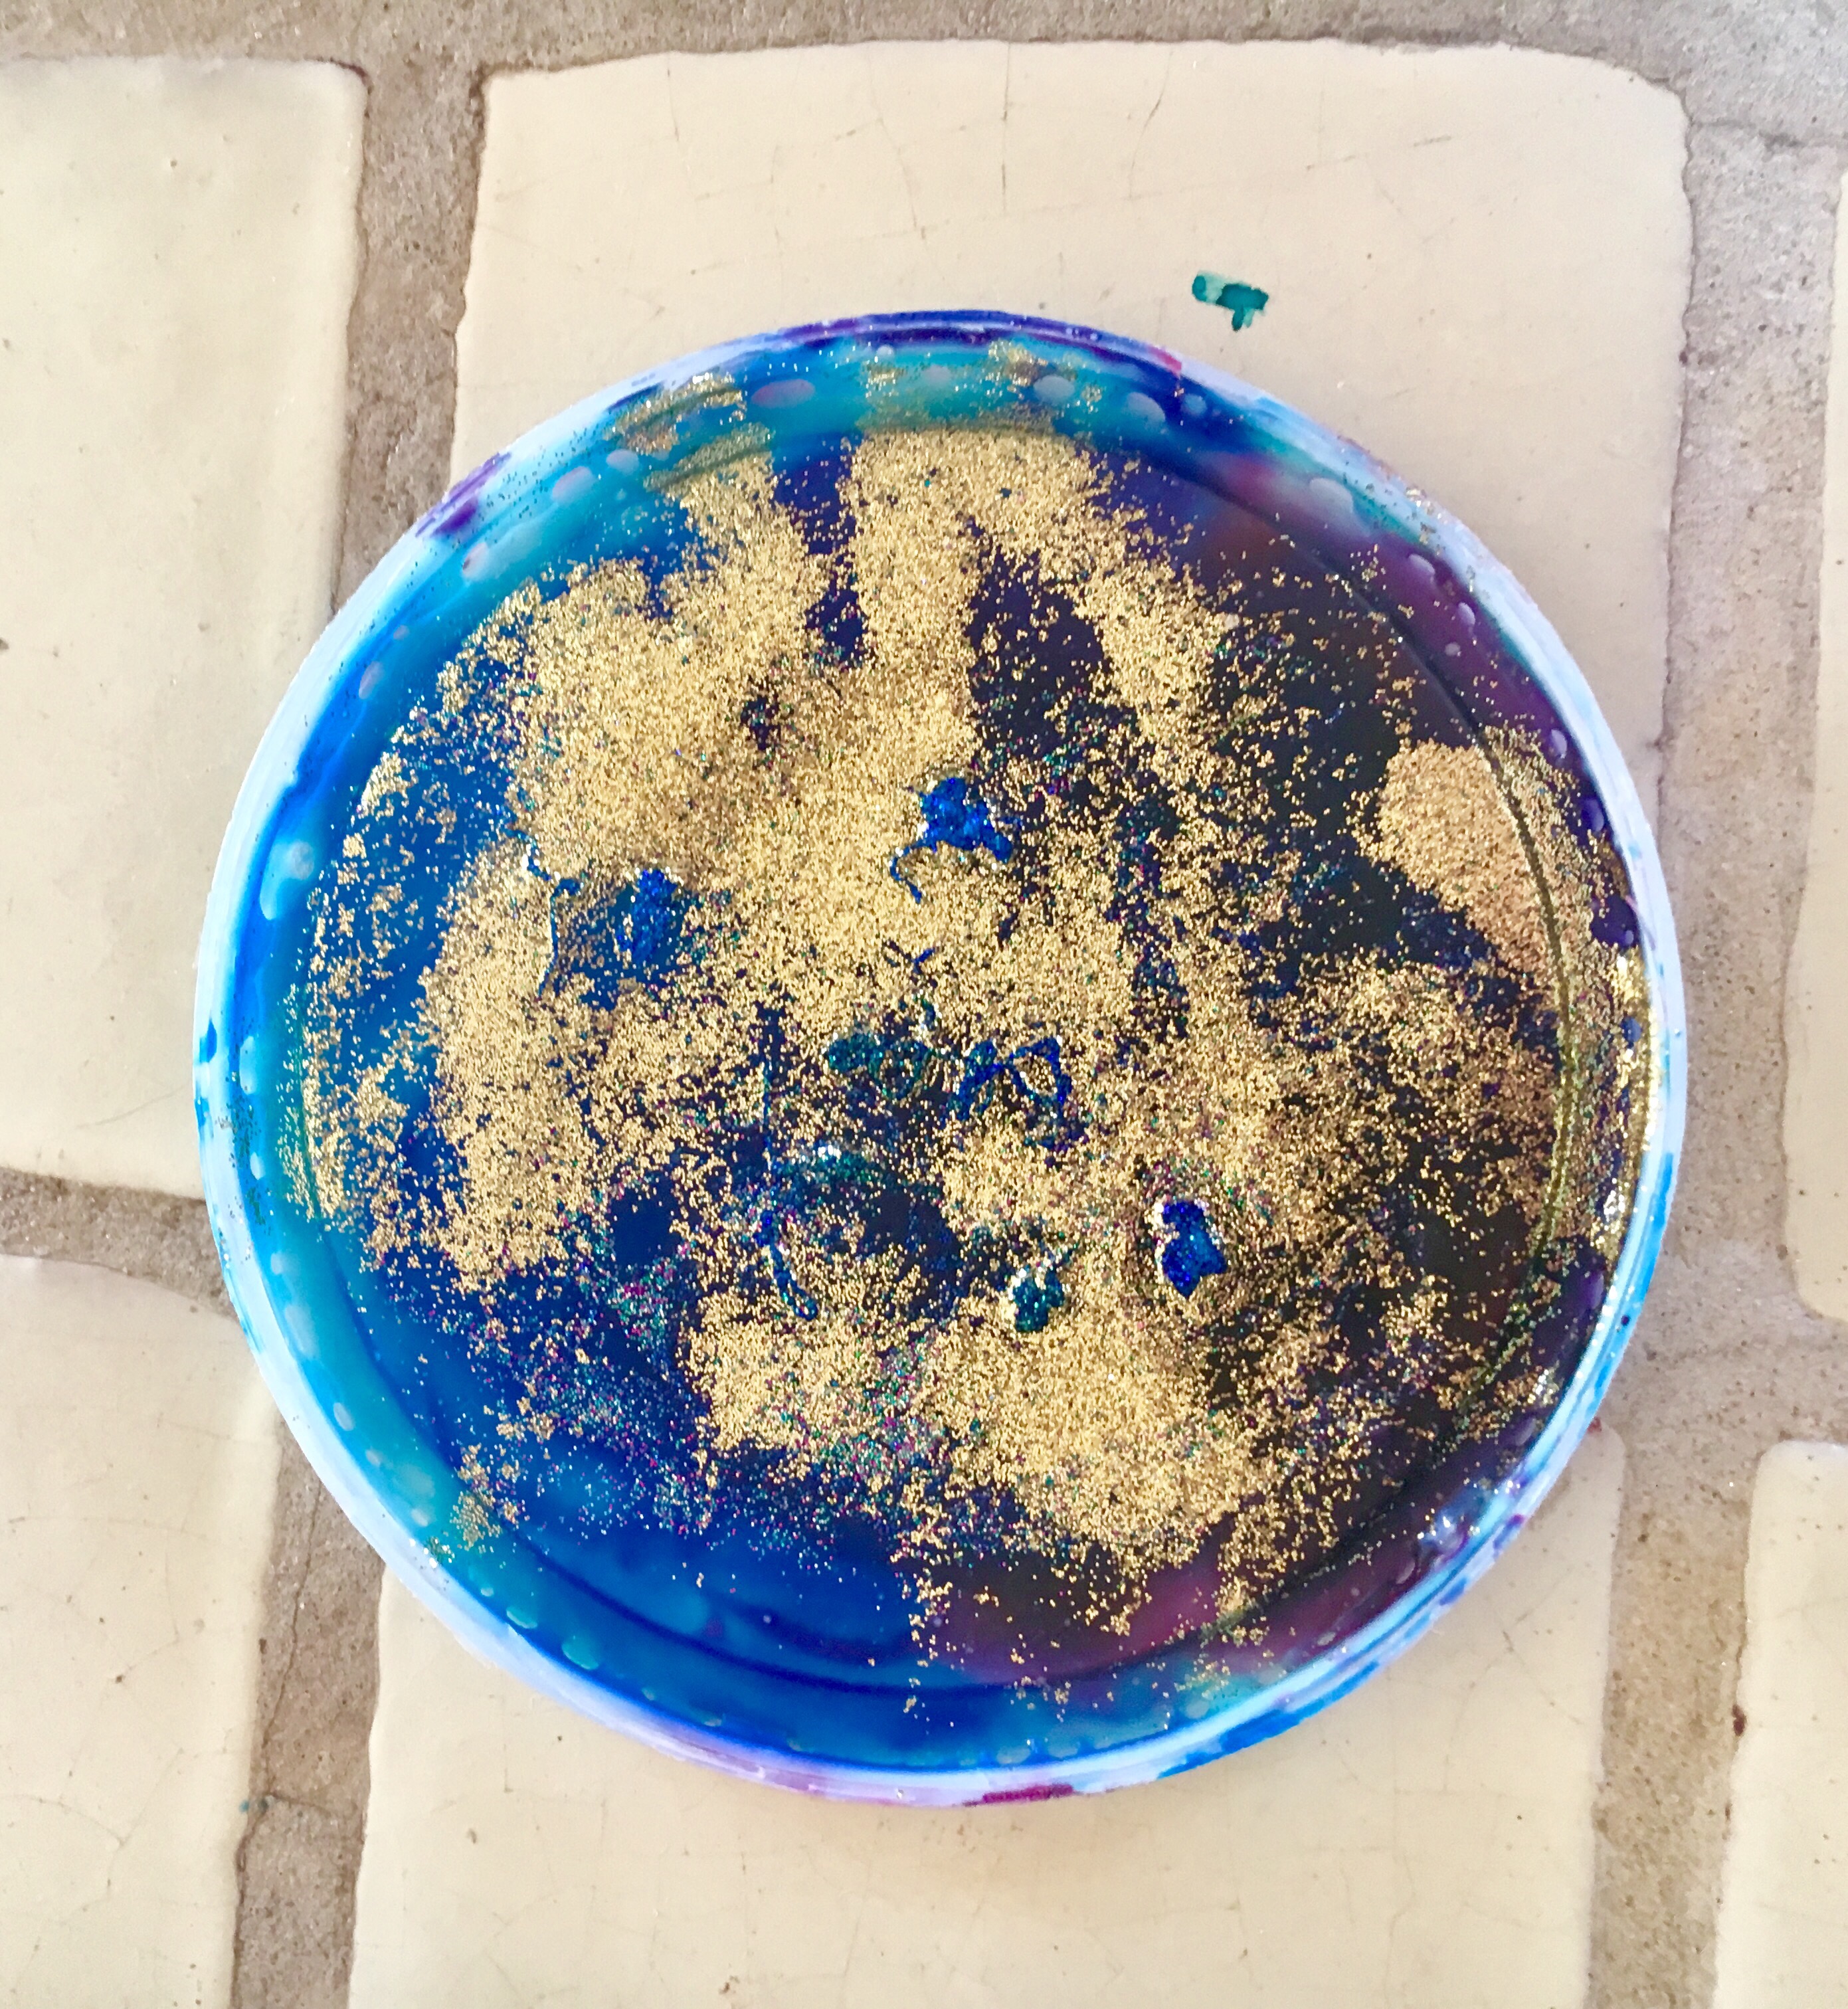
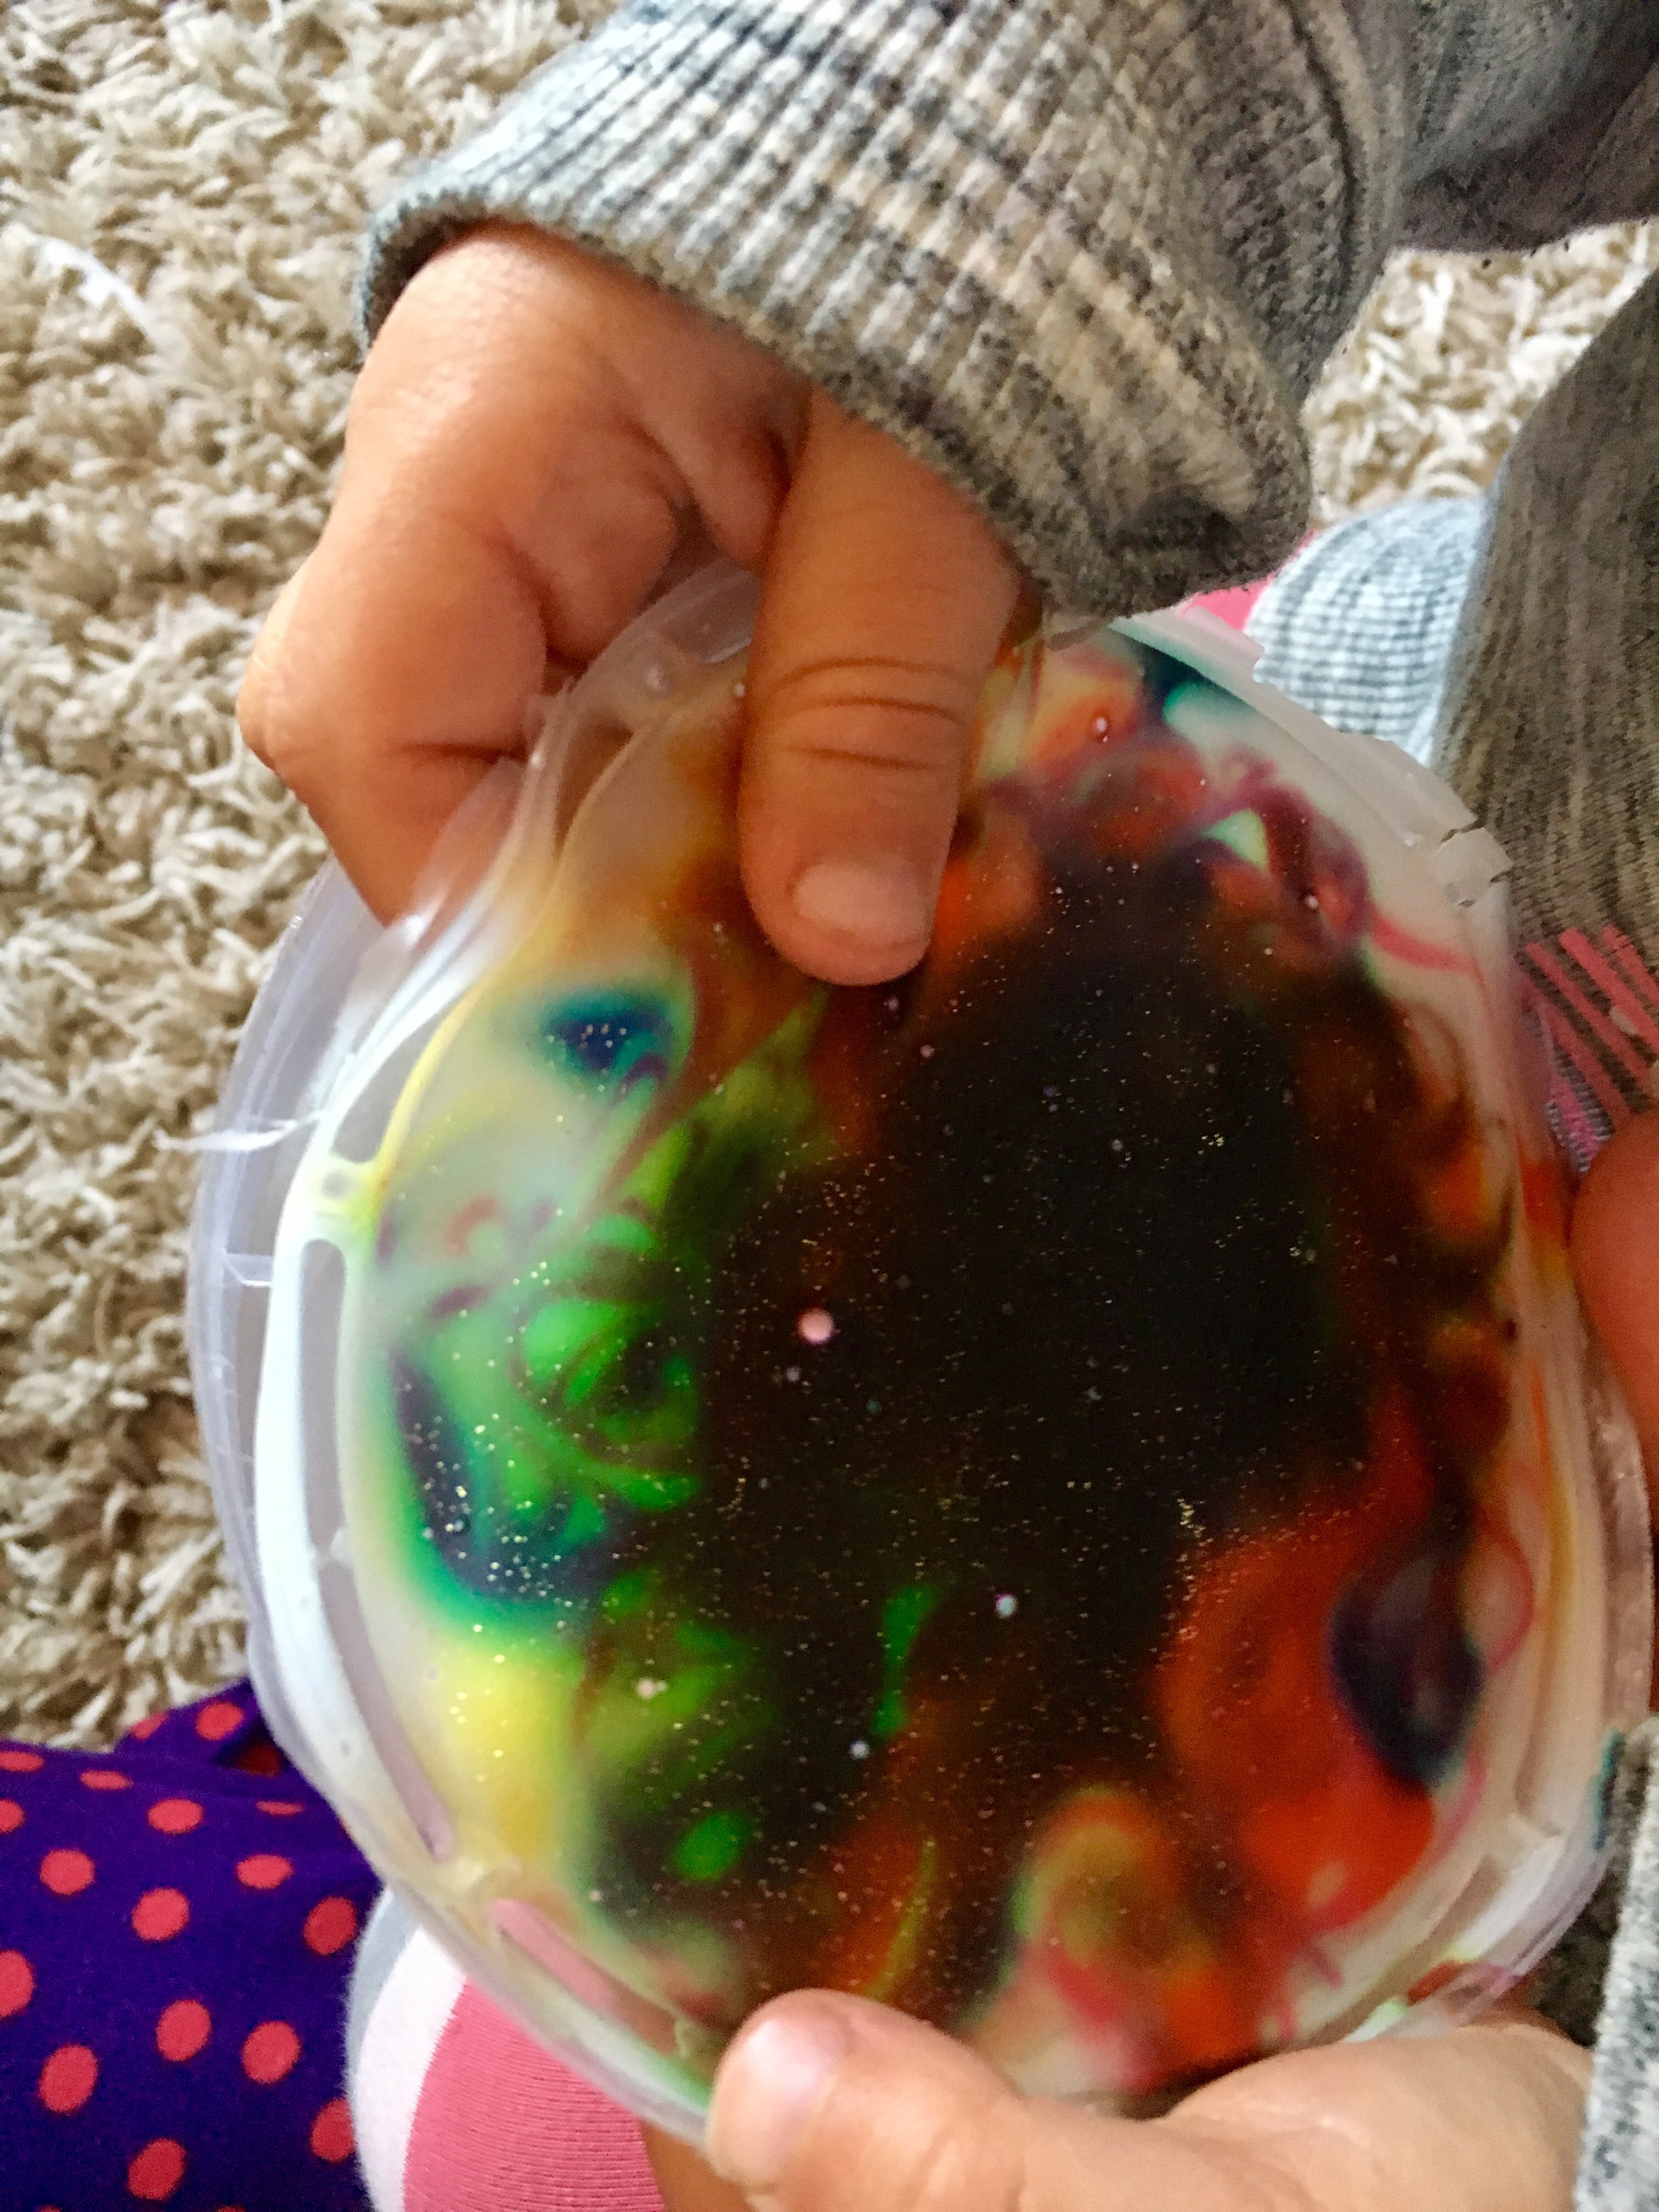
- Pour glue into a plastic lid. Make sure that the glue is evenly distributed and across all areas of the lid. You need a generous amount of glue to cover the plastic.
- Follow the same exact steps as in Translucent Twist Up (1. a couple drops of food coloring in different colors, 2. glitter if you want, 3. twist and swirl to your heart’s content with a toothpick or skewer).
- Wait 2-3 days for the glue to TOTALLY dry and begin to separate from the plastic. While the glue will appear dry after only a couple hours, you must demonstrate patience — it’s worth it. R kept running back to check on the lids and repeatedly tried to convince me that the time was upon us for the next step, but we waited it out for 2 days.

- Fold down the edges of the lid to determine whether your piece is ready to be released from its growth nest (aka, the lid). When it’s ready, you’ll notice the glue will easily separate from the plastic — detaching itself when you pull back the lid’s outer edge.

- PEEL!!! It’s short-lived but oh-so-satisfying — even better than peeling glue away from your skin (if you’re into that kind of thing 😉).

- The glue painting feels awesome — talk about multi-sensory fun. The front will be beautifully textured and the back is like a silky smooth colored plastic. Punch a hole in the top of the circle and string some ribbon.


- Hang near a natural light source (we chose a glass door). Yay! We made another homemade, kiddie-crafted stained glass!! Lovely.
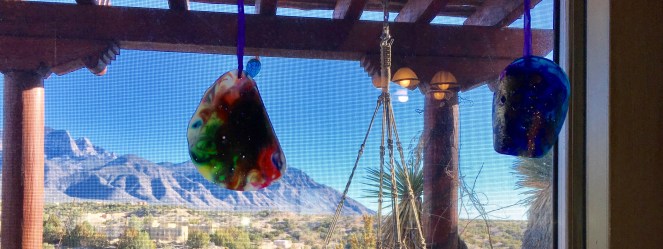


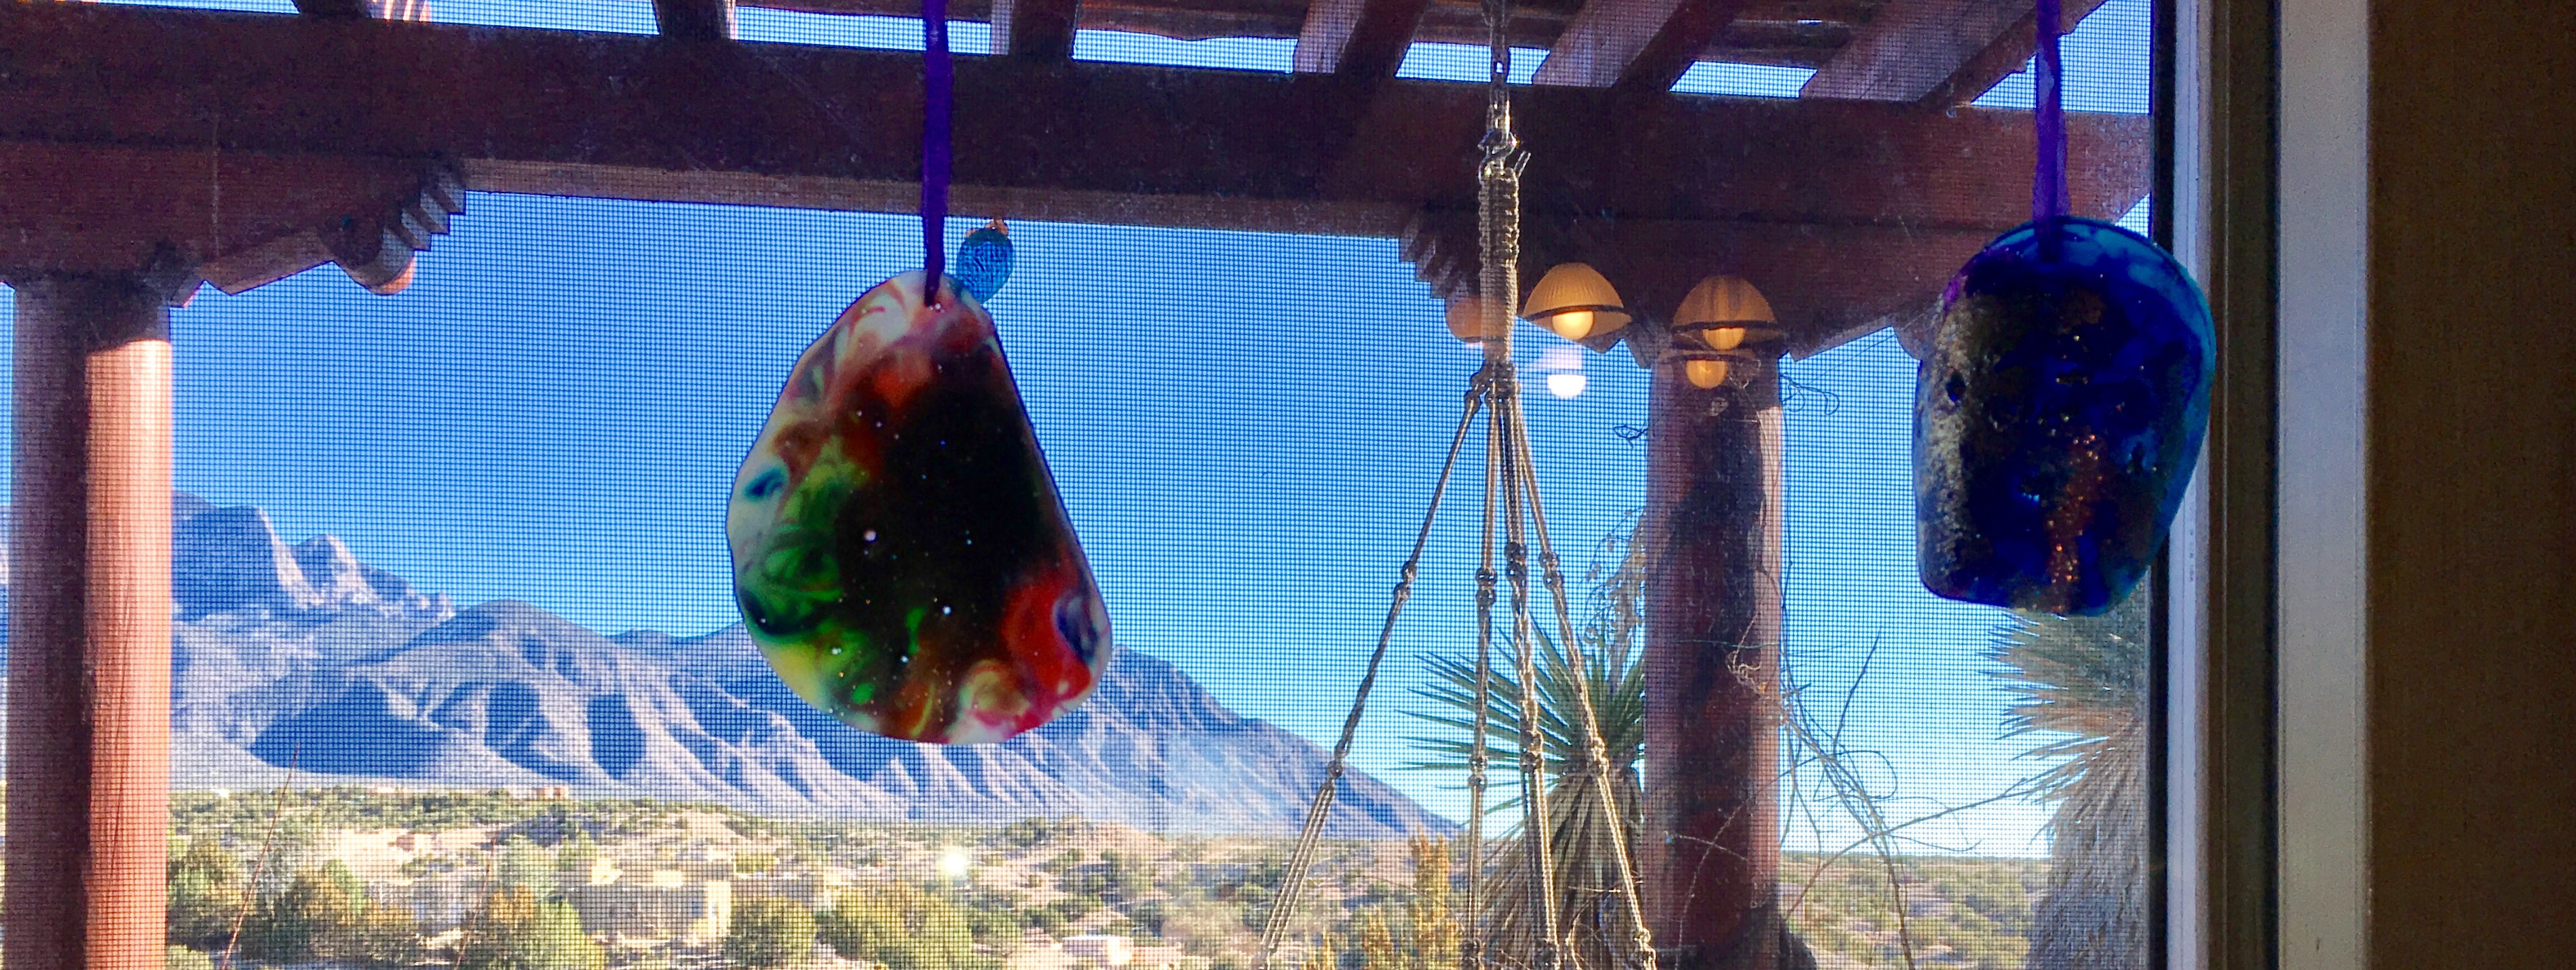
This project has BIG potential. My very own artymommy suggested applying the technique to a huge sheet of plastic (like a plastic baking sheet or storage lid) to achieve a more grandiose result. You could size it to a whole window, or create any number of different shapes. Can you try it, please? Besides the wait time, it takes all of 10 minutes. Ready? Go! 

This is so cool! Will try this. My fave artist is Alexander Calder, so mobiles are very much up my alley. Btw, that view is spectacular!!!
LikeLike
Your soooo creative honey!! Kuddos!!
LikeLike